Imaging to an AFF4 file
Atola TaskForce 2 supports performing an image acquisition of an evidence device to an AFF4 forensic file.
AFF4 is a highly optimized open-source forensic file format used for the storage of digital evidence and data. It offers a wide range of benefits:
- Is an open-source format: you can describe it in court.
- Supports multipass imaging.
- Offers fast compression methods: Snappy and LZ4.
- Supports block hashes.
- Stores binary zeroes as spans similar to sparse files.
- Is vendor-neutral.
AFF4’s block hashes are calculated for small segments of data on the drive and are stored in a table inside AFF4 metadata. There is a Block map hash that represents a single SHA-512 hash value for all the individual block hashes based on the Merkle tree model. This is great for imaging of damaged drives to a file using TaskForce’s multipass imaging algorithms.
Create an AFF4 file as an imaging target
- In the TaskForce main window, click Image.
- Select a source device.
- Optional: On the Imaging sessions page, click Start new.
- On the Select target devices panel, switch to the Files tab and click Create file.
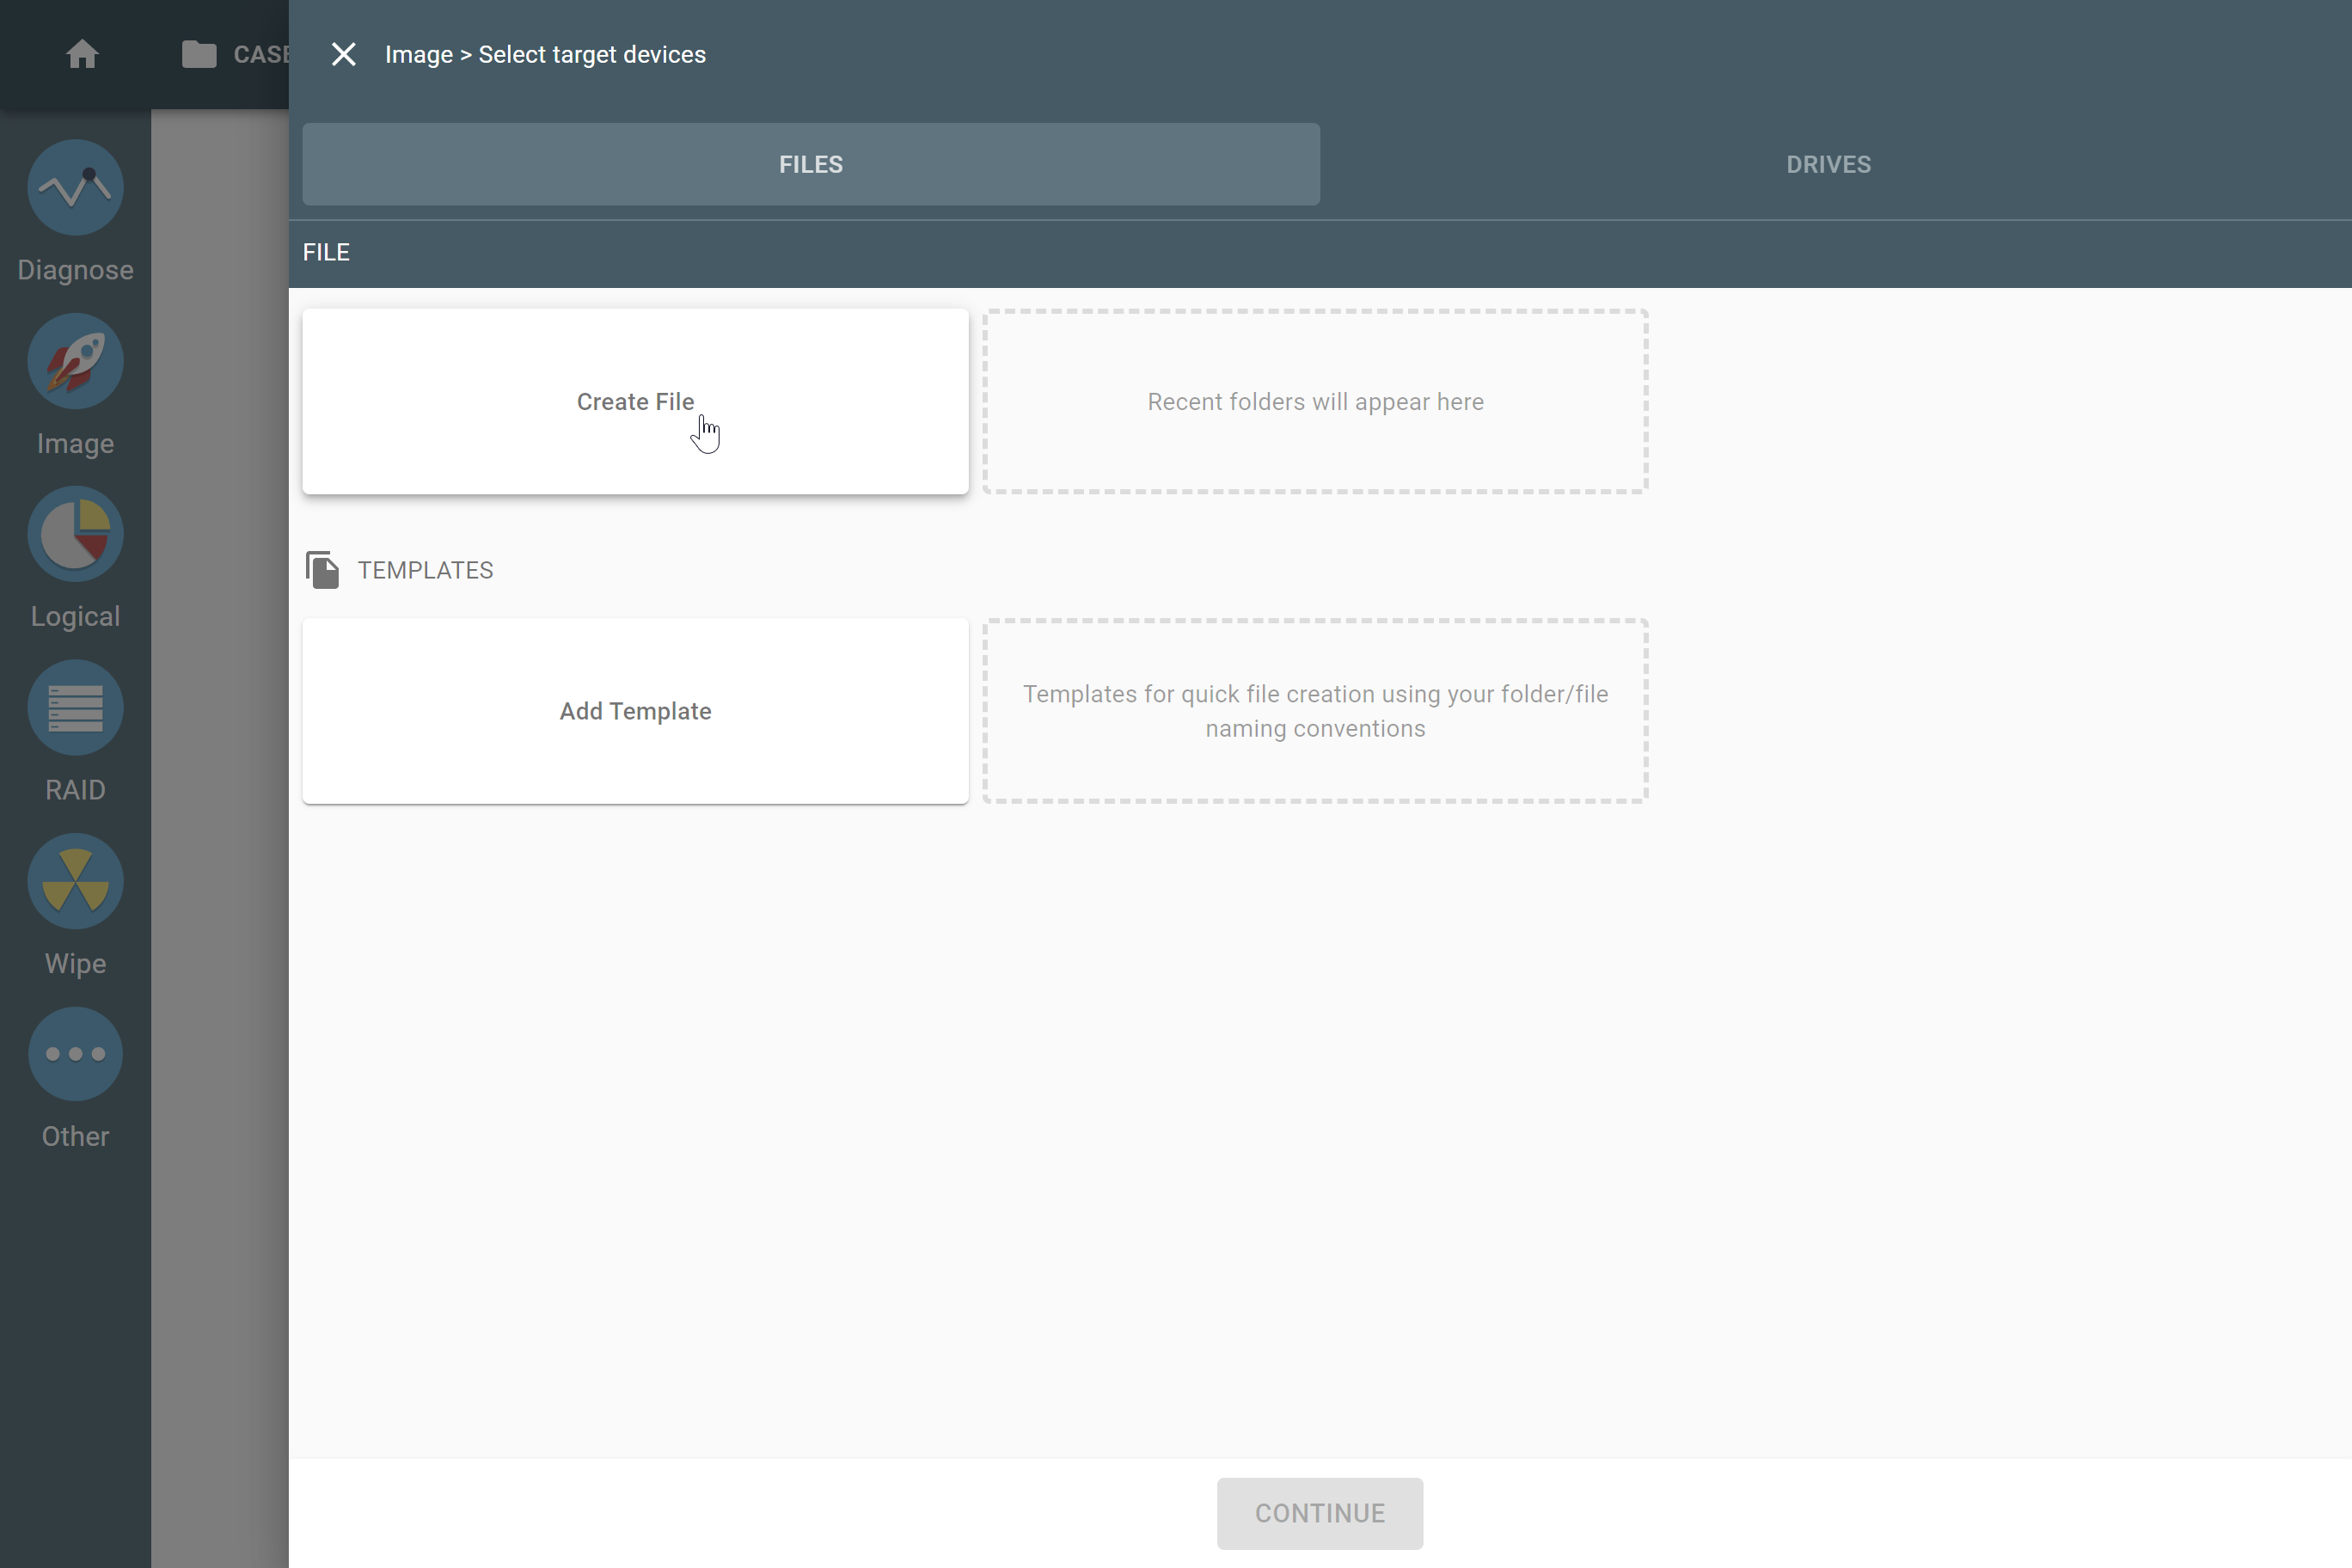
Creating a file as an imaging target.
- Choose a folder for your file. You can save a file:
- on a computer or server in your local network or
- on a storage device connected to your TaskForce.
- After selecting a folder, click Create file.
- In the Create image file dialog, change file Type to AFF4.
- Define hashing type and compression algorithm for your target AFF4 file:
- Block hashes: choose from MD5, SHA1, MD5 + SHA1, SHA256, or SHA512
- Compression: choose from LZ4, Snappy, or Not compressed.
- Enter other case details and then click Create.
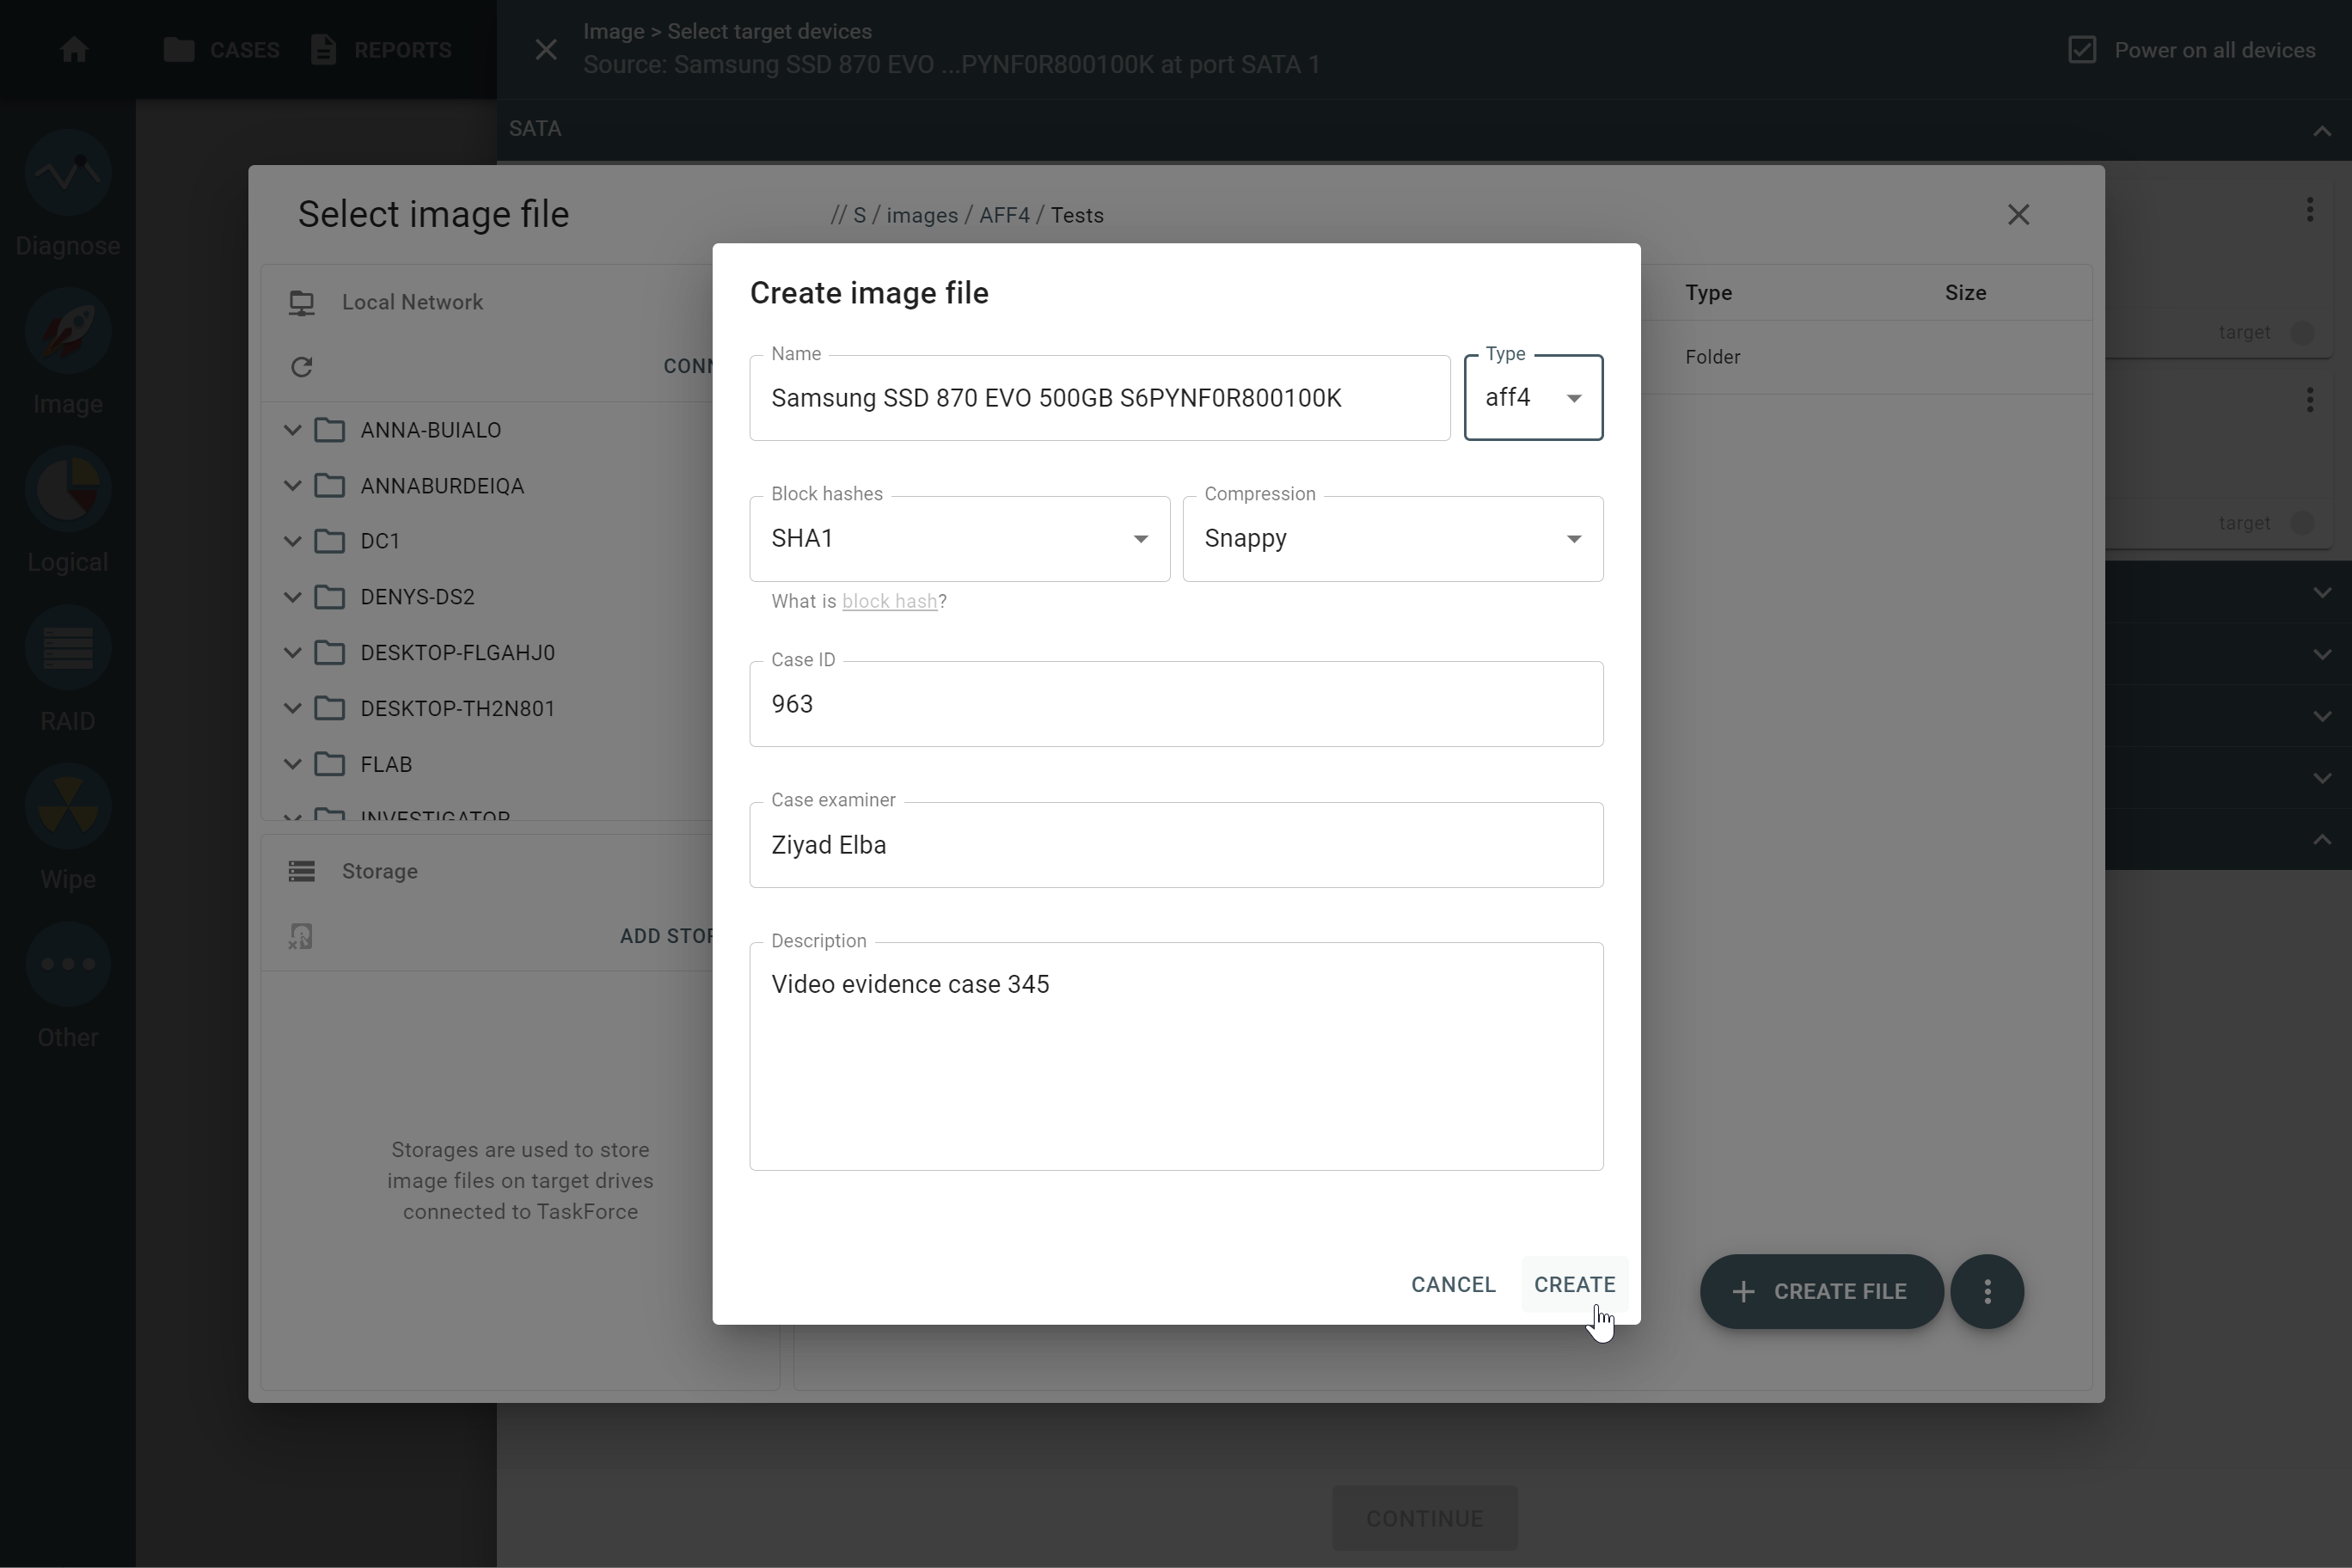
The settings for AFF4 target image file.
- Click Continue.
- Check imaging settings, change them if needed, and then click Start.
TaskForce 2 starts imaging your evidence device to an AFF4 target file. After imaging is finished, the system shows an Imaging completed report.
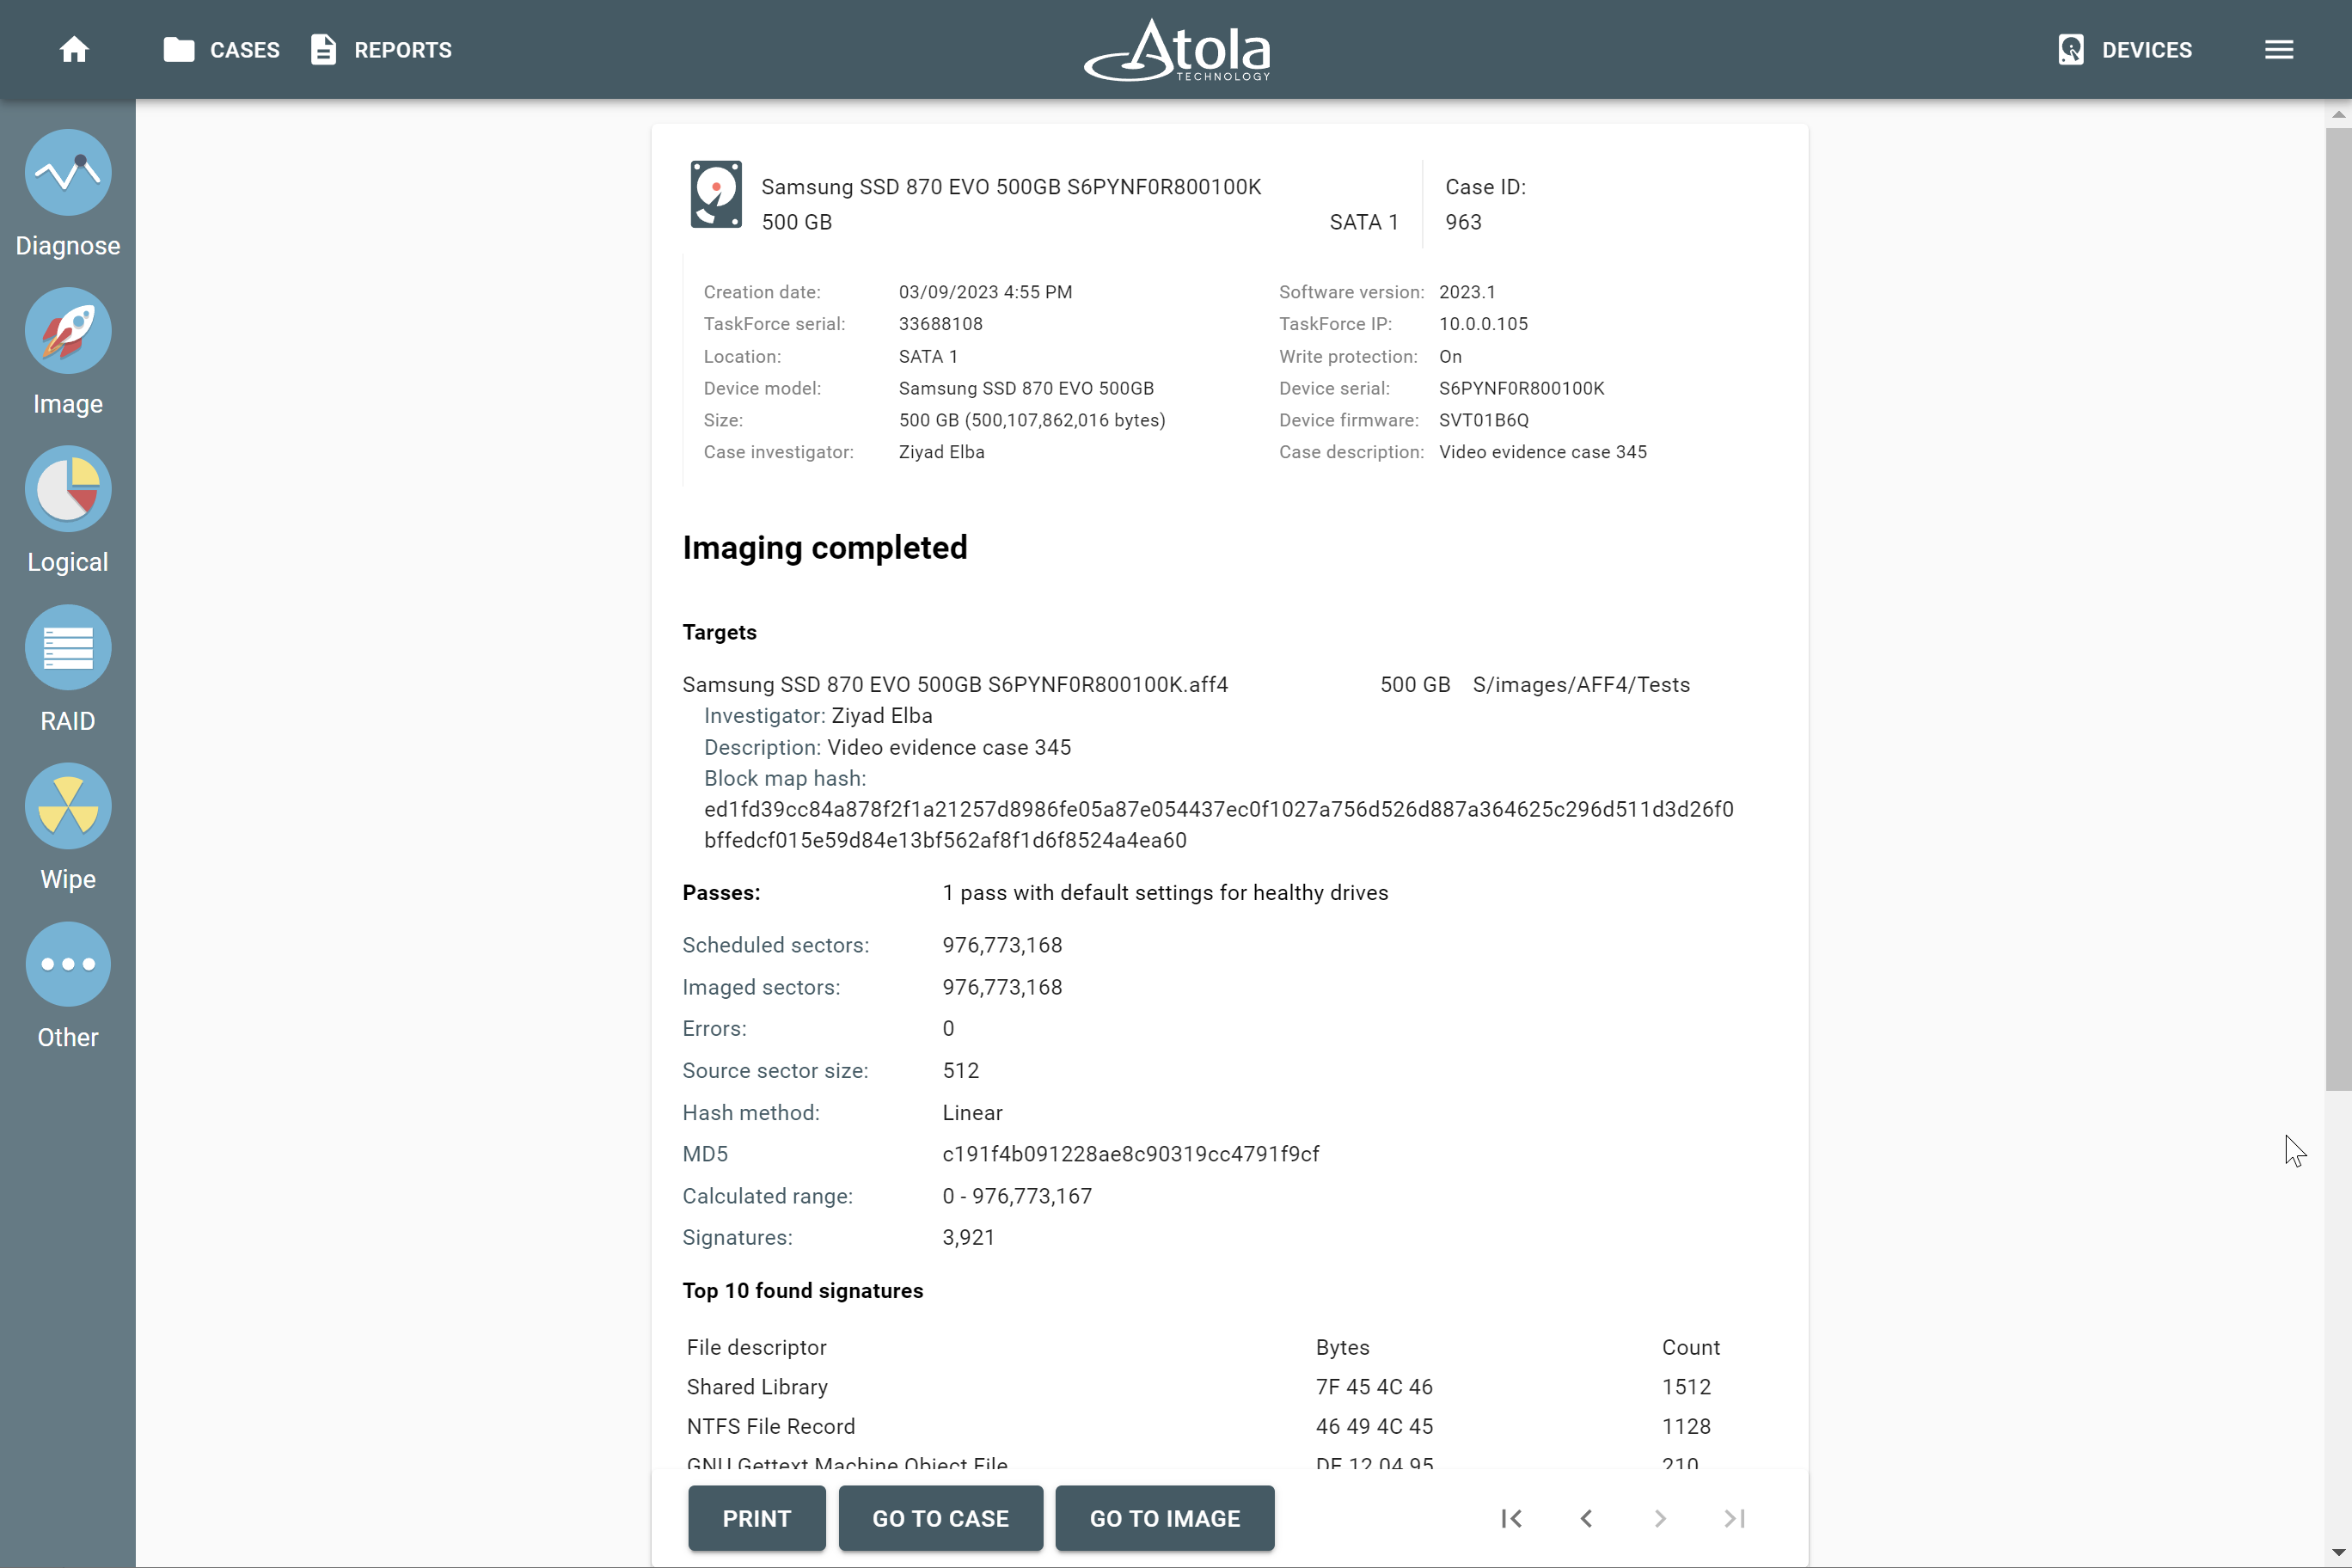
The Imaging completed report with an AFF4 file as a target.