TaskForce workflow
Atola TaskForce has all the features needed to acquire data from an evidence drive in a forensically sound manner and covers all phases of the data acquisition procedure.
Drawing from our extensive expertise with data storage devices and the hands-on experience of our clients from the digital forensics field, we strongly advise the following workflow for getting a verified bit-by-bit copy of digital evidence:
- Diagnose the evidence to detect possible issues.
- Unclip any limitations to get access to the whole disk space.
- Image the evidence device, creating its exact copy.
- Verify the resulting image by calculating hashes of the source and the target.
Step 1. Diagnose
What is the actual condition of an evidence drive you need to image and analyze? Are there any bad sectors, damaged heads, hidden areas, short circuit or other issues? And how much time will it take to image it?
To get you answers to these important questions before starting an imaging process, TaskForce has built-in diagnostic tools to check all drive systems.
We always recommend running the diagnostics first, because it helps to:
- Prioritize imaging and investigative tasks
- Estimate time needed to image evidence drive
- Extract data from a bad drive without damaging it
A fully-automated diagnostics module checks the following elements:
- Printed circuit board (PCB)
- Spindle motor and head stack
- Media surface
- Firmware
- File systems
To prevent further damage to an evidence drive in bad condition, TaskForce is also equipped with the current monitor and hardware short circuit protection.
The diagnostics module generates a comprehensive report that gives you an estimate of the drive condition, mentions exact issues with the device (if any), and offers the best strategy for data acquisition without causing further damage to a drive.
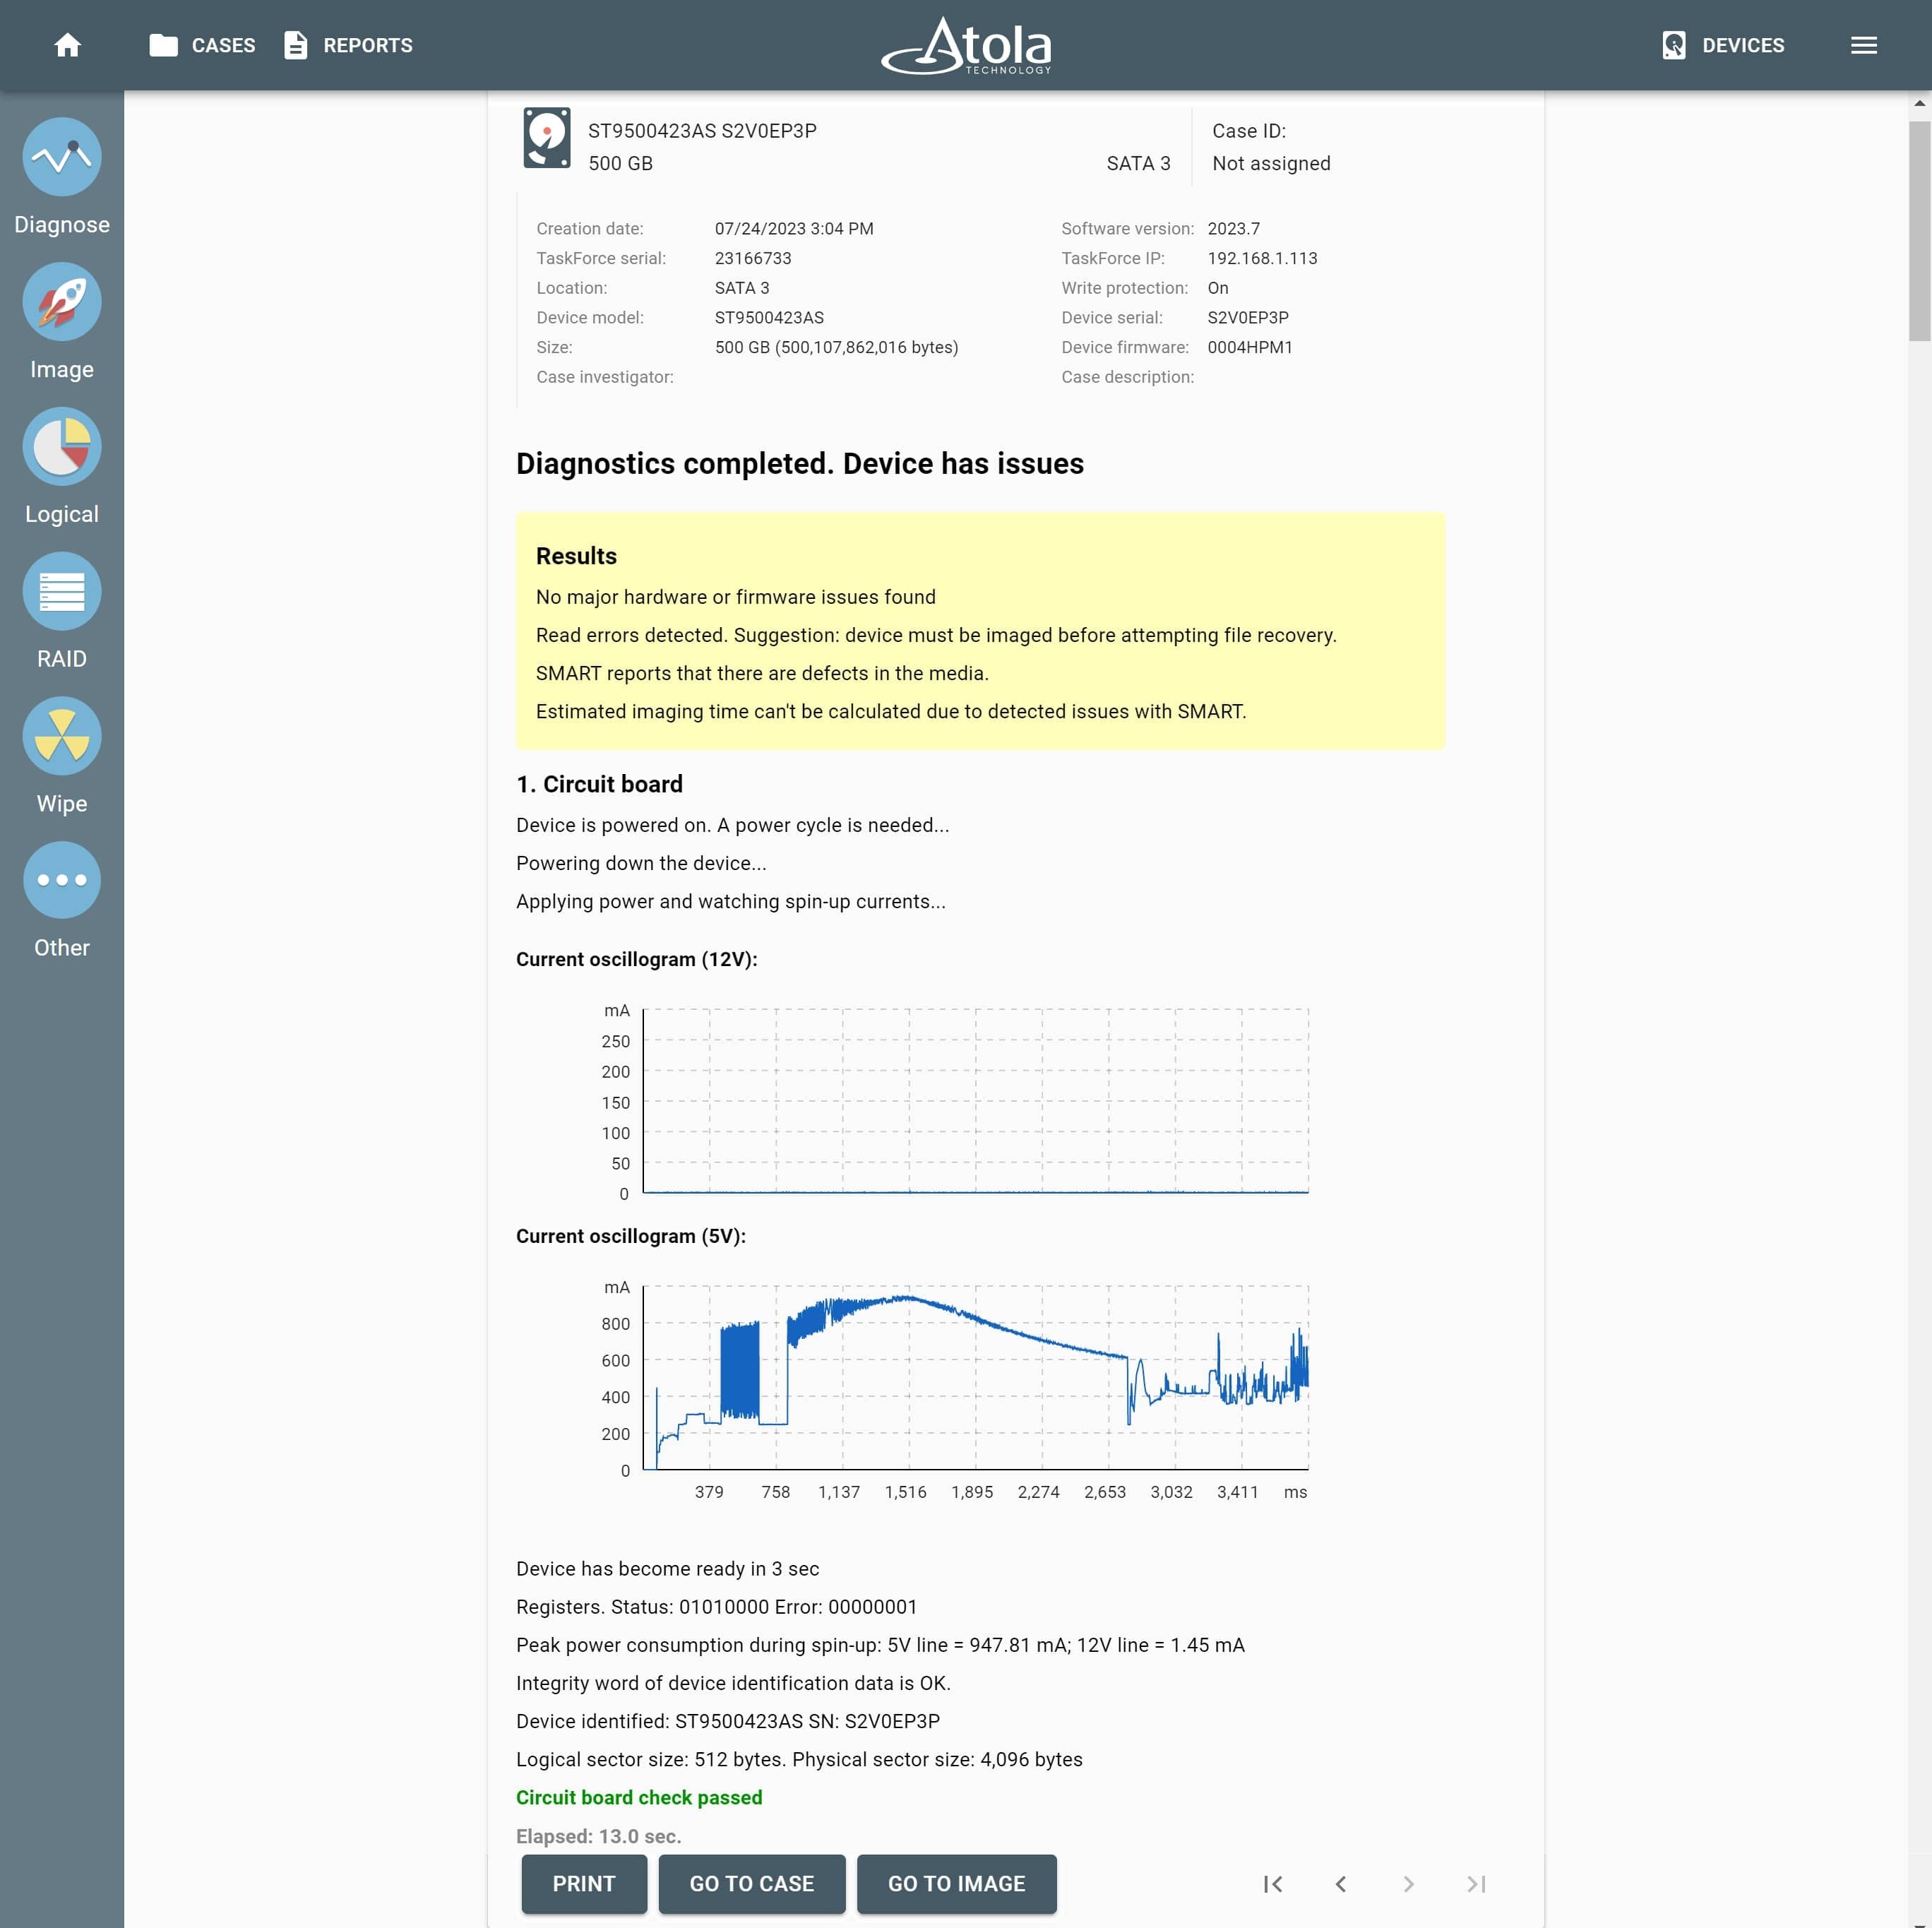
Diagnostics of a damaged drive.
Step 2. Unclip
If the diagnostics report shows that there are limitations and hidden areas on the drive set via Host Protected Area (HPA) or Device Overlay Configuration (DCO), TaskForce can remove them to provide you with access to the whole drive space.
You can also reset the HPA limitation only until the next power cycle, without altering the initial state of the drive.
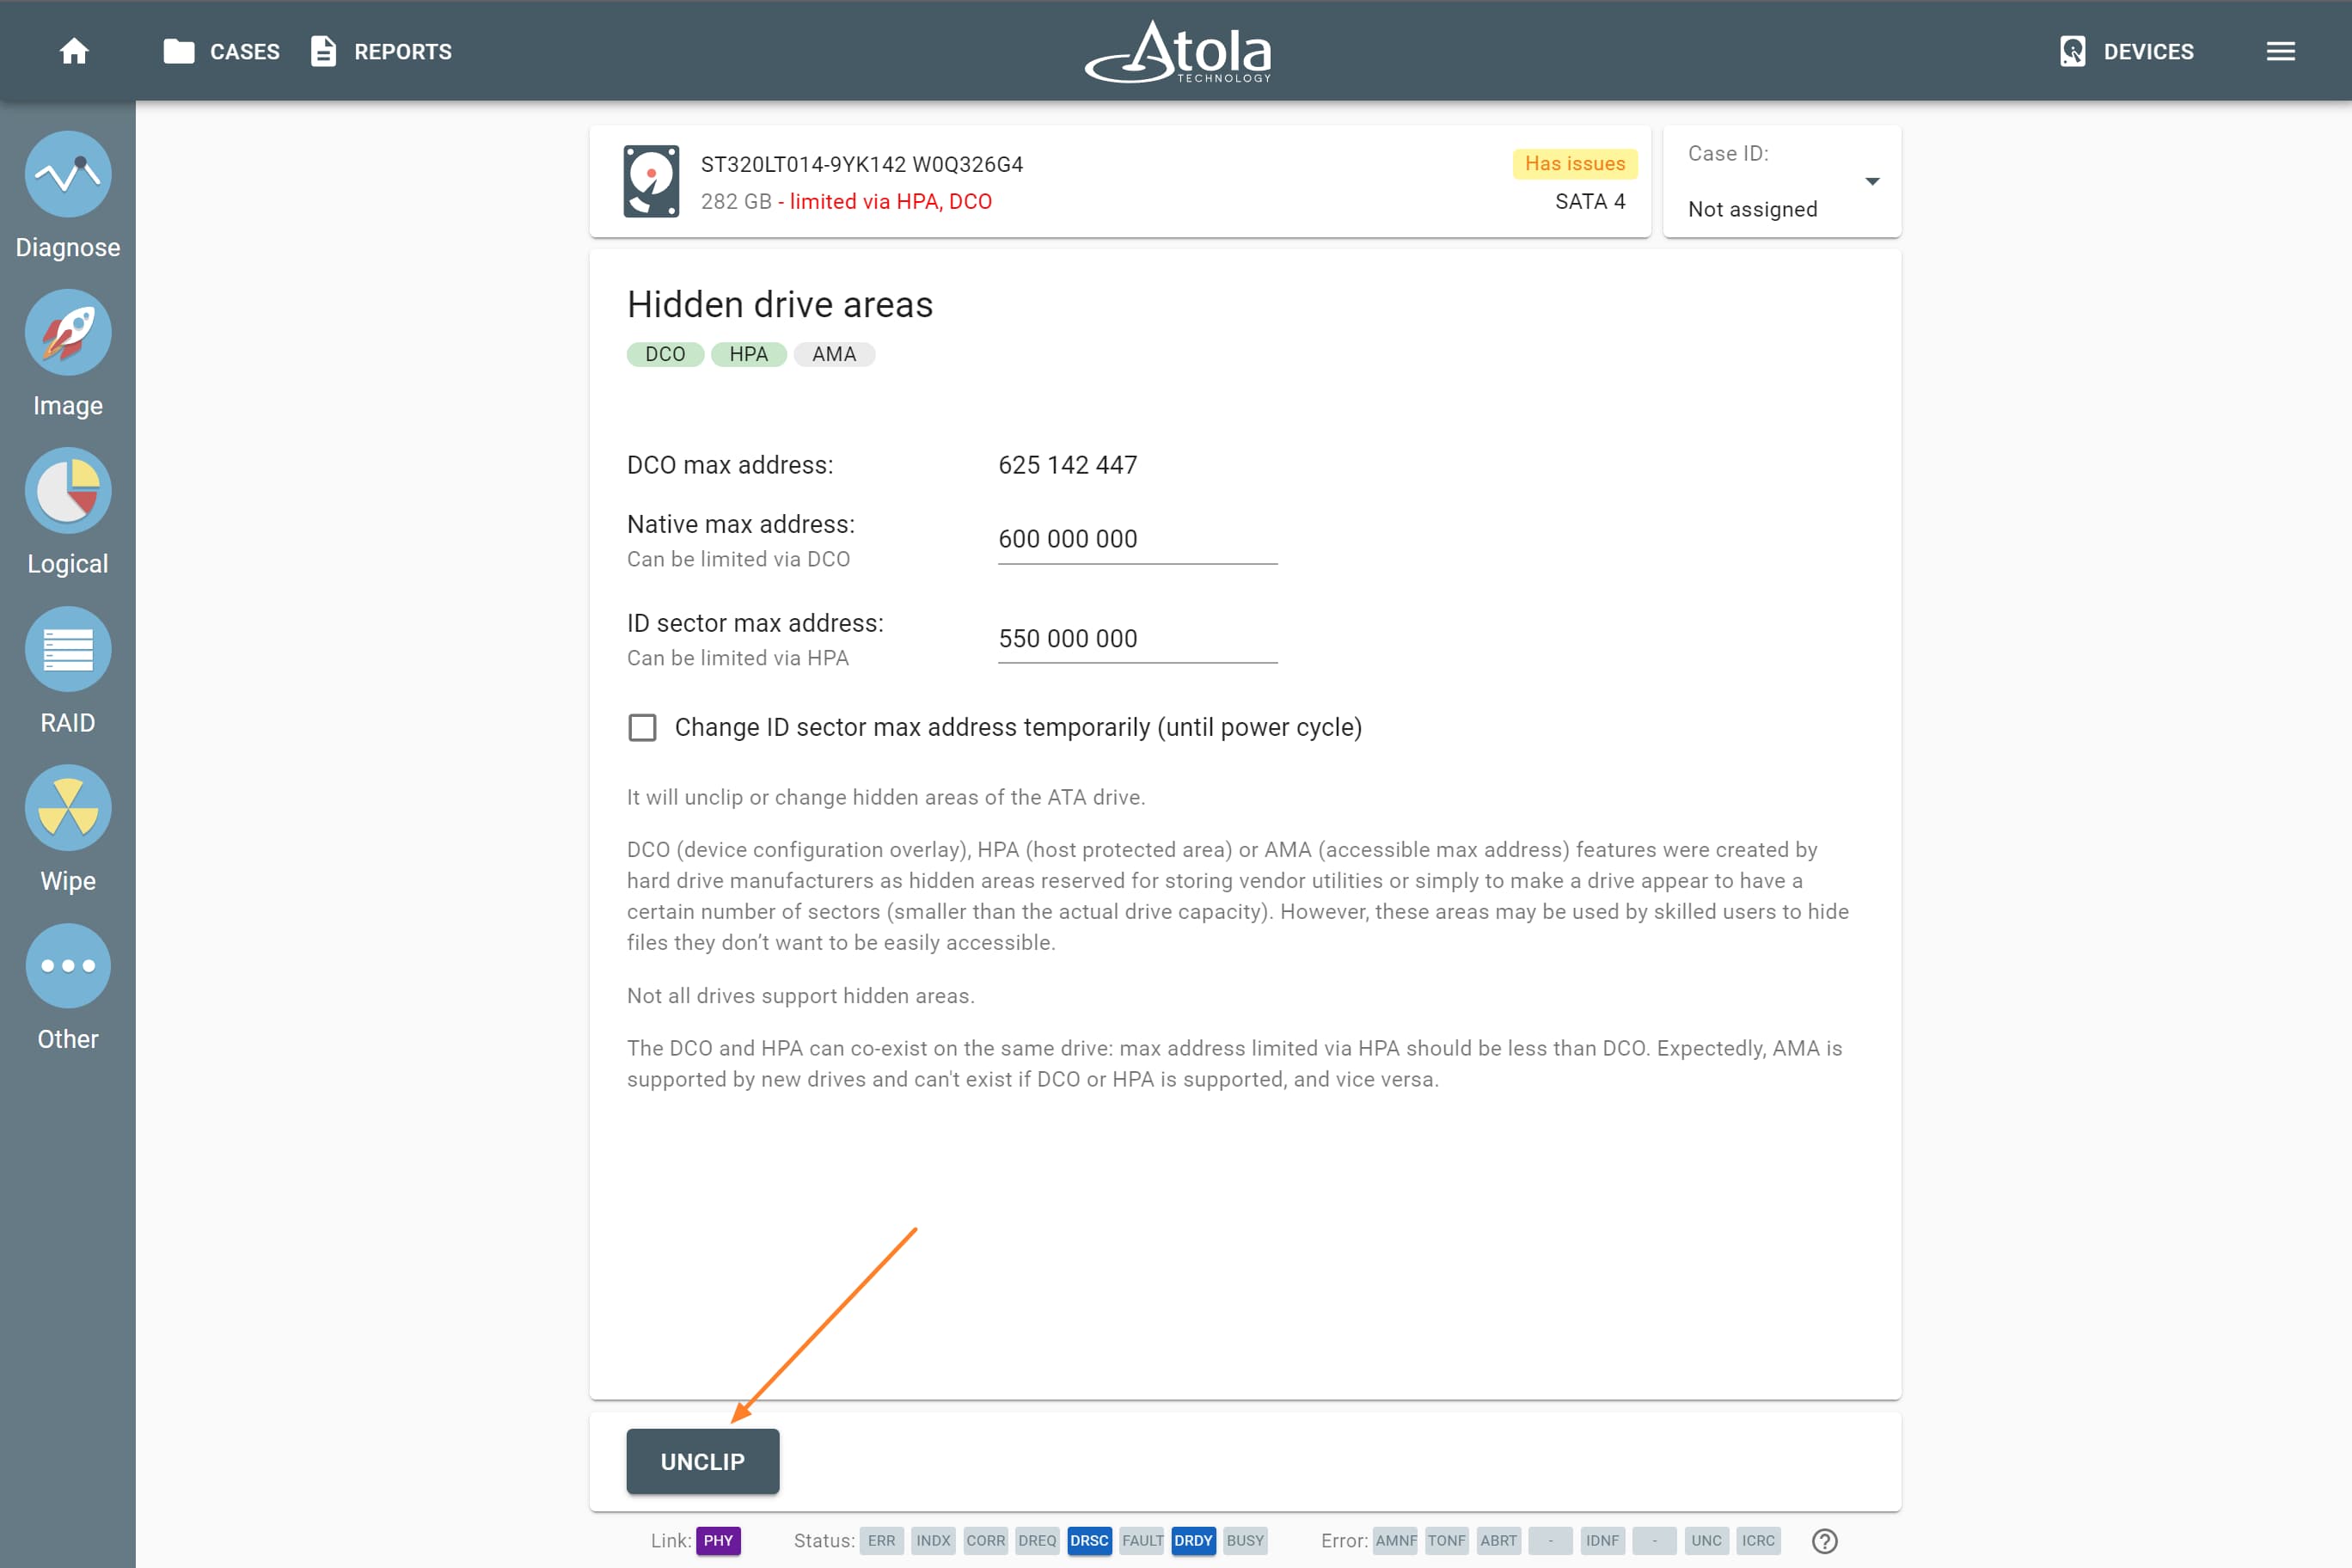
Removing HPA and DCO limitations in Atola TaskForce.
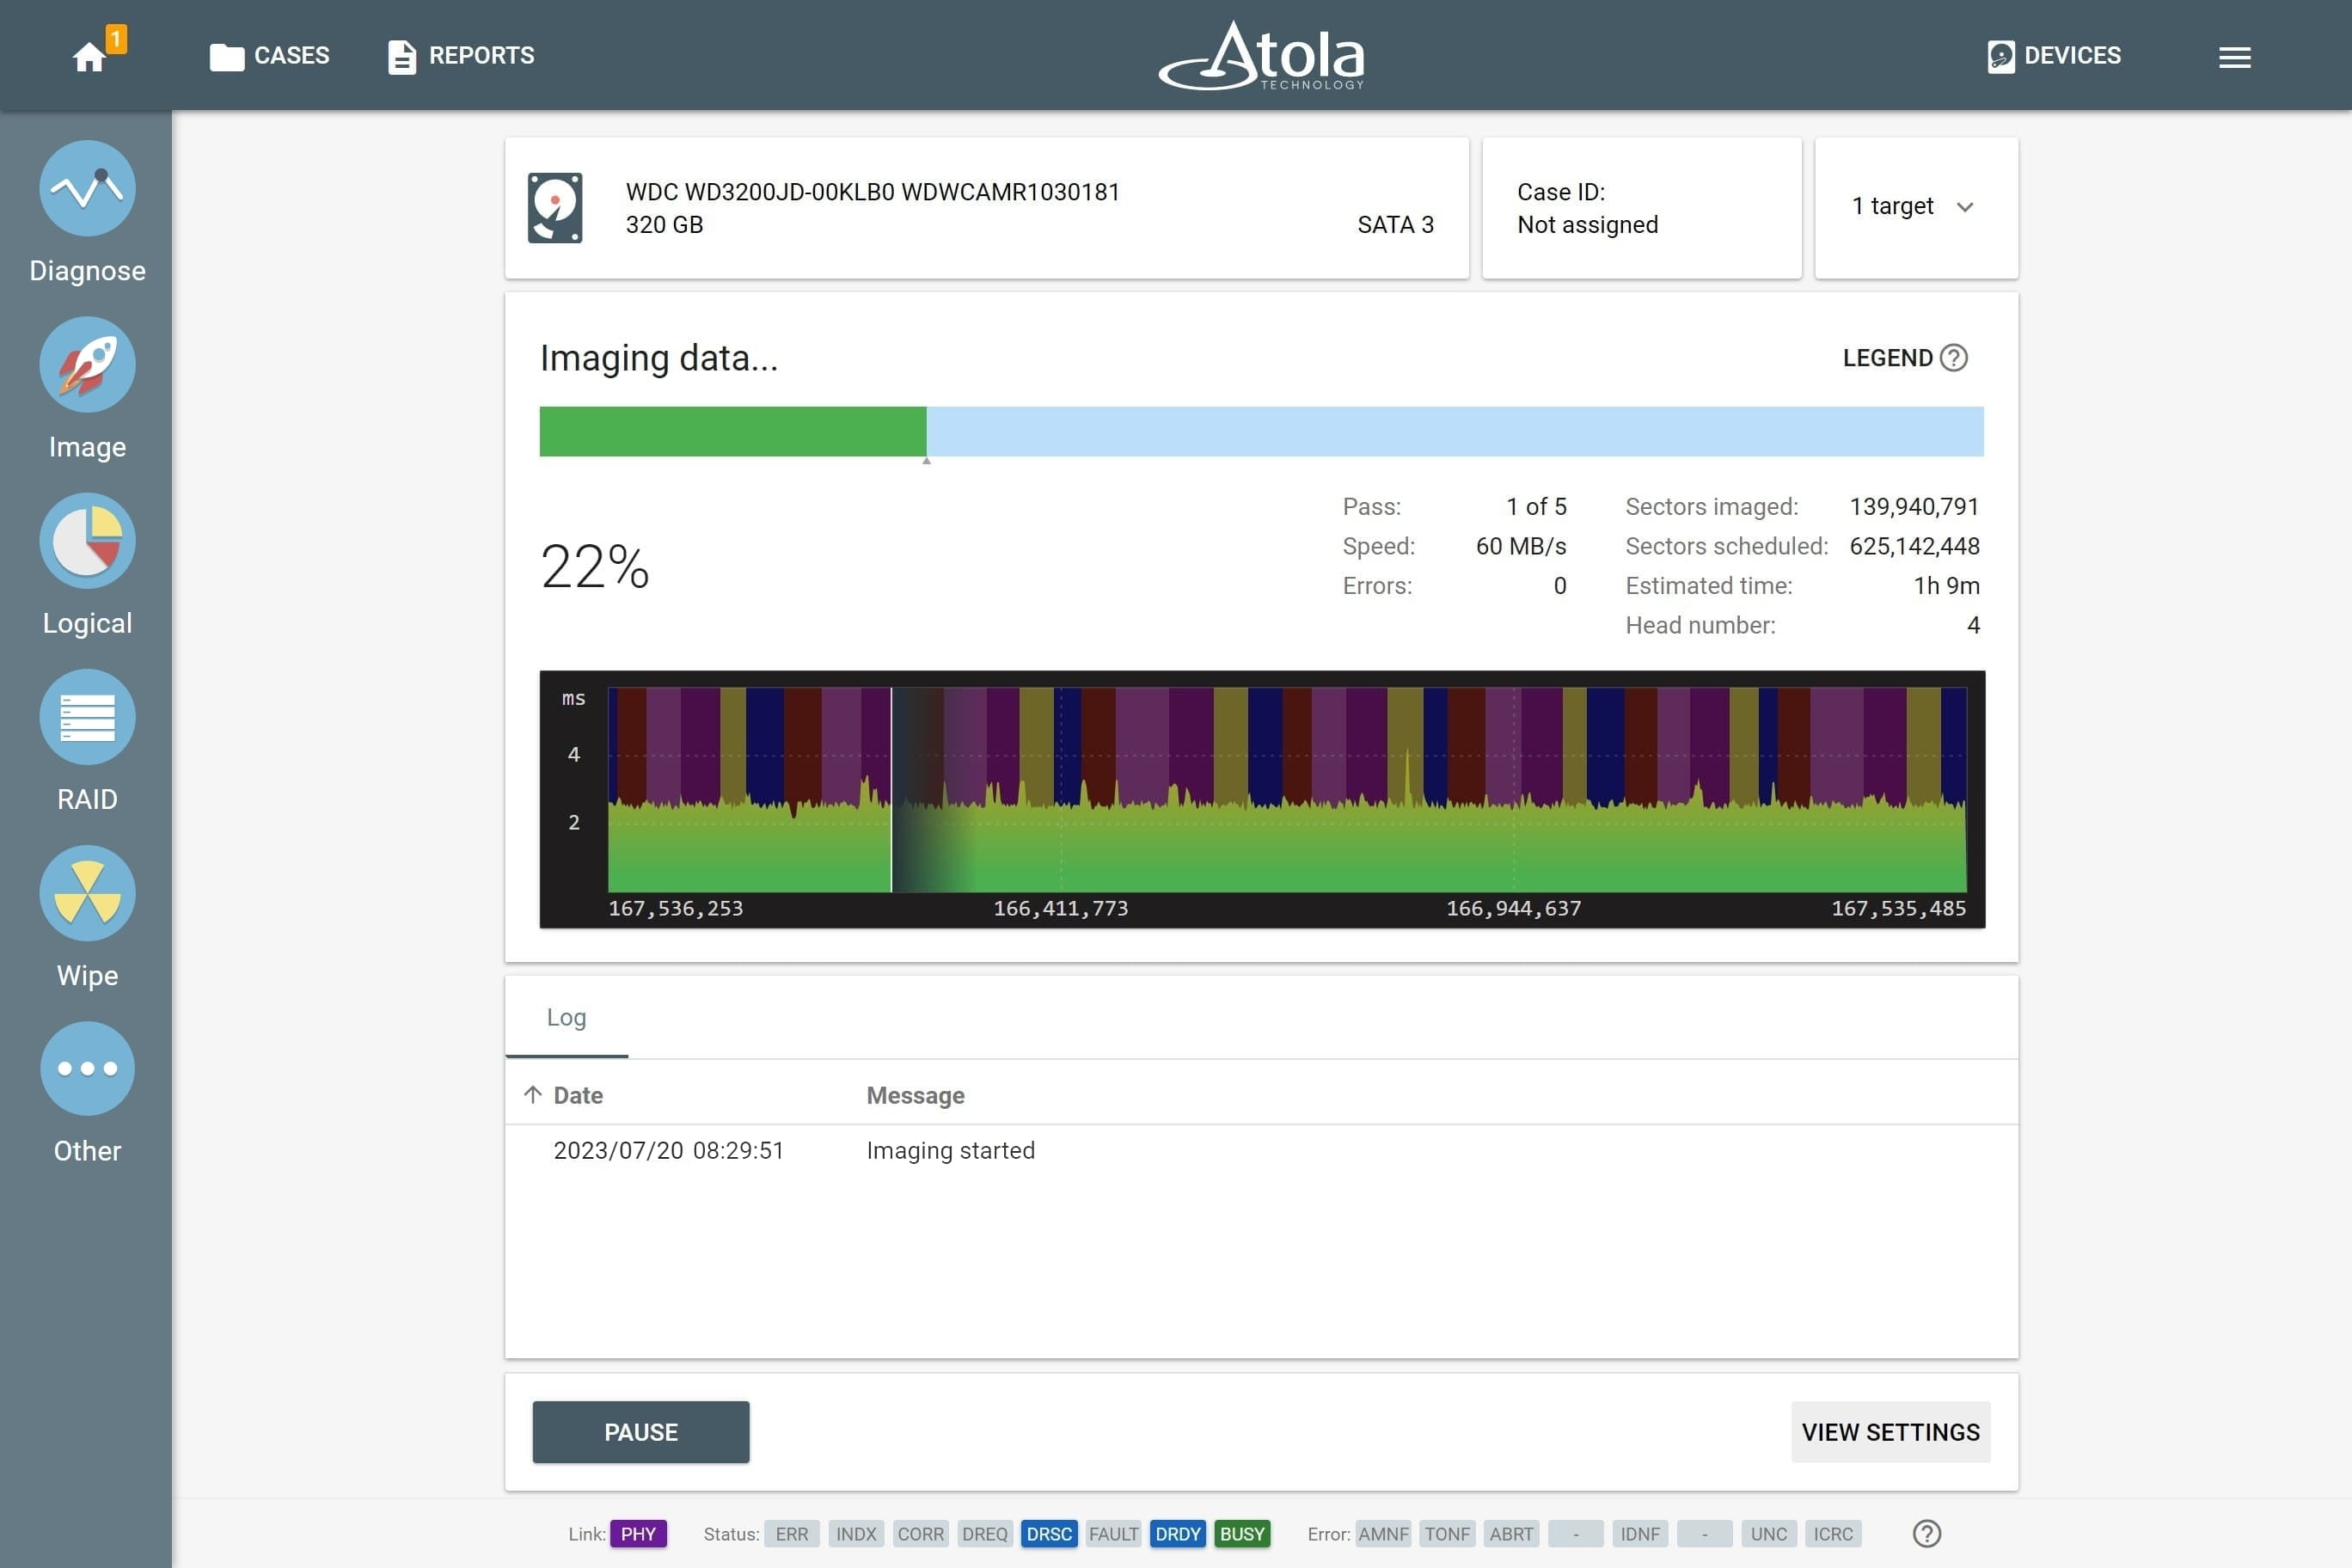
Step 3. Image
Thanks to its 18 ports and tailored server-grade hardware, TaskForce runs more than 12 imaging sessions simultaneously at the cumulative imaging speed of 15 TB/hour, creating bit-by-bit copies on target drives or image files on a server or a storage device.
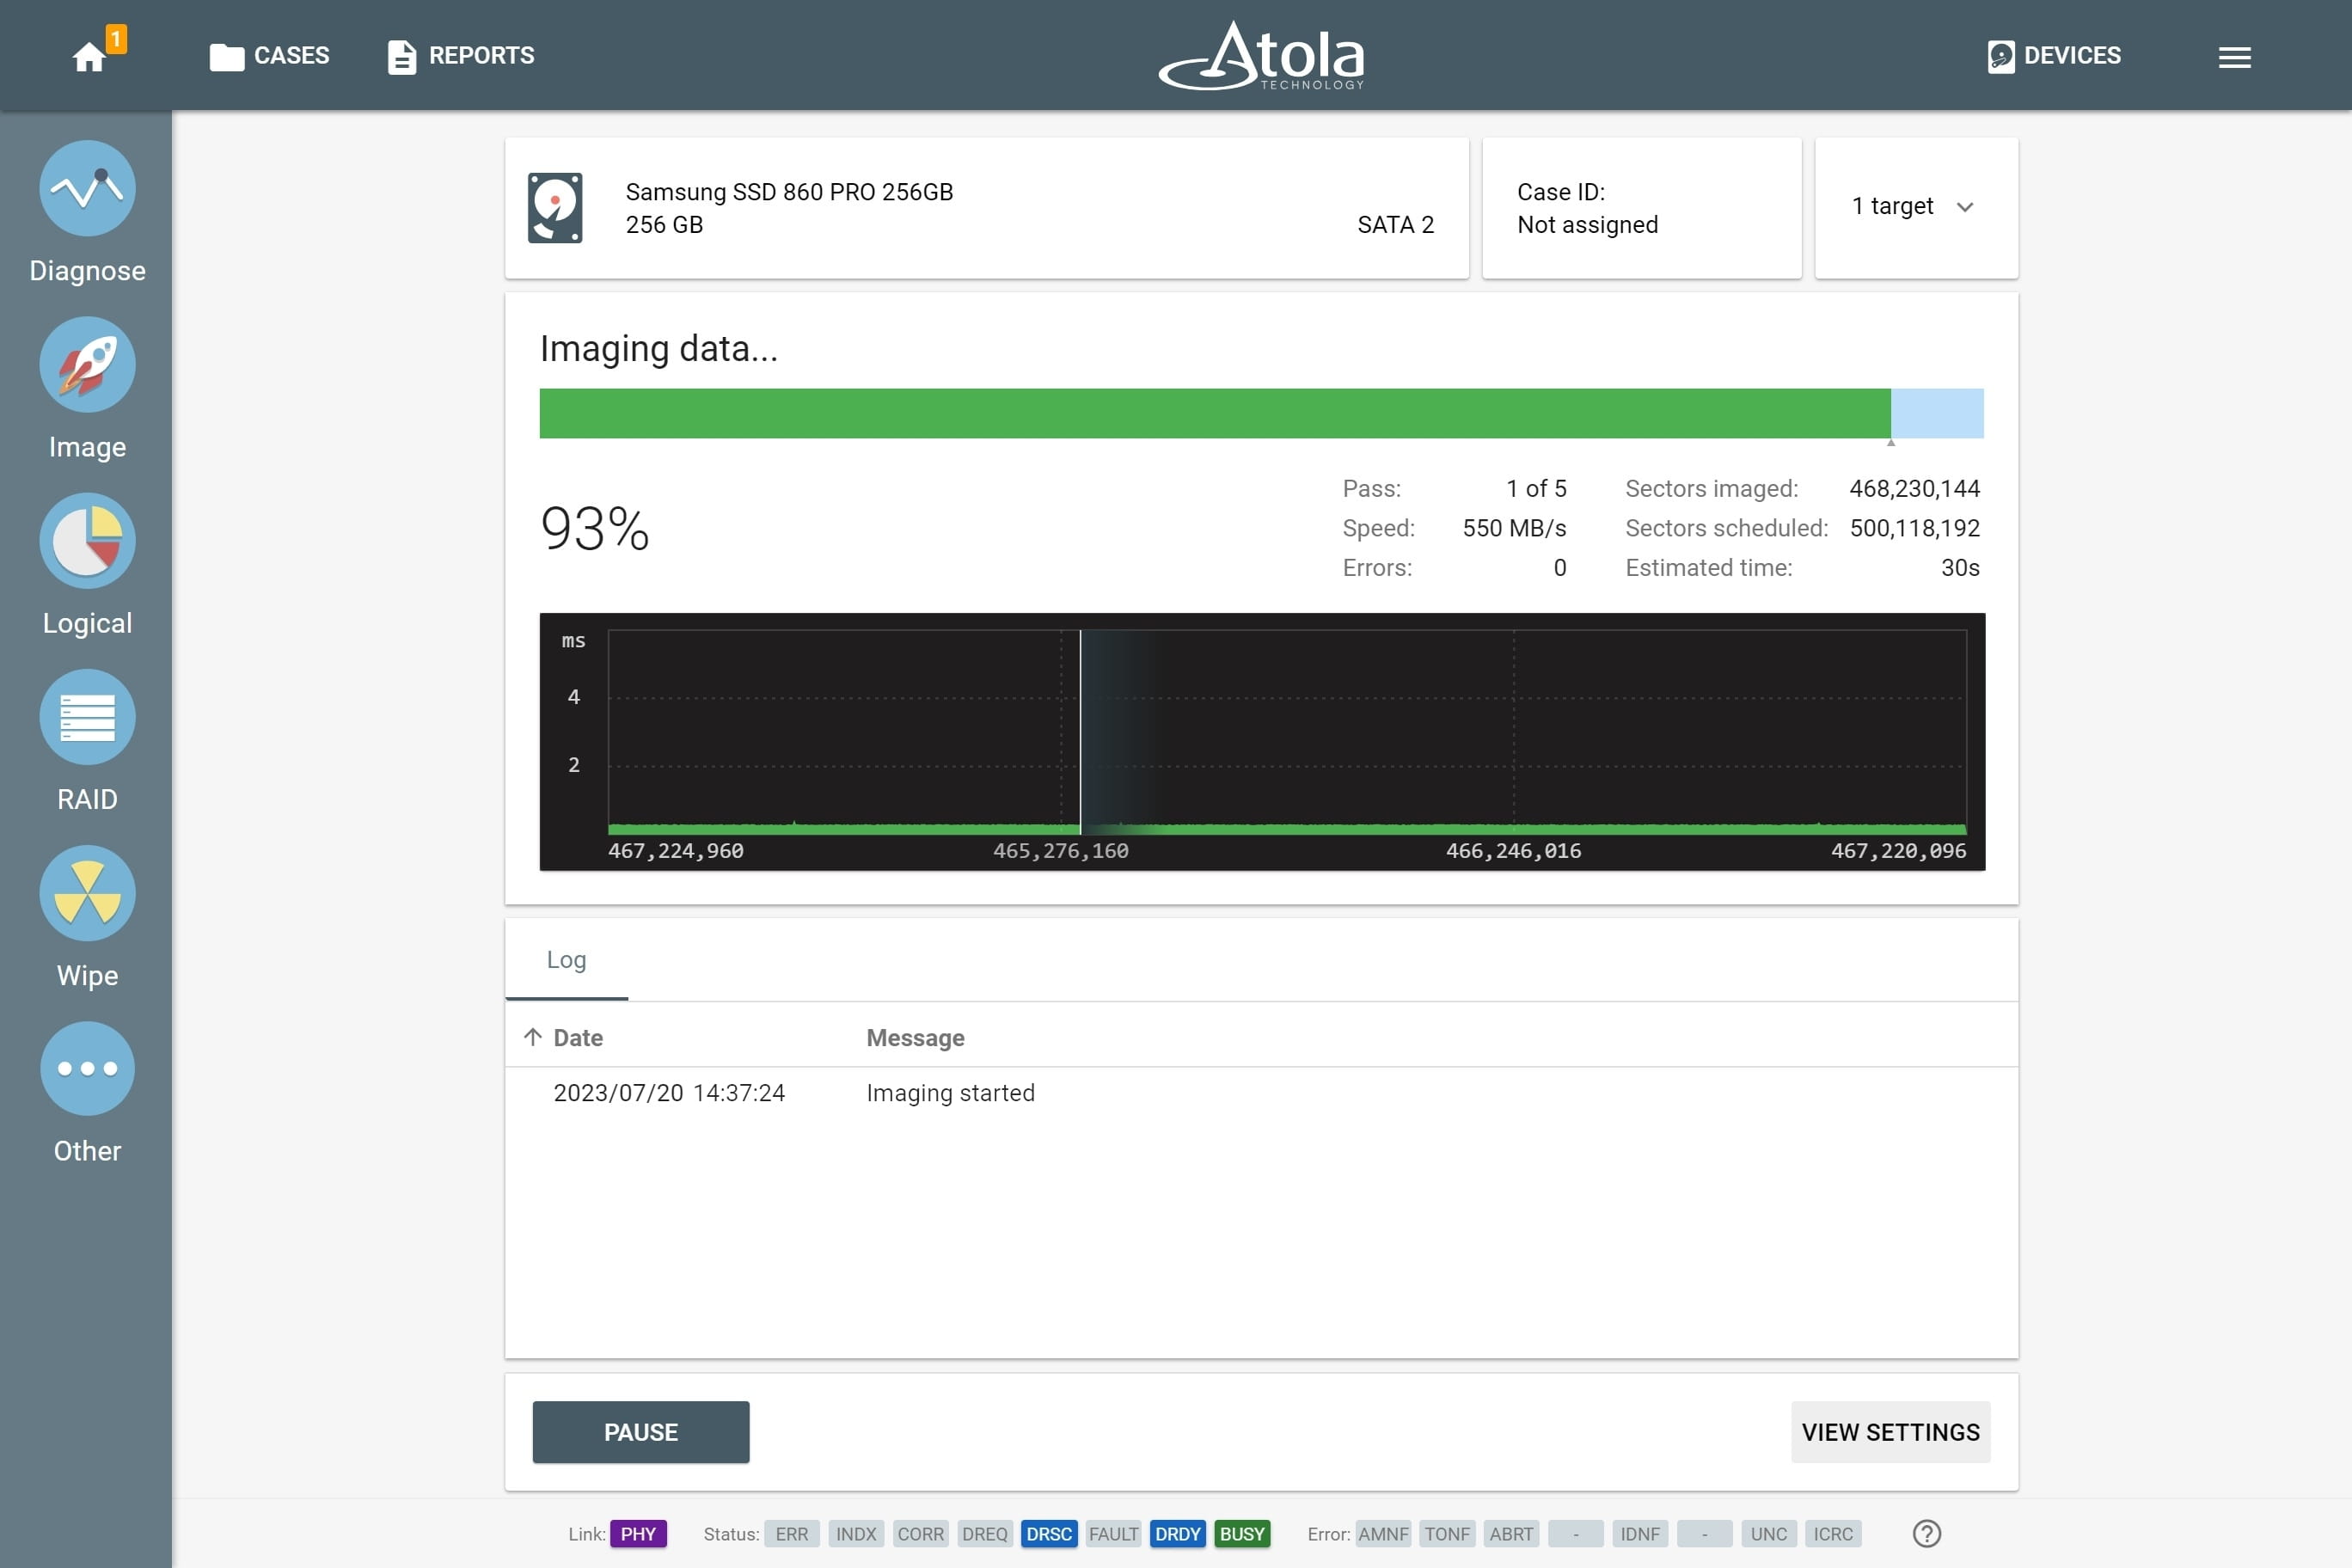
Imaging of a solid state drive in Atola TaskForce.
Source evidence drives can be imaged to up to 5 targets each. Targets may include any combination of:
- Other drives: SATA, SAS, USB, NVMe, IDE.
- E01, AFF4, RAW files located on a network server.
- E01, AFF4, RAW files located on other drives. Encryption with VeraCrypt is available as an option.
TaskForce comes with two pre-configured presets: Default and Damaged, recommended for good and faulty drives respectively. The Damaged preset allows TaskForce to approach drives in bad condition in the most gentle and thorough way.
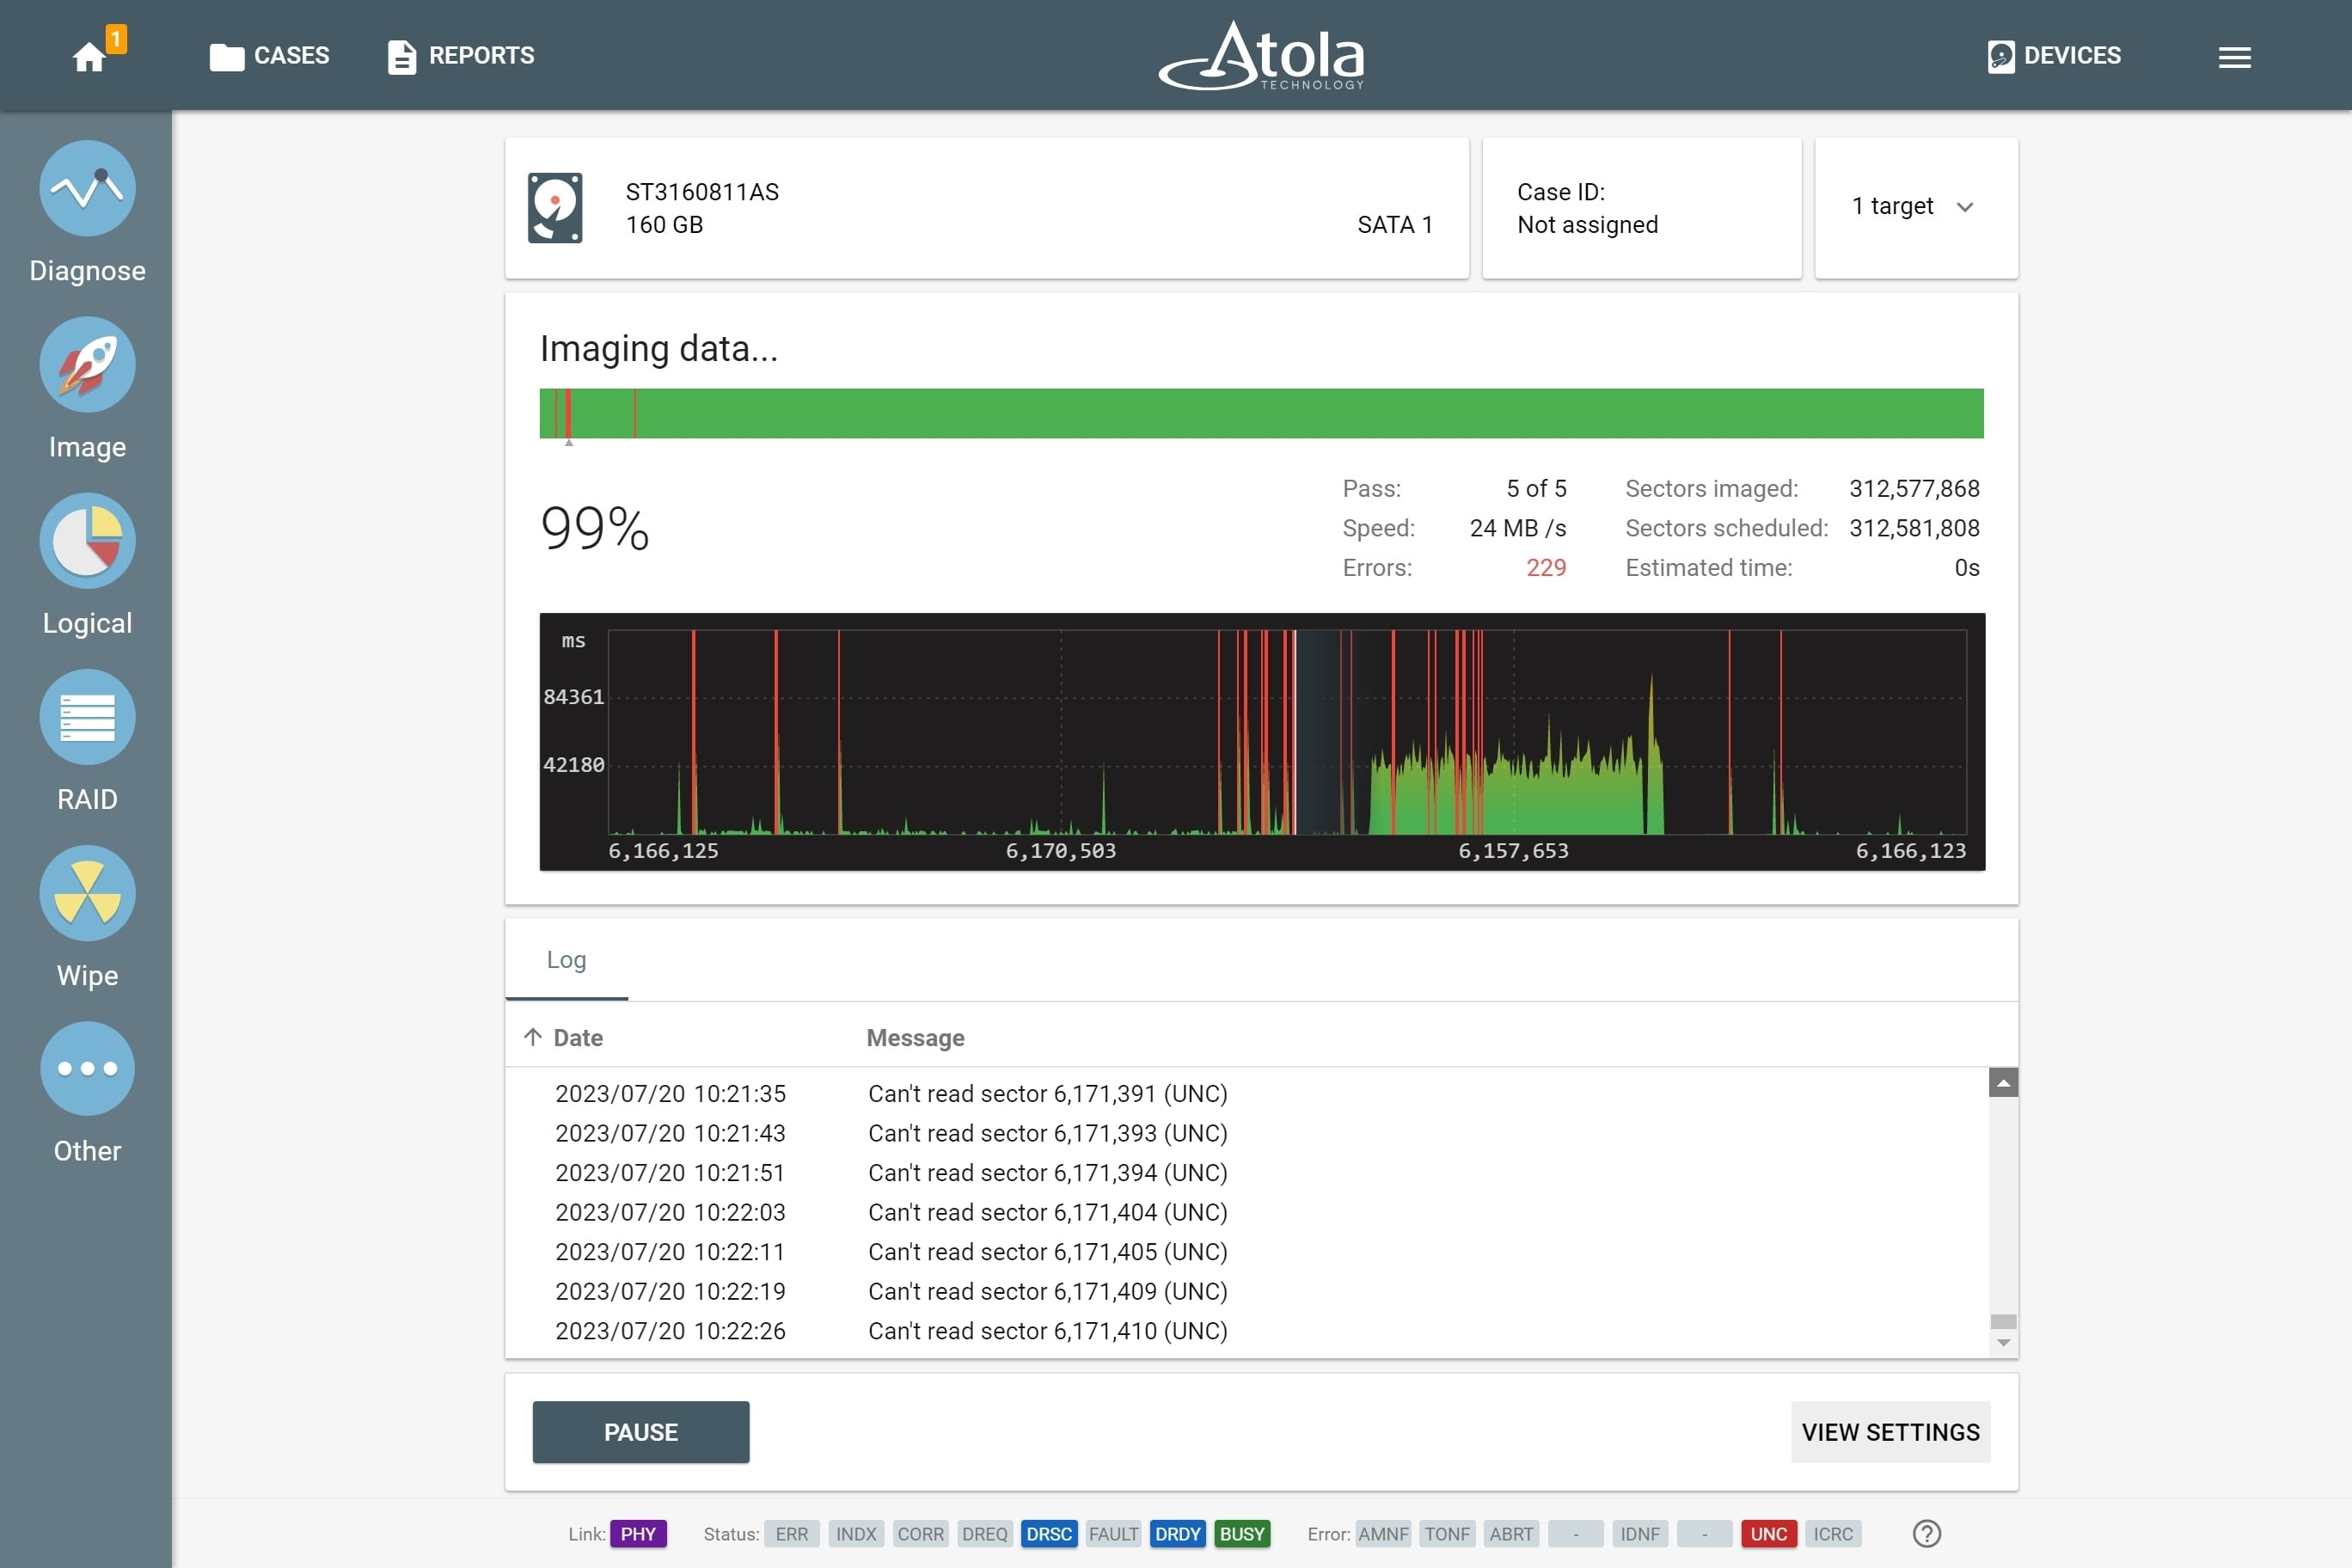
Imaging a damaged drive.
For instance, if a damaged or degraded head is detected during diagnostics, the imaging module prompts to disable it when starting the first imaging session.
Imaging good heads only with a disabled damaged head.
Step 4. Verify
To maintain a forensically sound evidence acquisition process, it is crucial to calculate the hash values of both the evidence drive and the image.
This verification step ensures the integrity of the image and serves as a reliable means of evidence validation.
For the damaged drives, we strongly recommend enabling segmented hashing and calculating hash during imaging.
By applying this method, TaskForce only reads the data on a fragile device once, so you can prevent any further damage to the media.