RAID 6 with two missing devices
Even if two of the devices in a RAID 6 array are damaged or missing, Atola TaskForce 2 can rebuild and image a RAID of this type, taking advantage of its extra redundancy. To accomplish that, TaskForce 2 uses both types of parity blocks, XOR parity and Reed-Solomon parity, distributed across all the devices in a RAID 6 array.
TaskForce 2 automatically detects all parameters of a RAID 6 array with two missing devices, reassembles the array, and enables a preview of its contents. Once the RAID is reassembled, you can acquire its full physical image or perform logical imaging of only selected partitions, folders, and files.
To rebuild and image a RAID 6 array with one or two missing devices, do the following:
- In the Taskbar, click RAID.
- On the Select source device panel, select the devices that make up a RAID array. They can be physical drives of all supported types, connected to the TaskForce 2 hardware unit, image files (raw, E01 or AFF4 image files), or a combination of both.
- Once the available RAID members are selected, click Continue.
- TaskForce 2 redirects you to the RAID reassembly screen and immediately starts the Autodetection process to find the suitable configuration.
- Since you know that one or two RAID members are missing, select RAID 6 from the RAID type list and click the Add missing device button once or twice respectively. When checking variants of possible RAID configuration, TaskForce 2 will take into account that there are missing RAID members.
- Optional: If you know some of the RAID parameters, such as RAID type, Start LBA, Block size, Block order, Parity block order, you can select them manually from the lists at the top of the RAID configuration section.
- Wait while the module is checking thousands of variants to find a possible RAID configuration. Autodetection progress is displayed on the right side of the screen. To learn more about our heuristic RAID autodetection algorithm, see How autodetection of an unknown RAID works.
- Once TaskForce 2 has detected a possible configuration with two missing devices, click Apply. TaskForce 2 automatically changes the order of the devices, applies the detected RAID type and other parameters, and then parses and verifies the file systems of an array.
- To make sure that the suggested RAID configuration is correct, check the Partitions section at the bottom left and preview the contents of the reassembled RAID, including partitions, folders, and files. To help you decide whether the applied configuration is valid or not, TaskForce 2 displays a small tag with the accuracy percentage near the partition.
- Click Go to image to acquire a full bit-by-bit copy of the array or Go to logical to copy only selected partitions, folders, or files.
- After imaging is finished, TaskForce 2 automatically generates an Imaging completed report. It includes all the details of the source drives, the RAID configuration, the target image, the timestamps and more.

Initiating work with RAID.
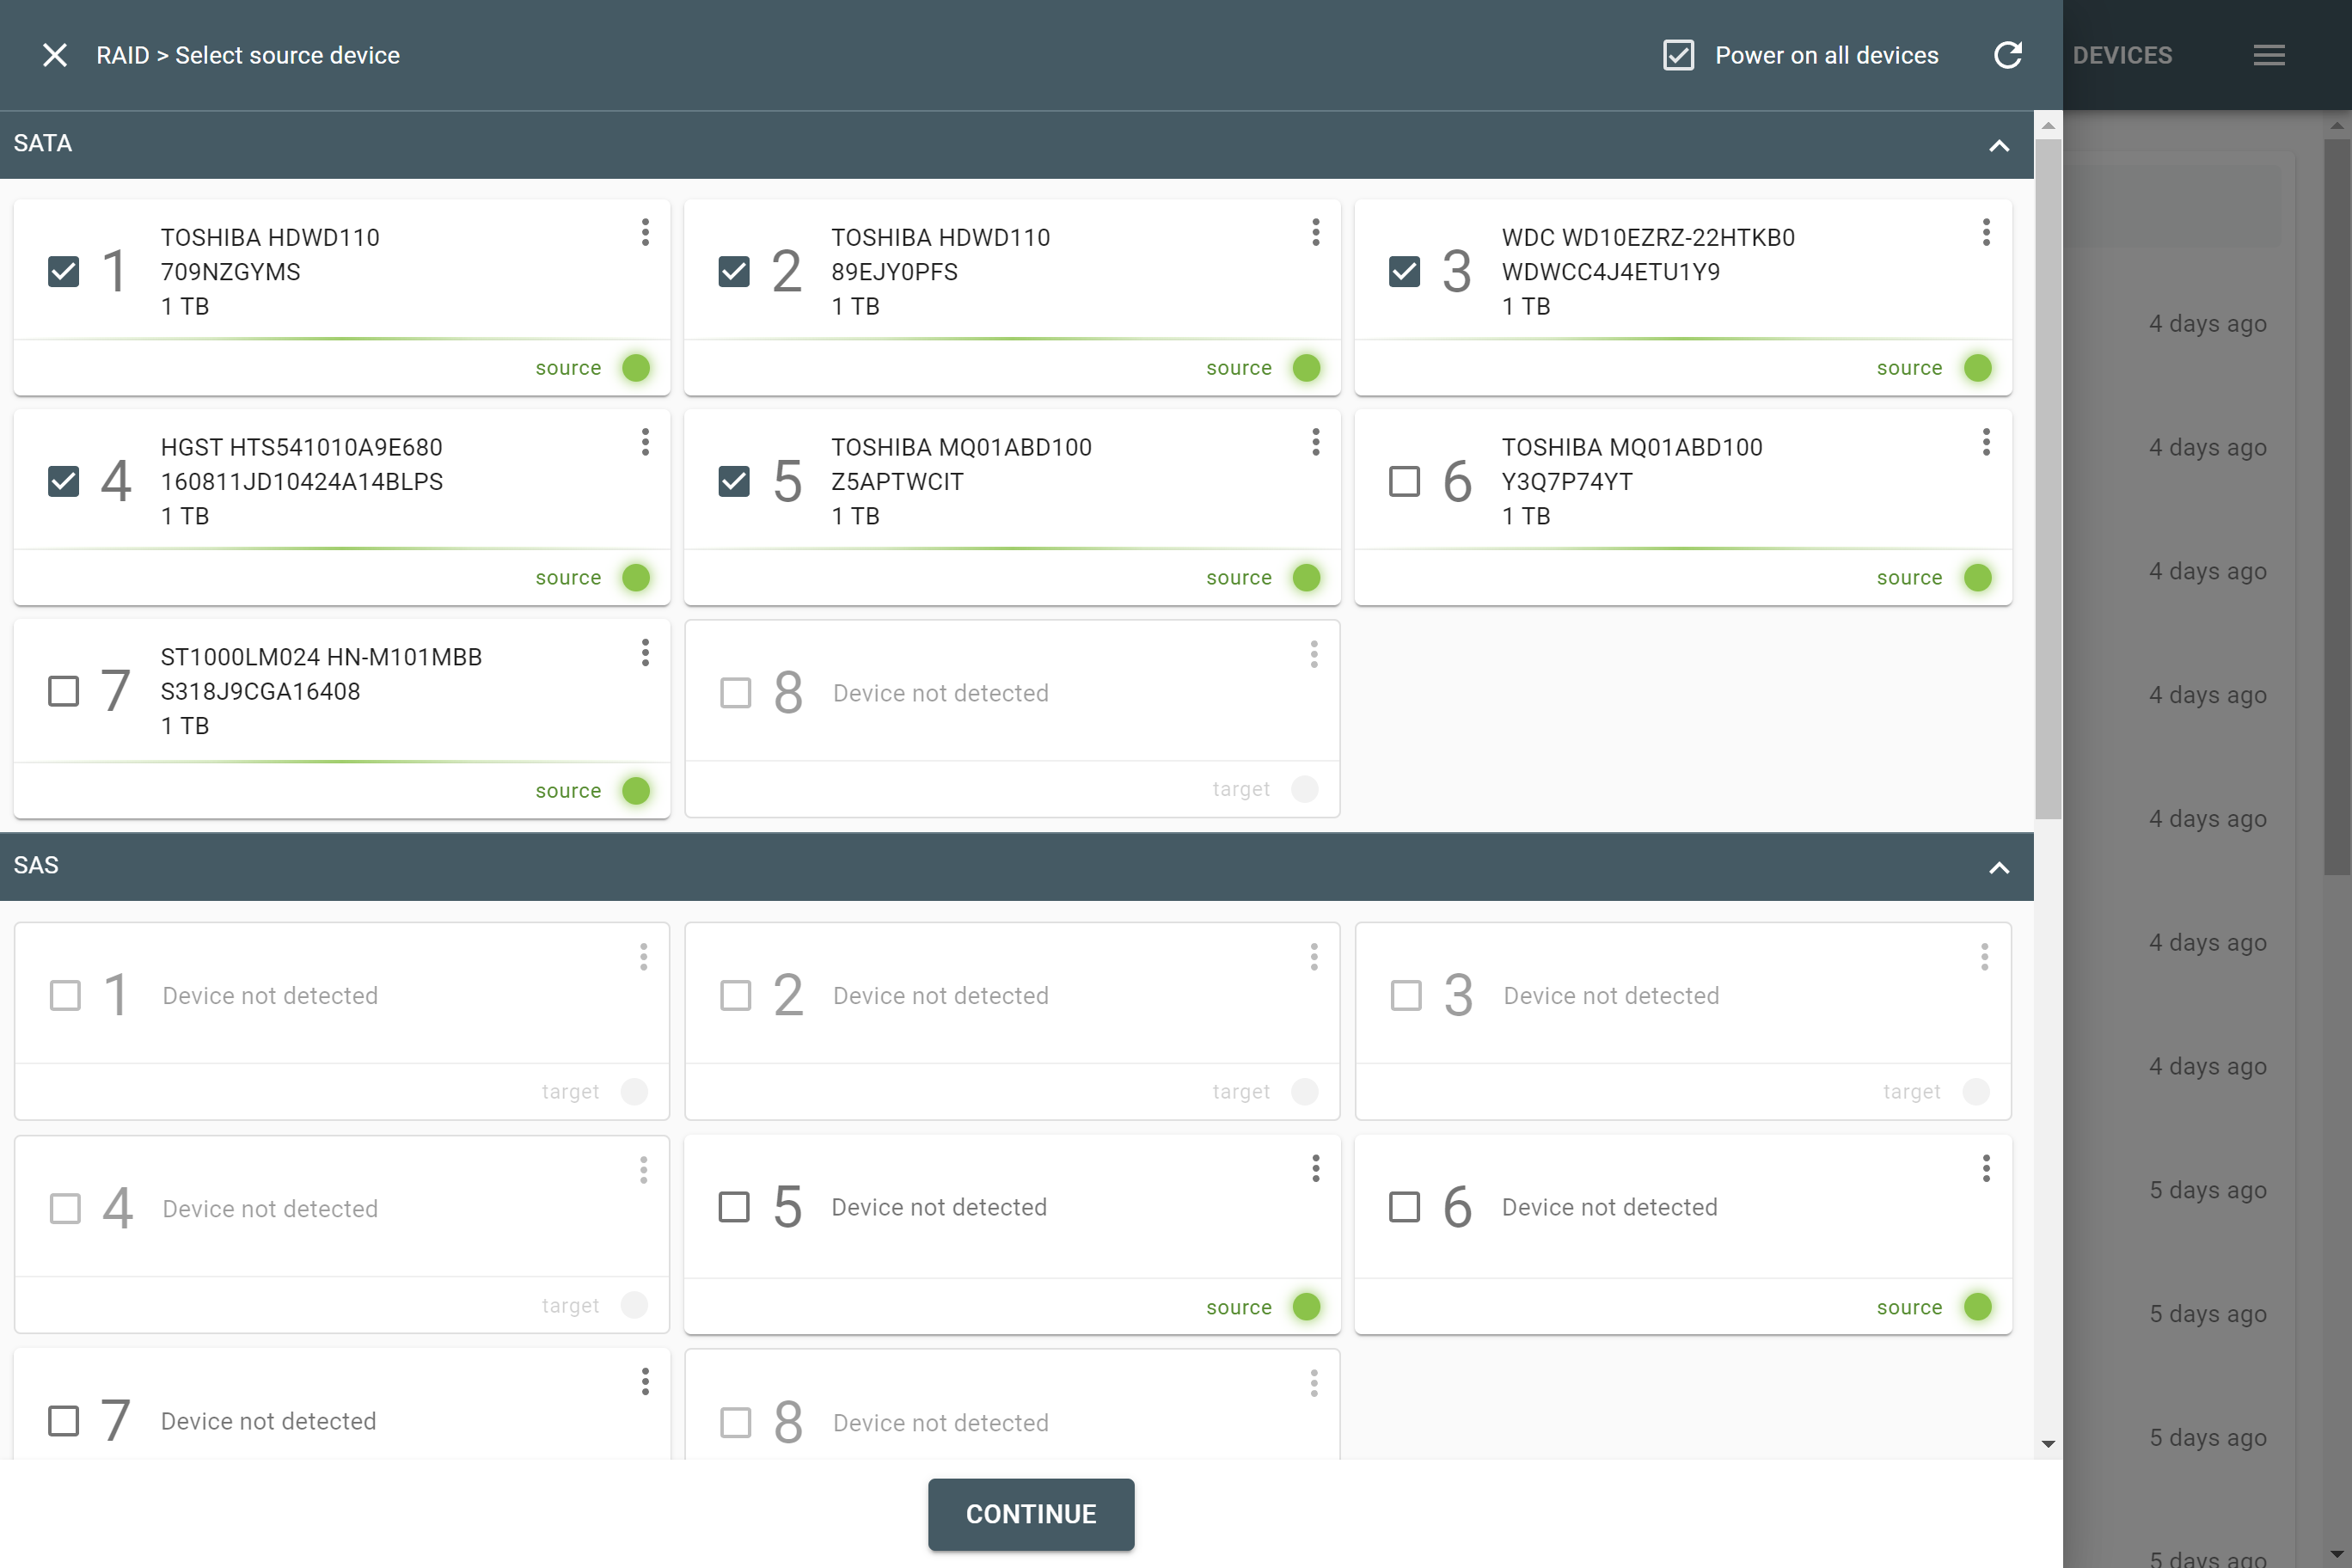
Selecting RAID members.
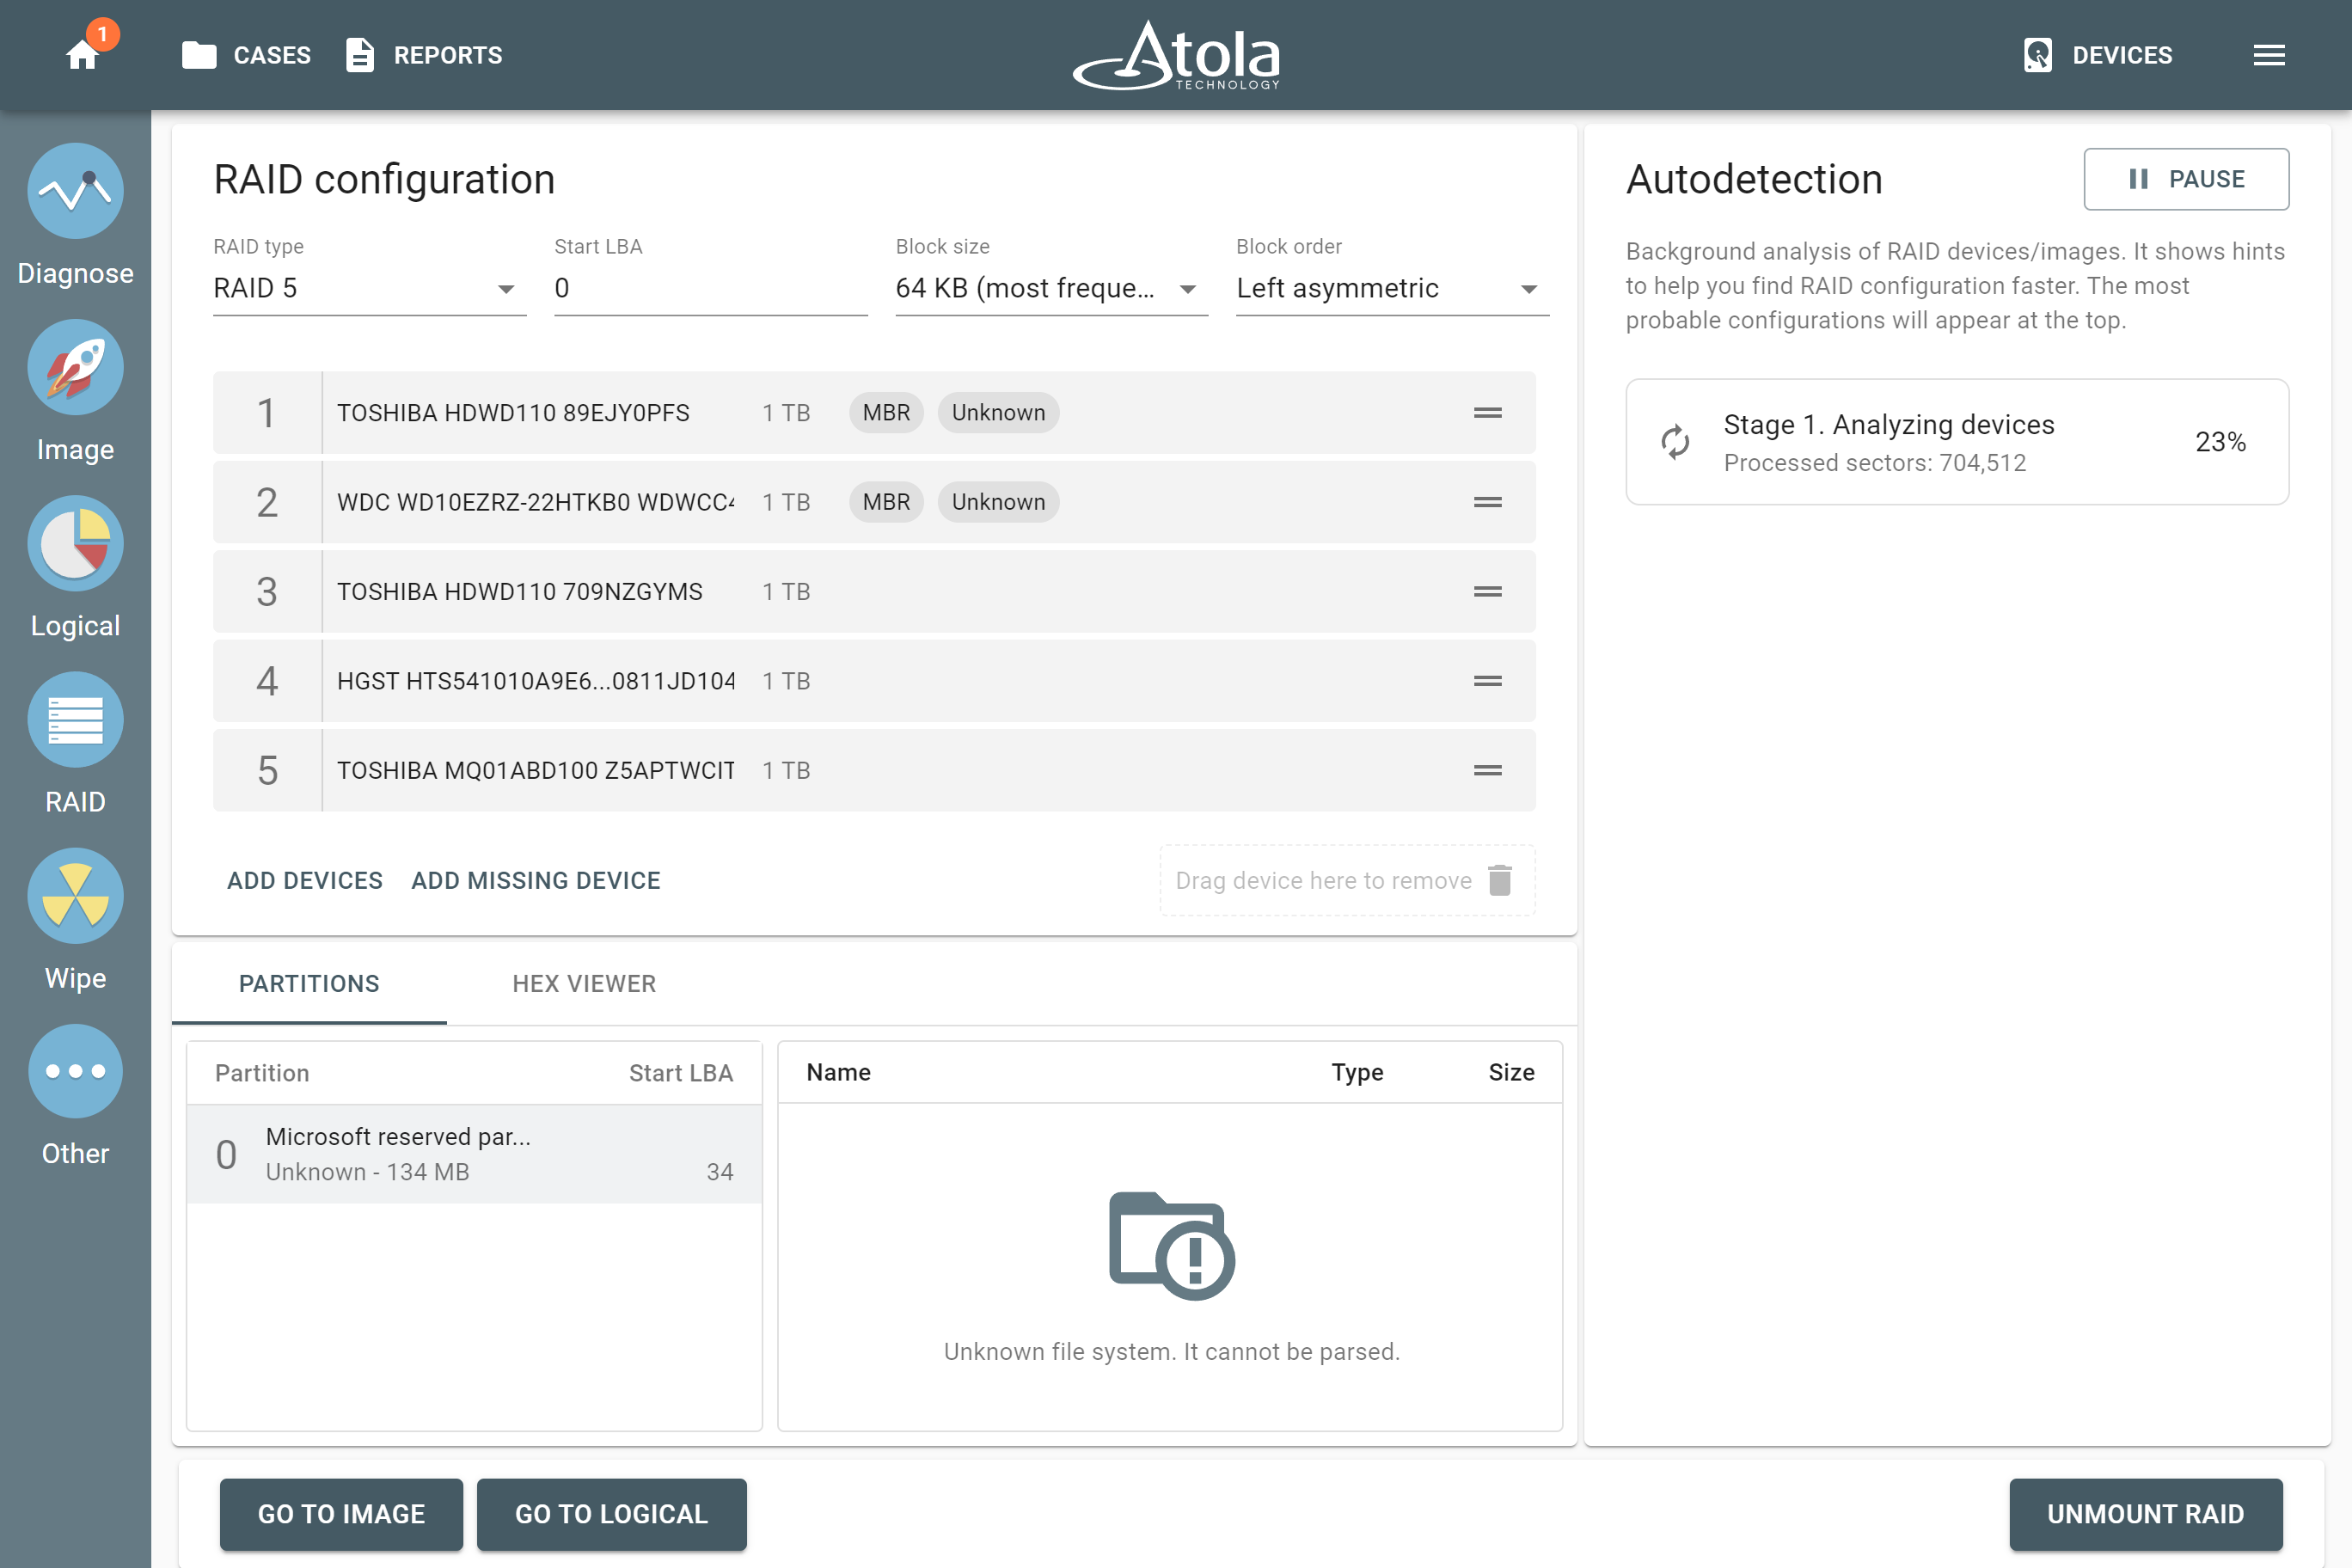
The RAID configuration screen in Atola TaskForce 2.
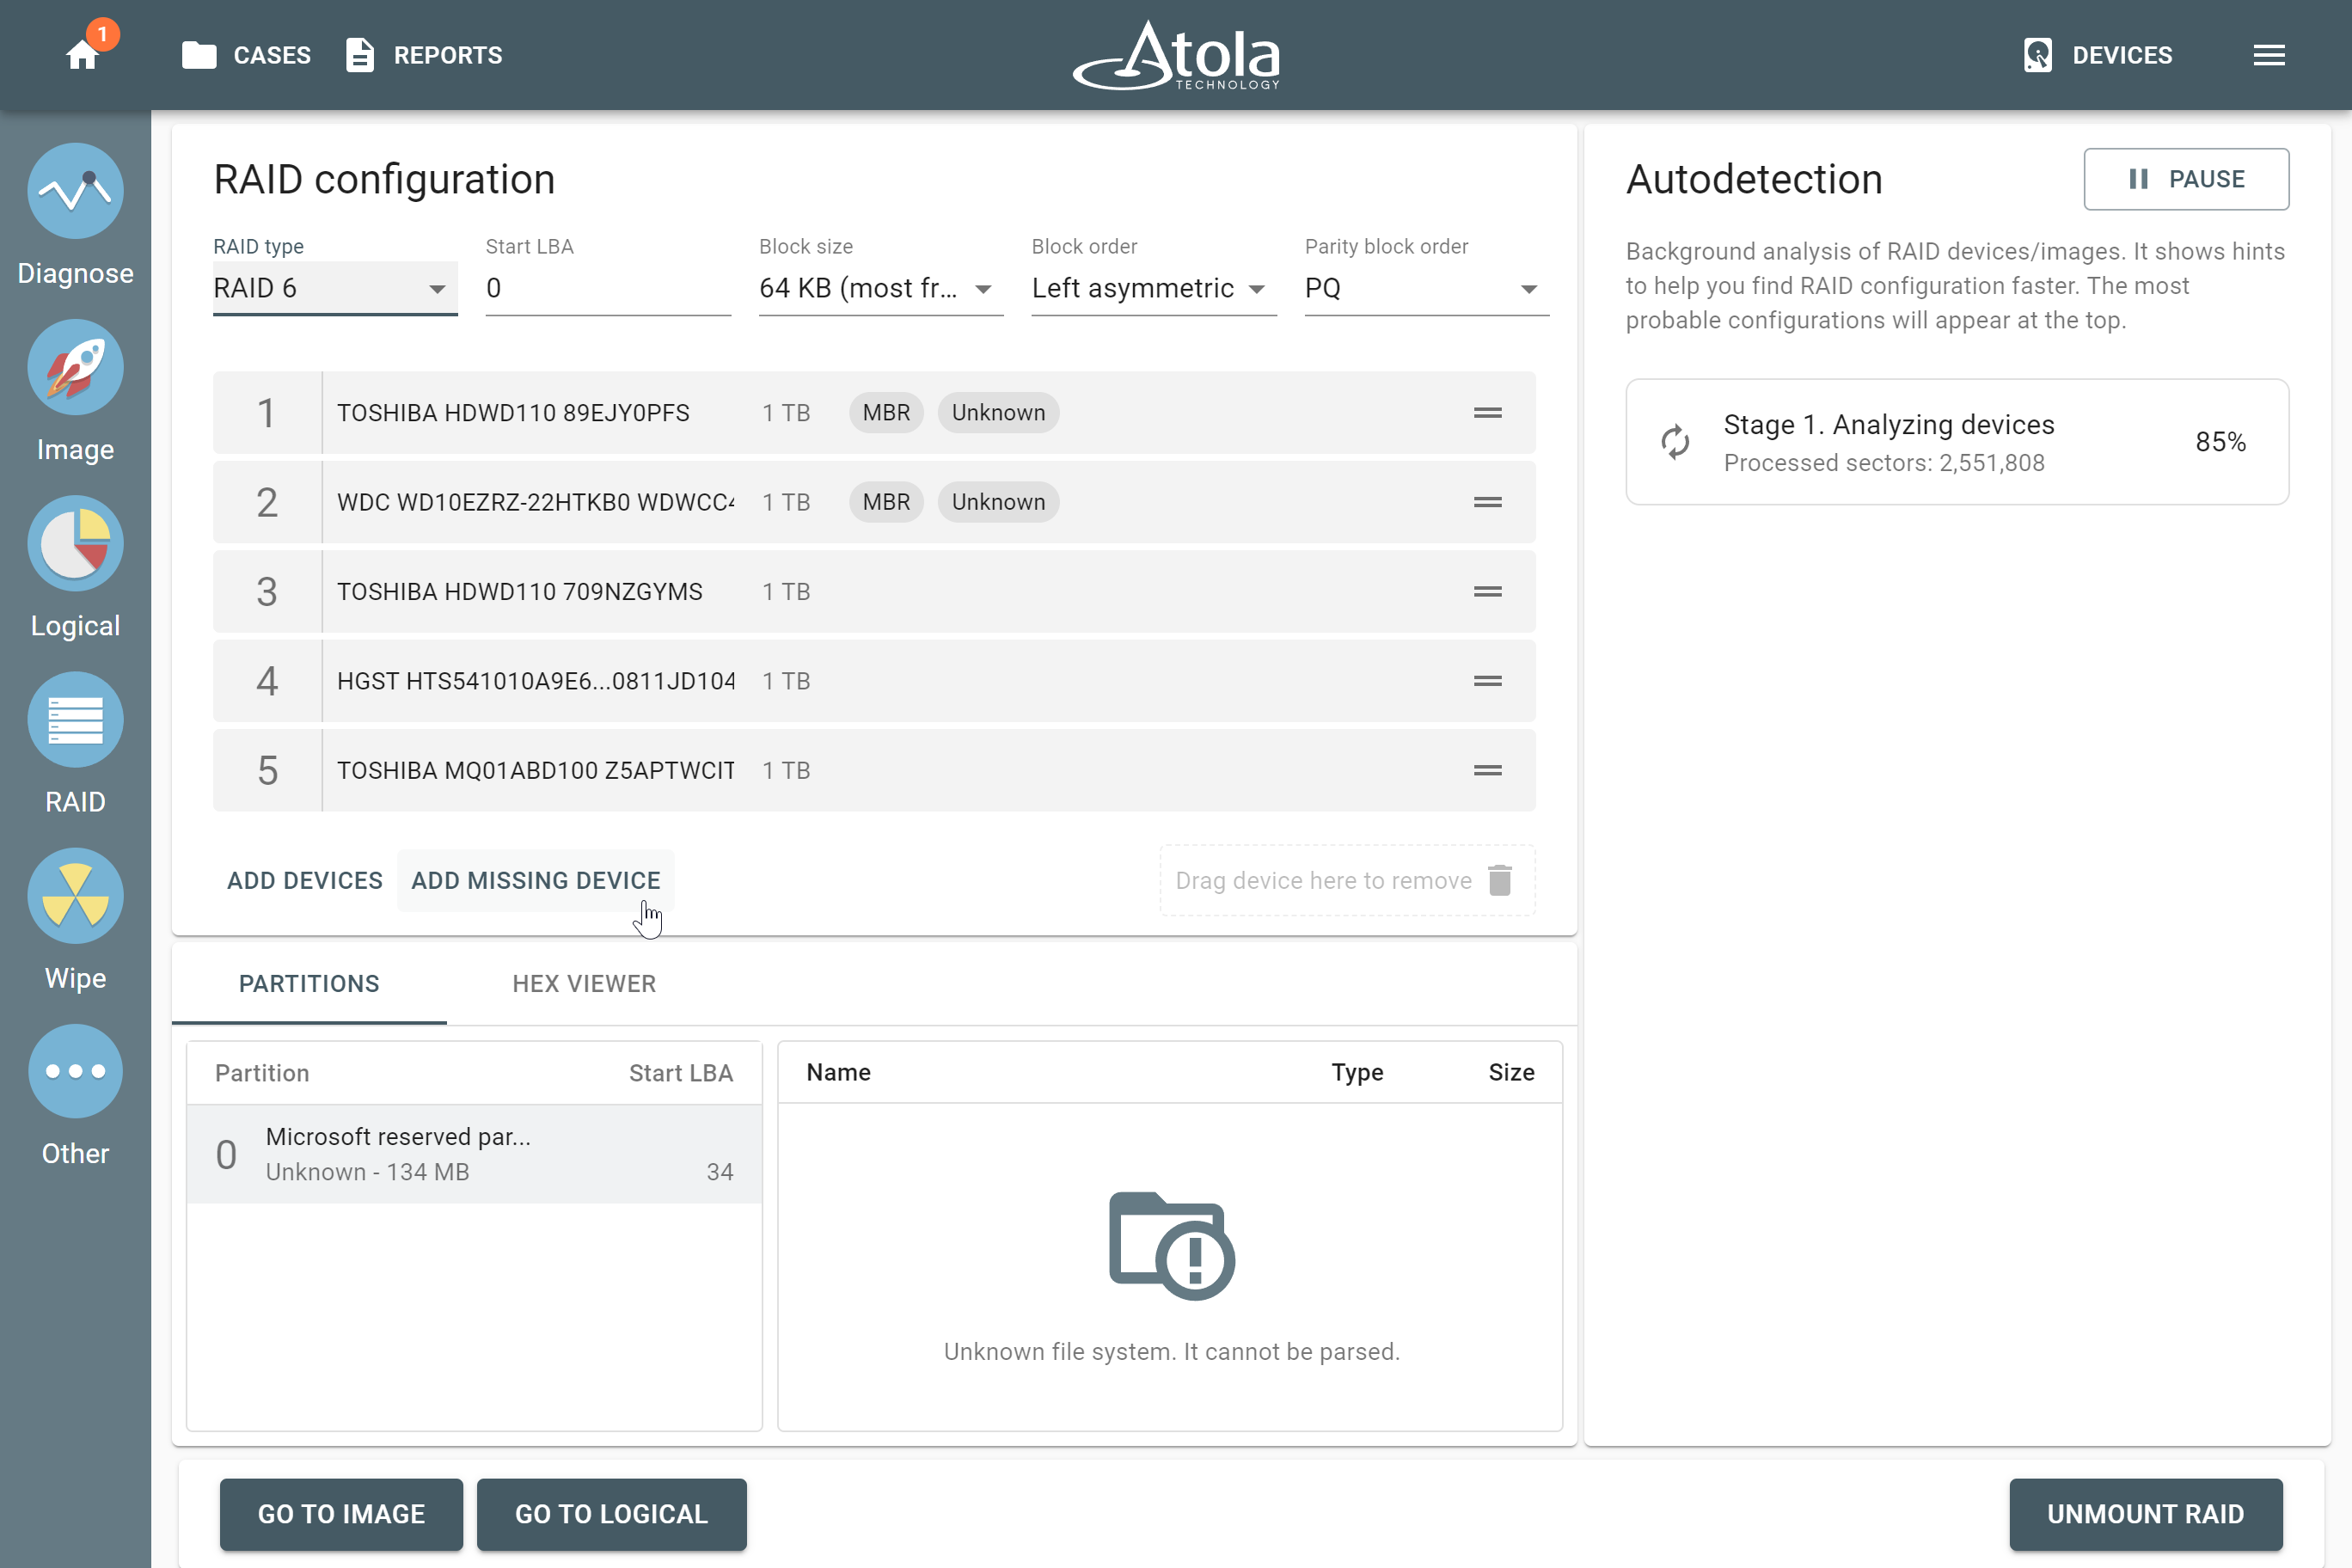
Adding a missing device to a RAID.
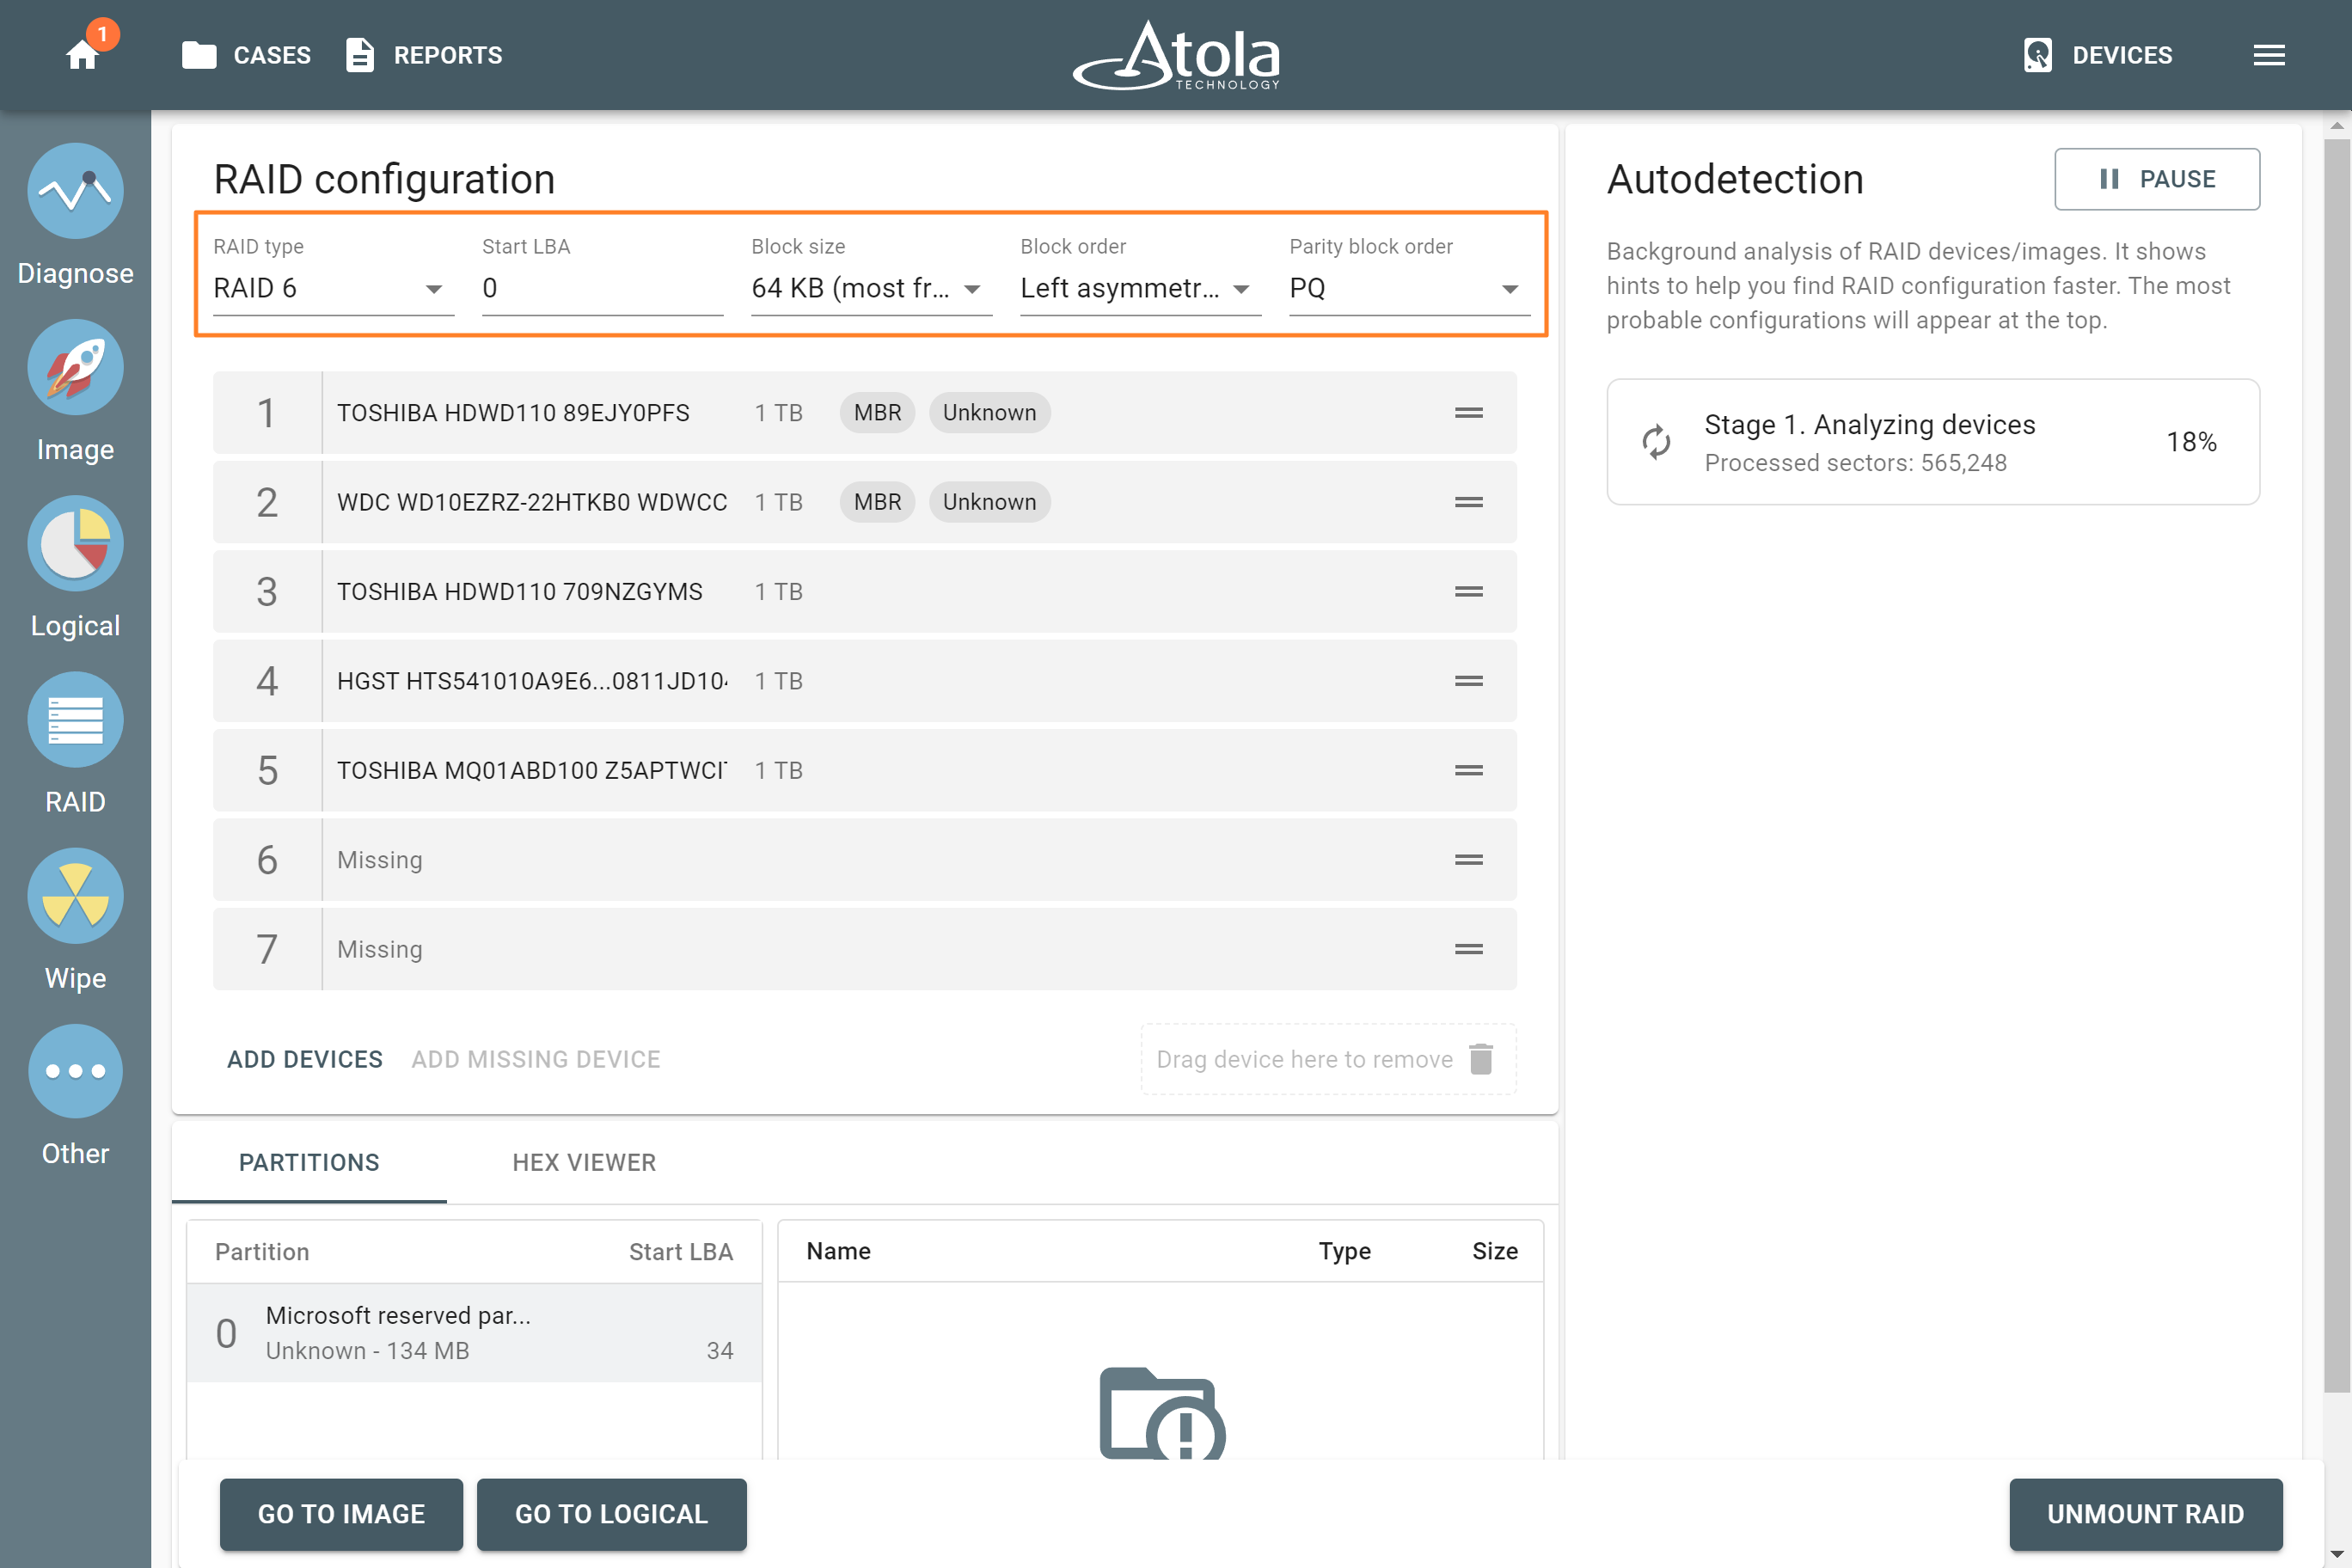
Lists with RAID parameters for manual selection.
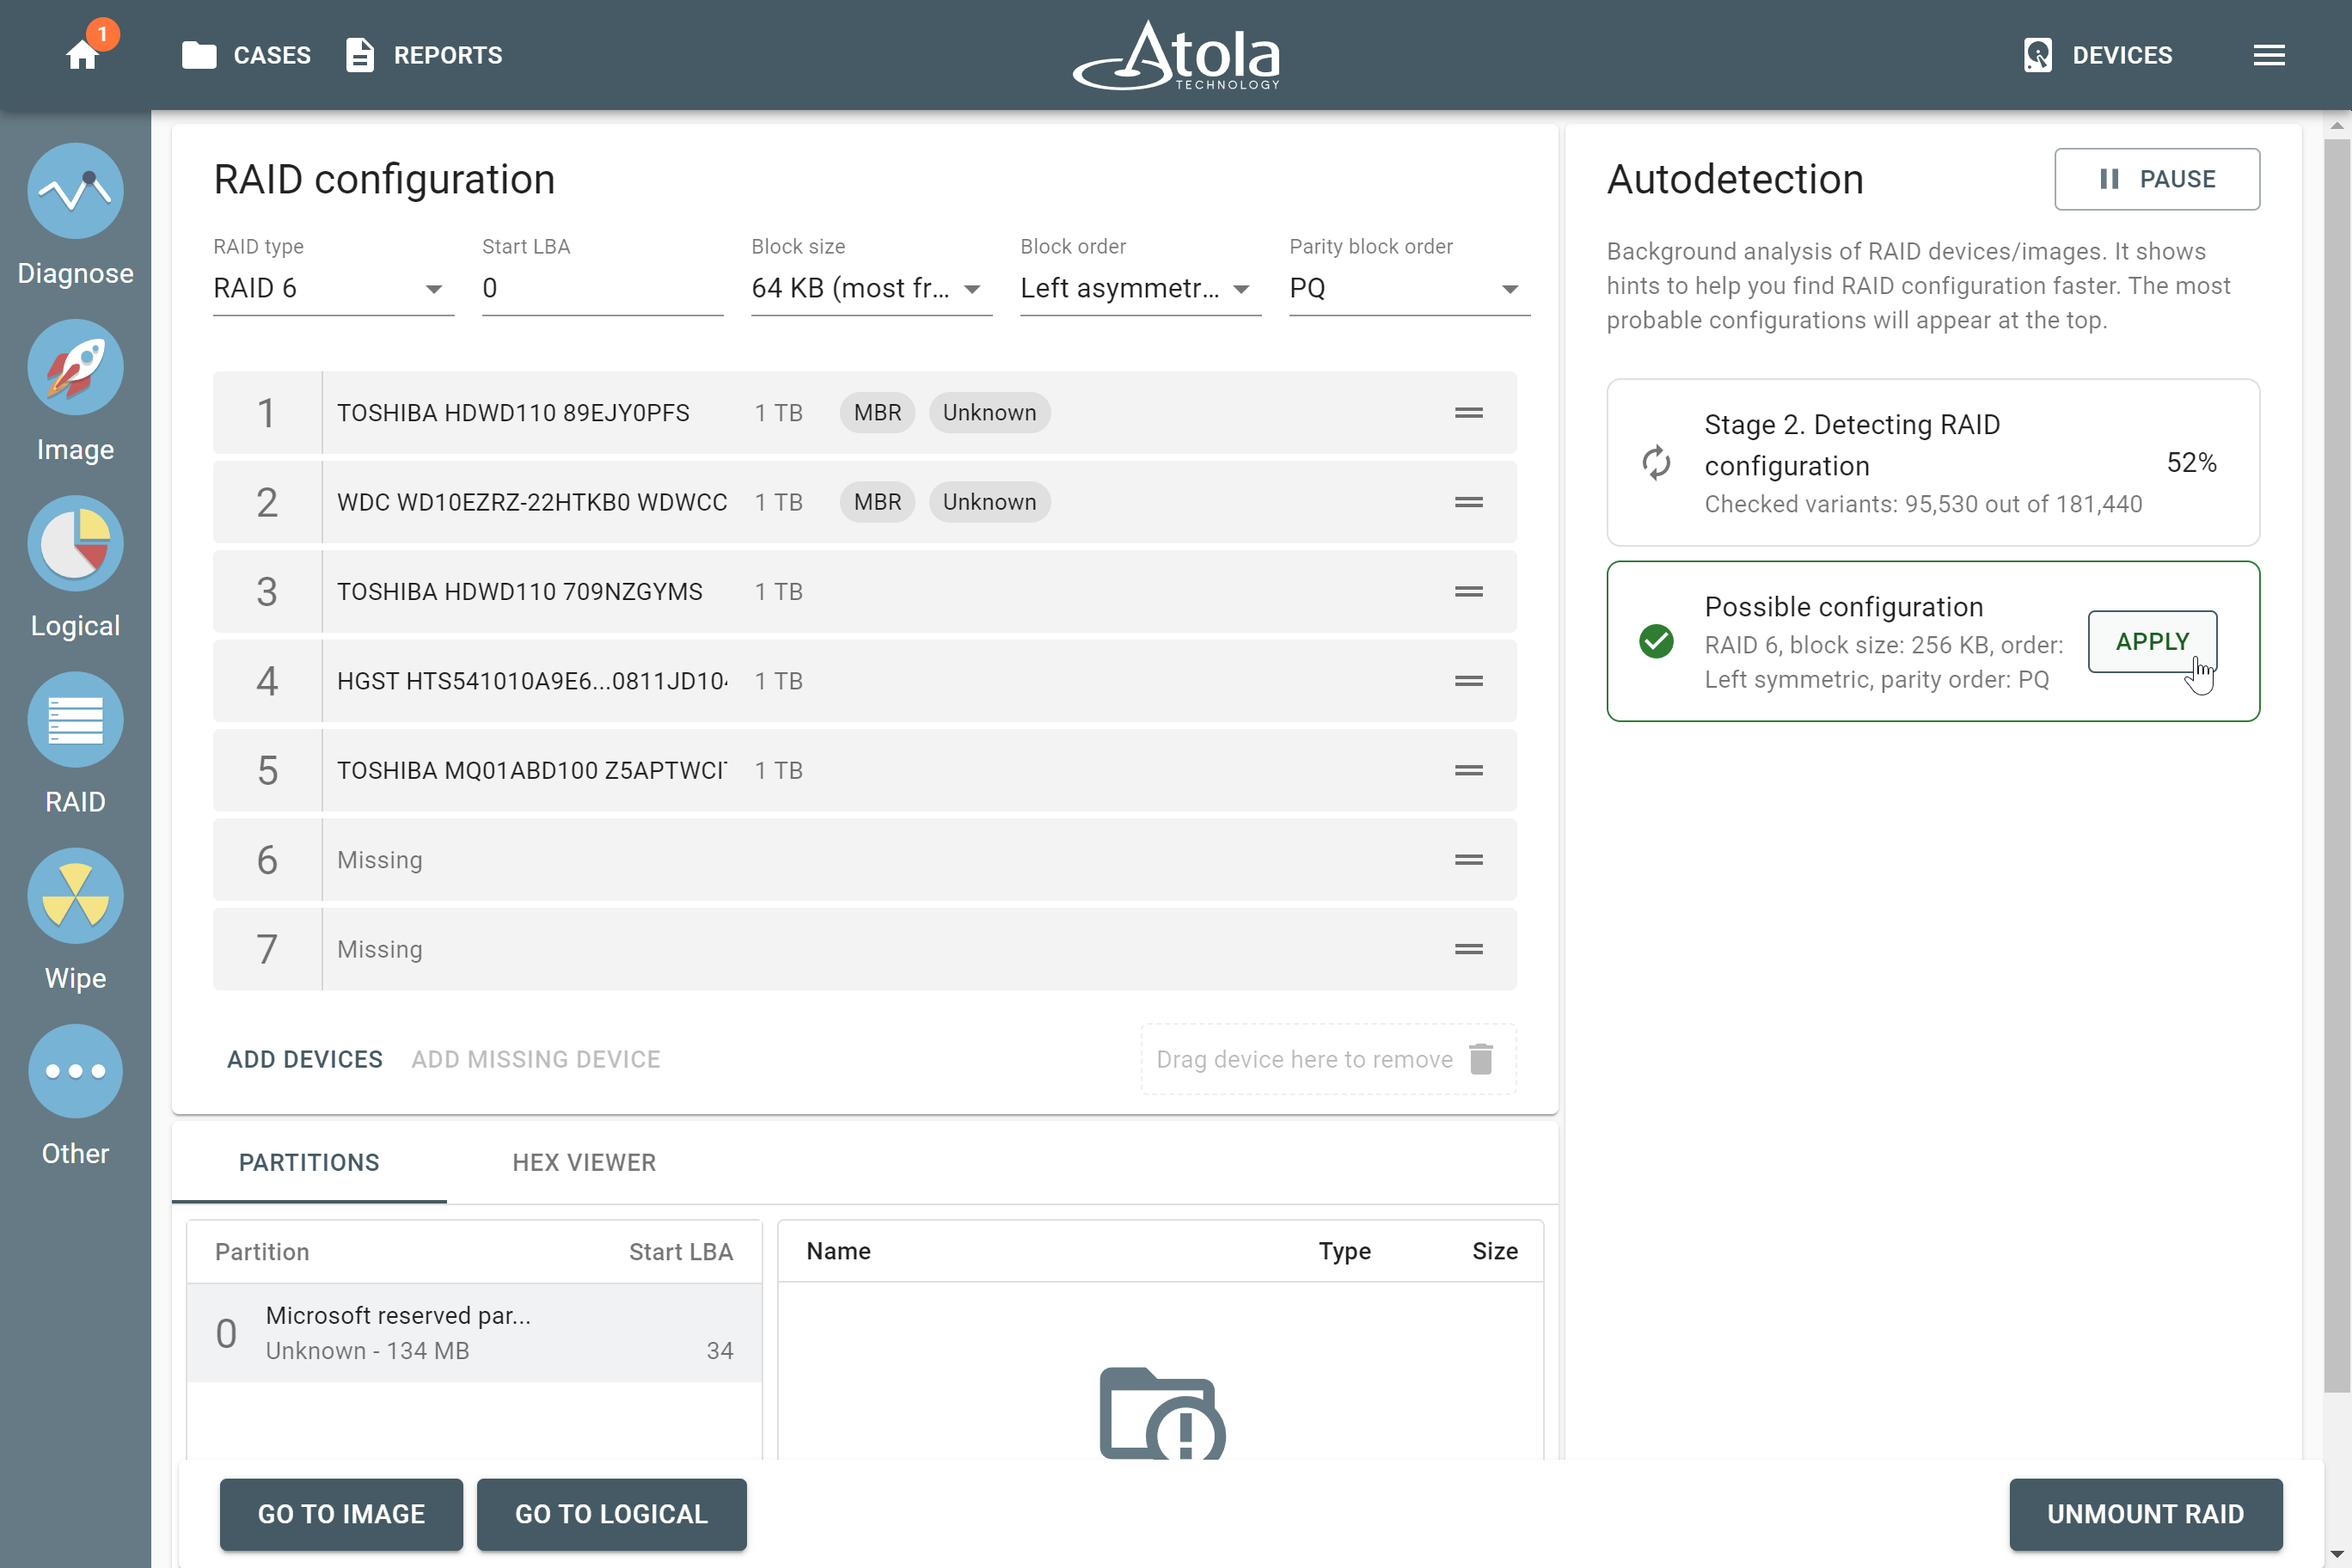
Applying a possible RAID configuration.
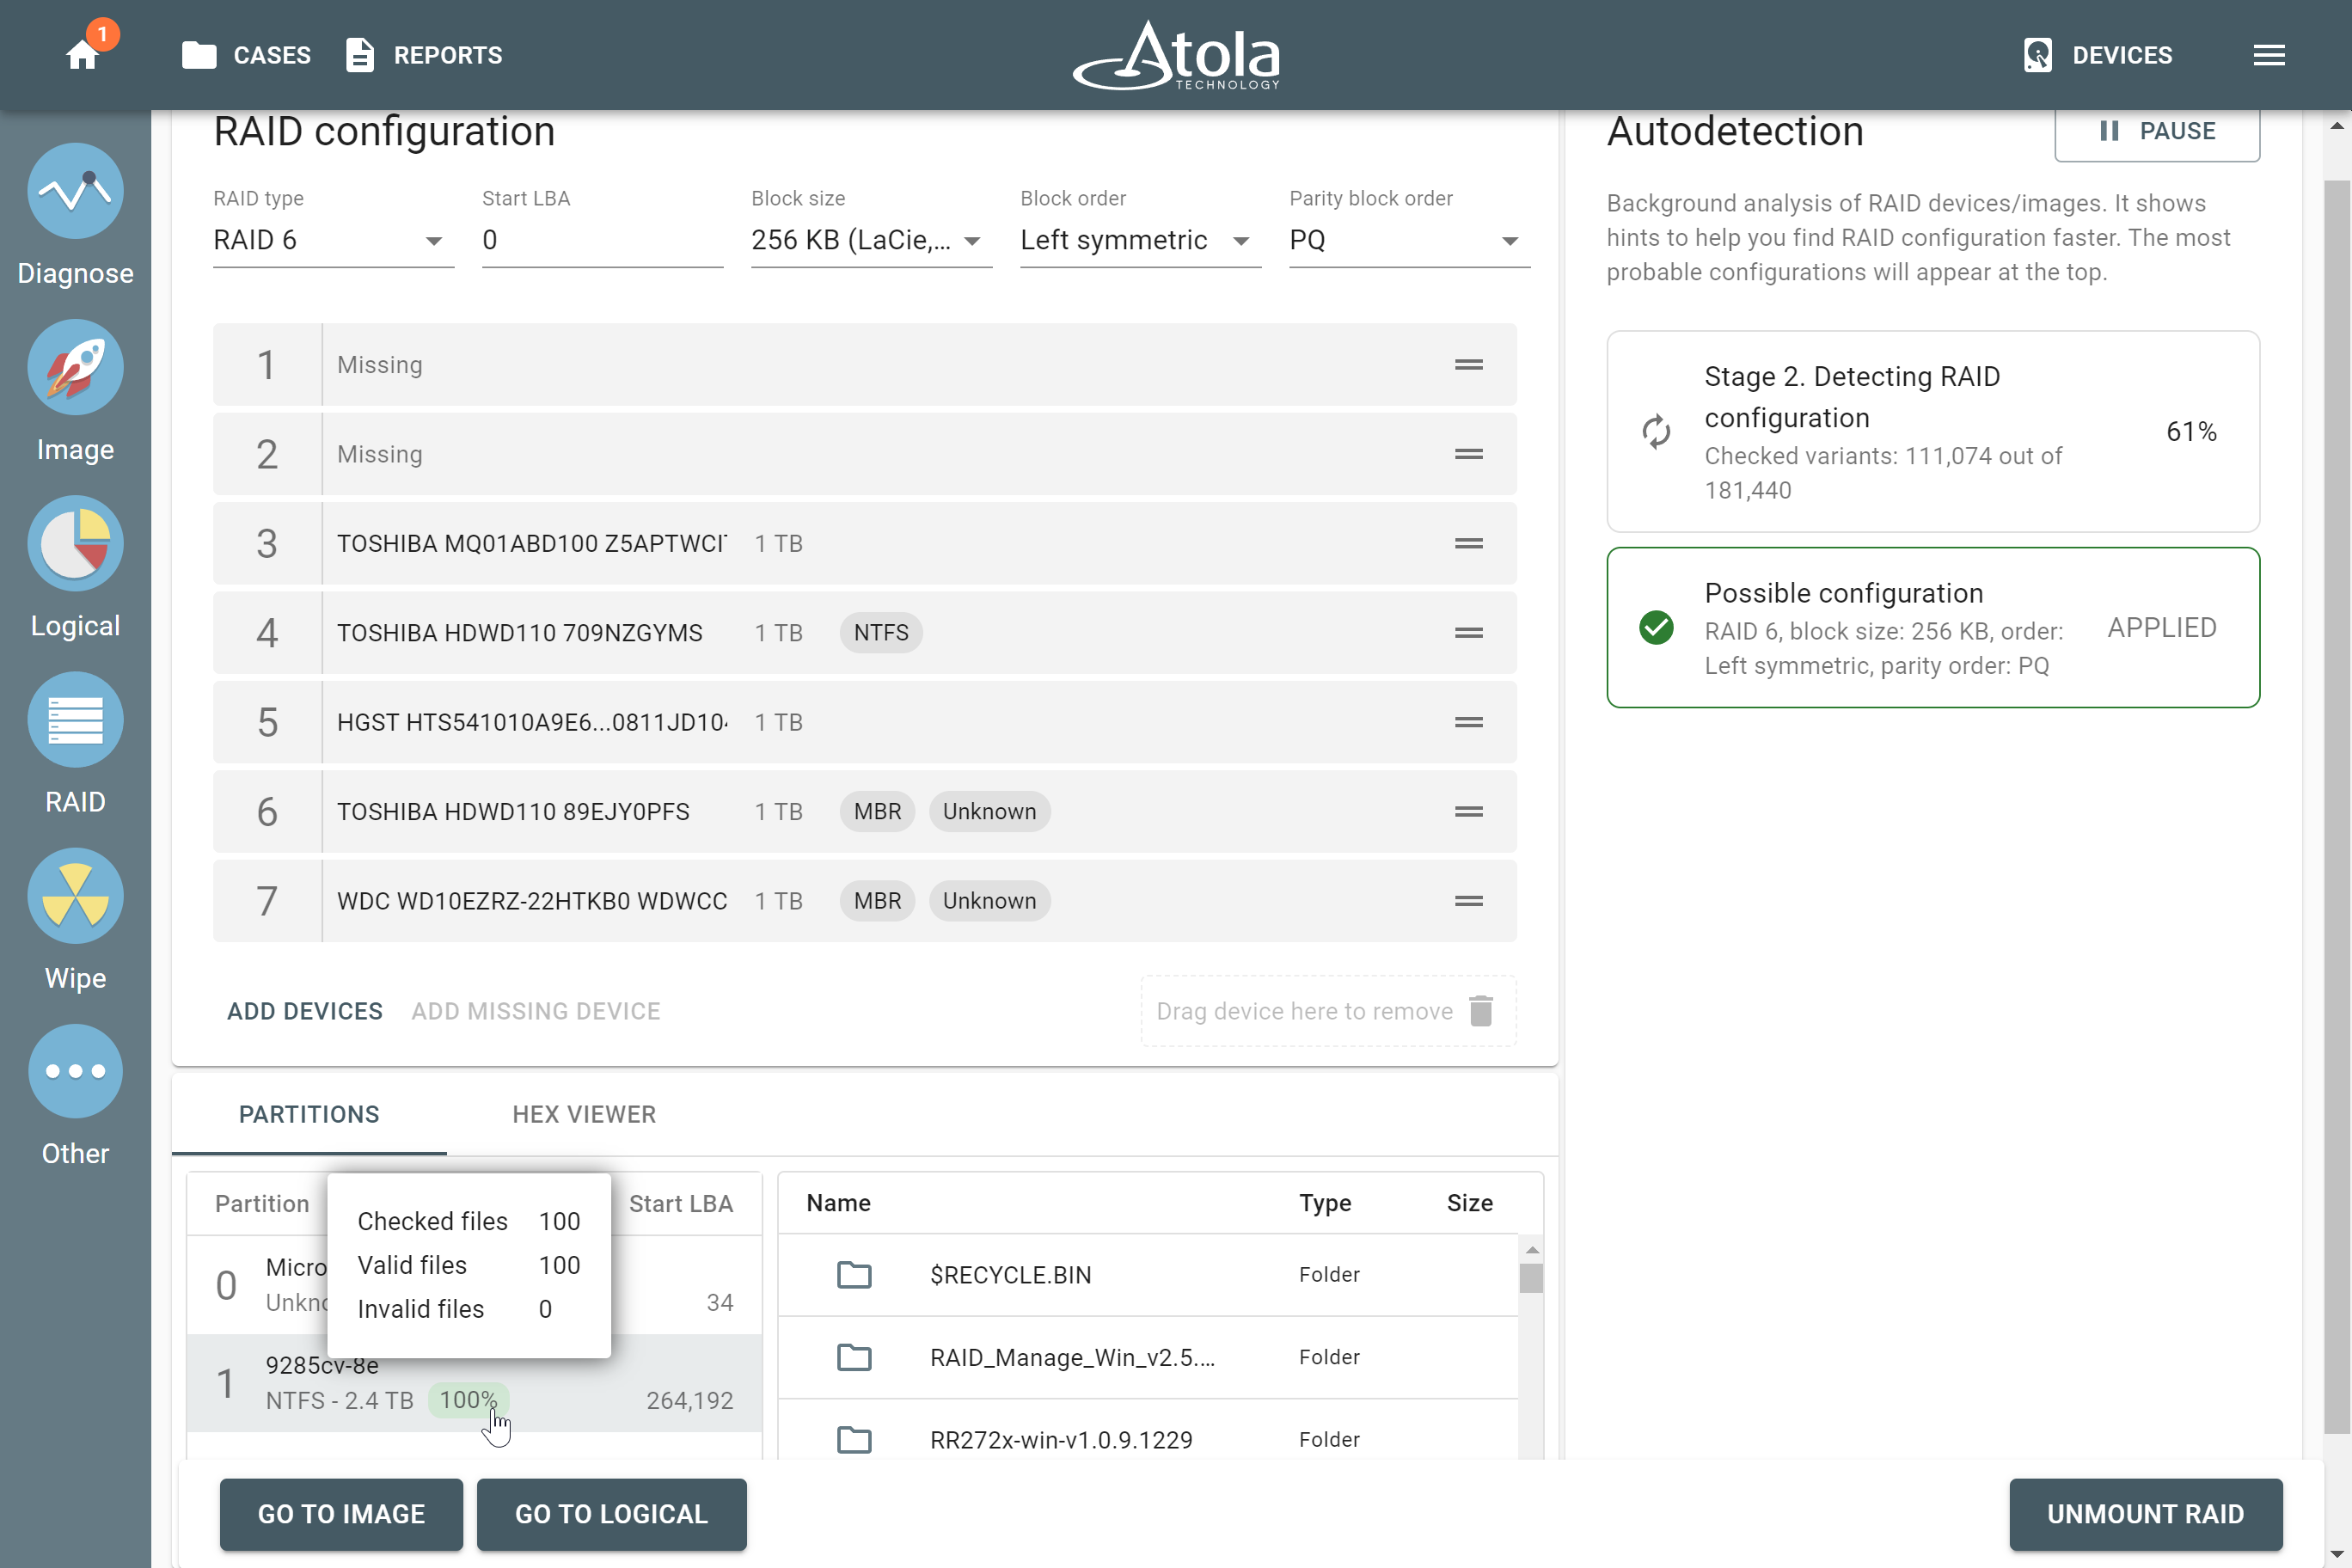
The preview of the RAID contents.
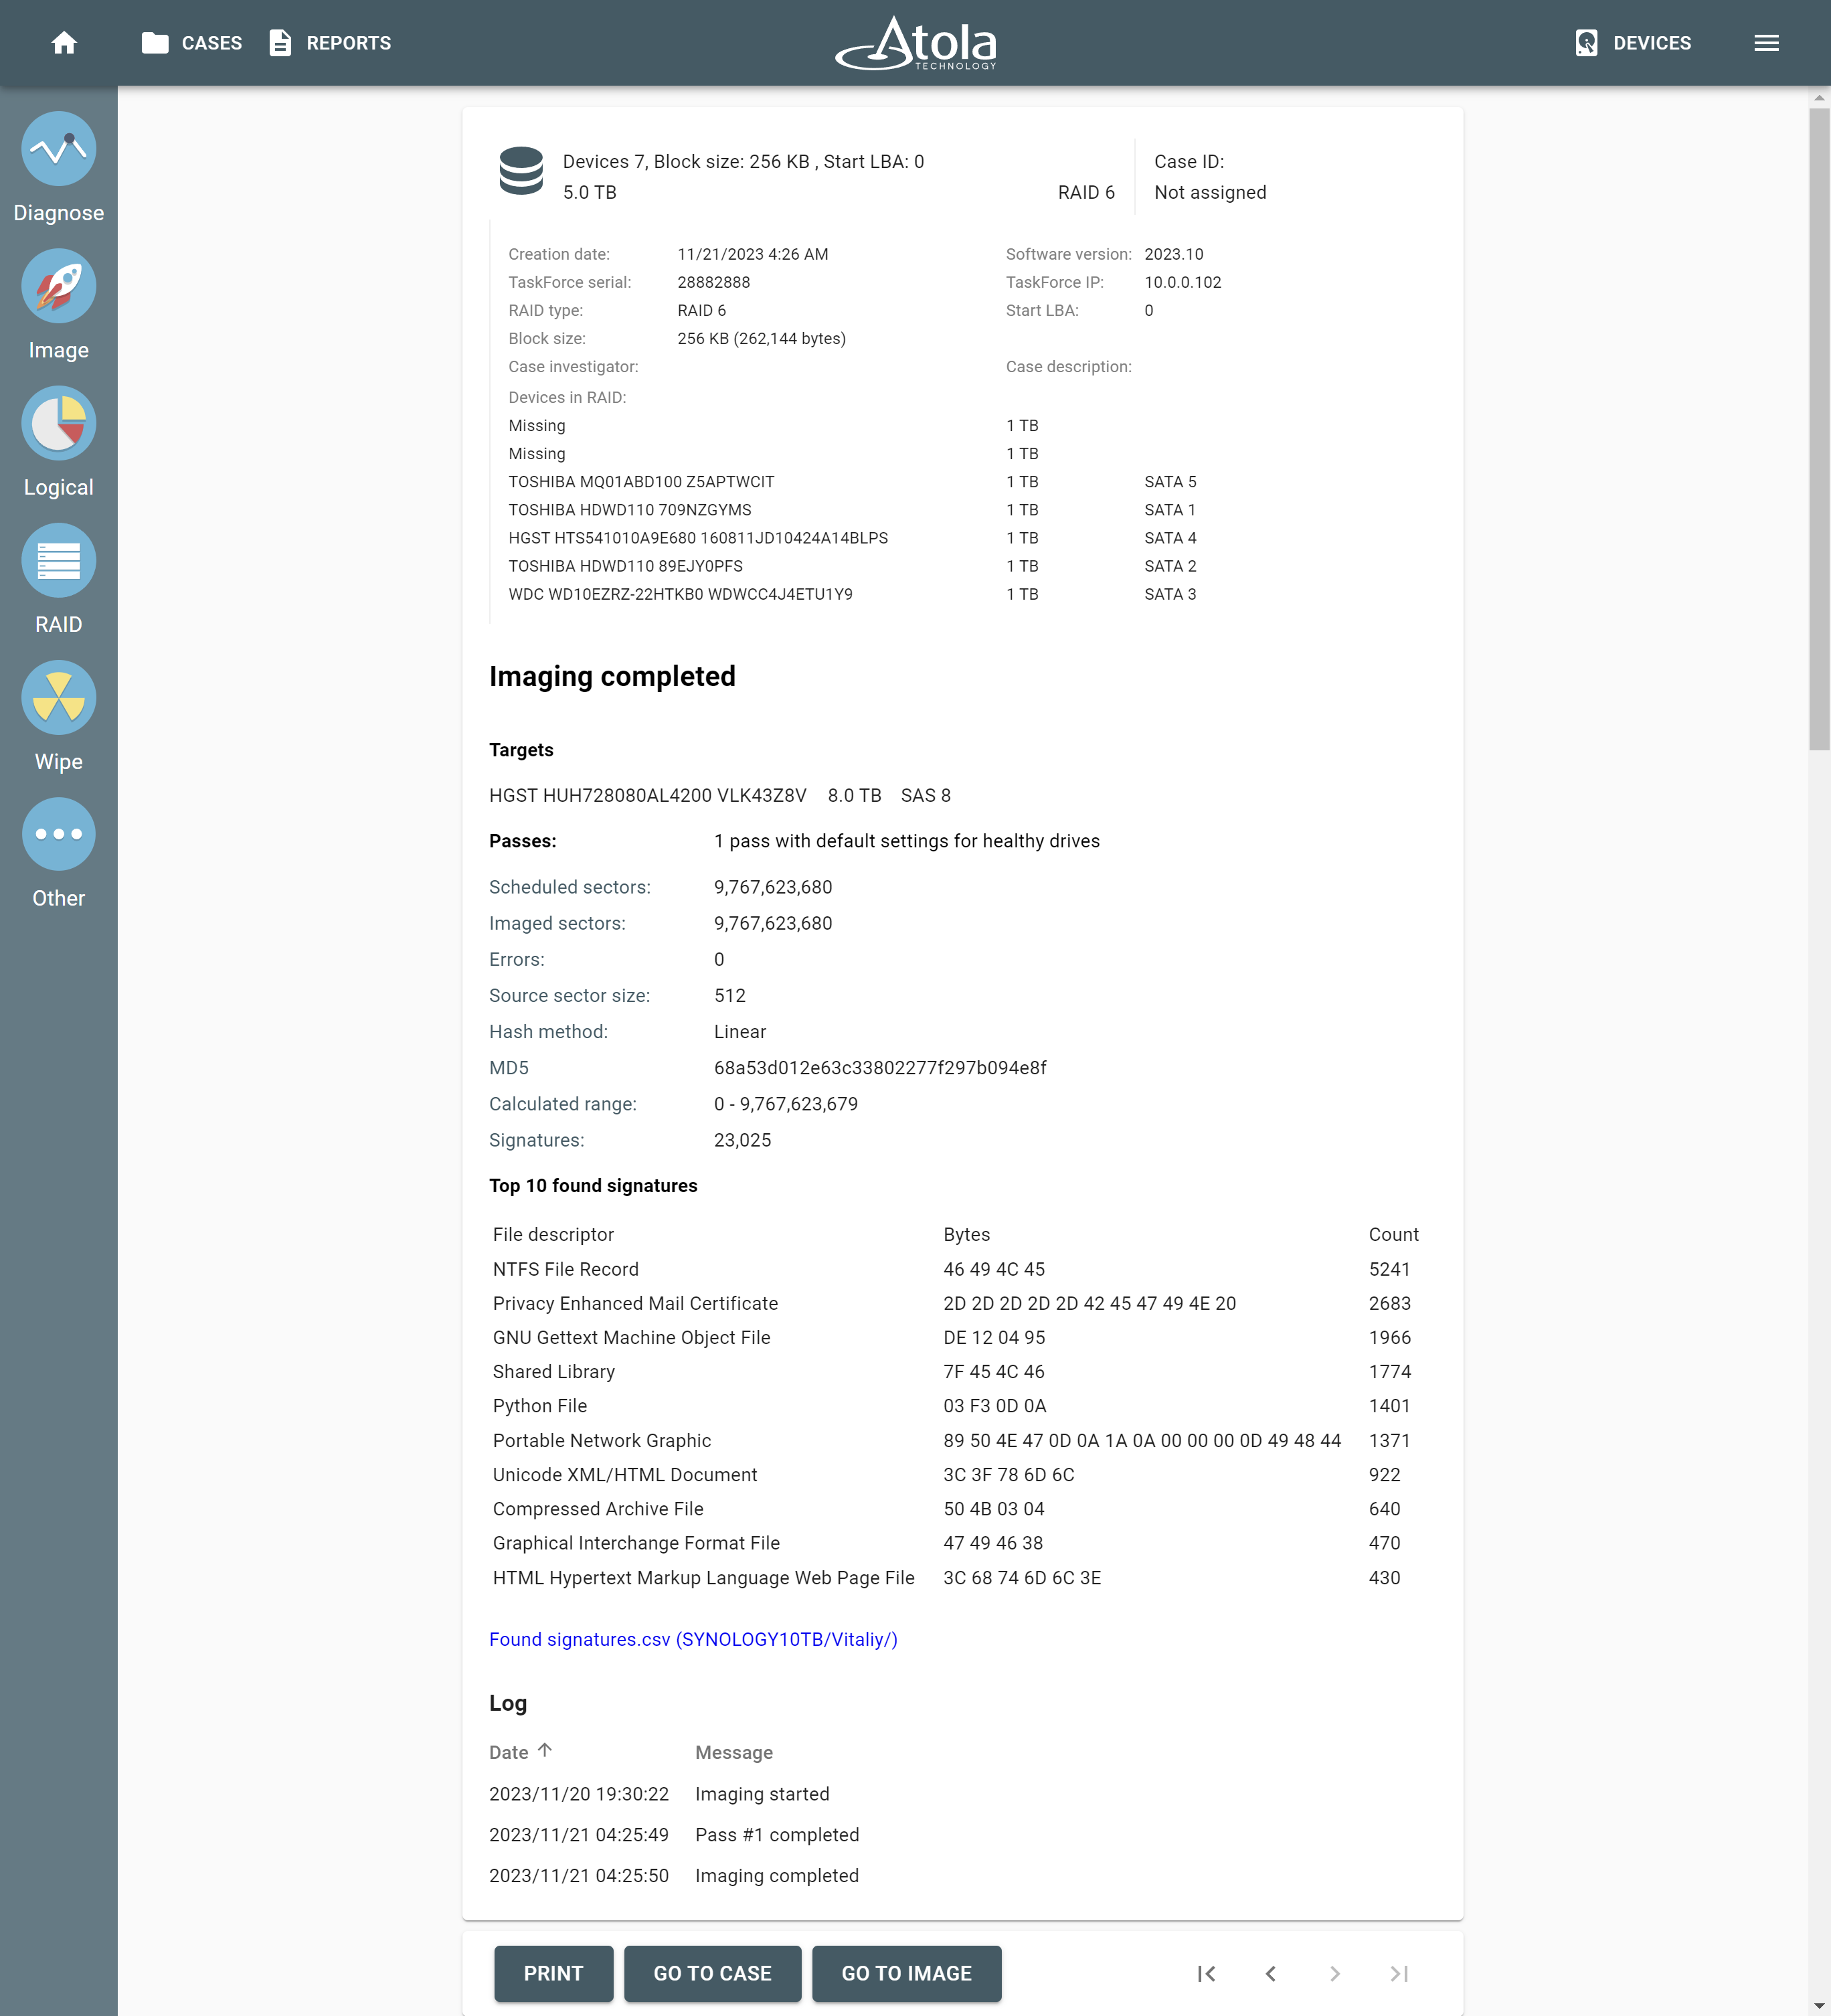
The Imaging completed report.