Imaging selected partitions of a RAID array
With Atola TaskForce 2, you can image individual partitions of an assembled RAID array to avoid imaging excessive amounts of data.
Once the RAID array has been reassembled, you can preview the contents of its partitions. It helps you conclude which of the partitions may contain the critical evidence and which are irrelevant.
Image selected partitions
To image only selected partitions of an assembled RAID array, do the following:
- On the RAID configuration page, click Go to image.
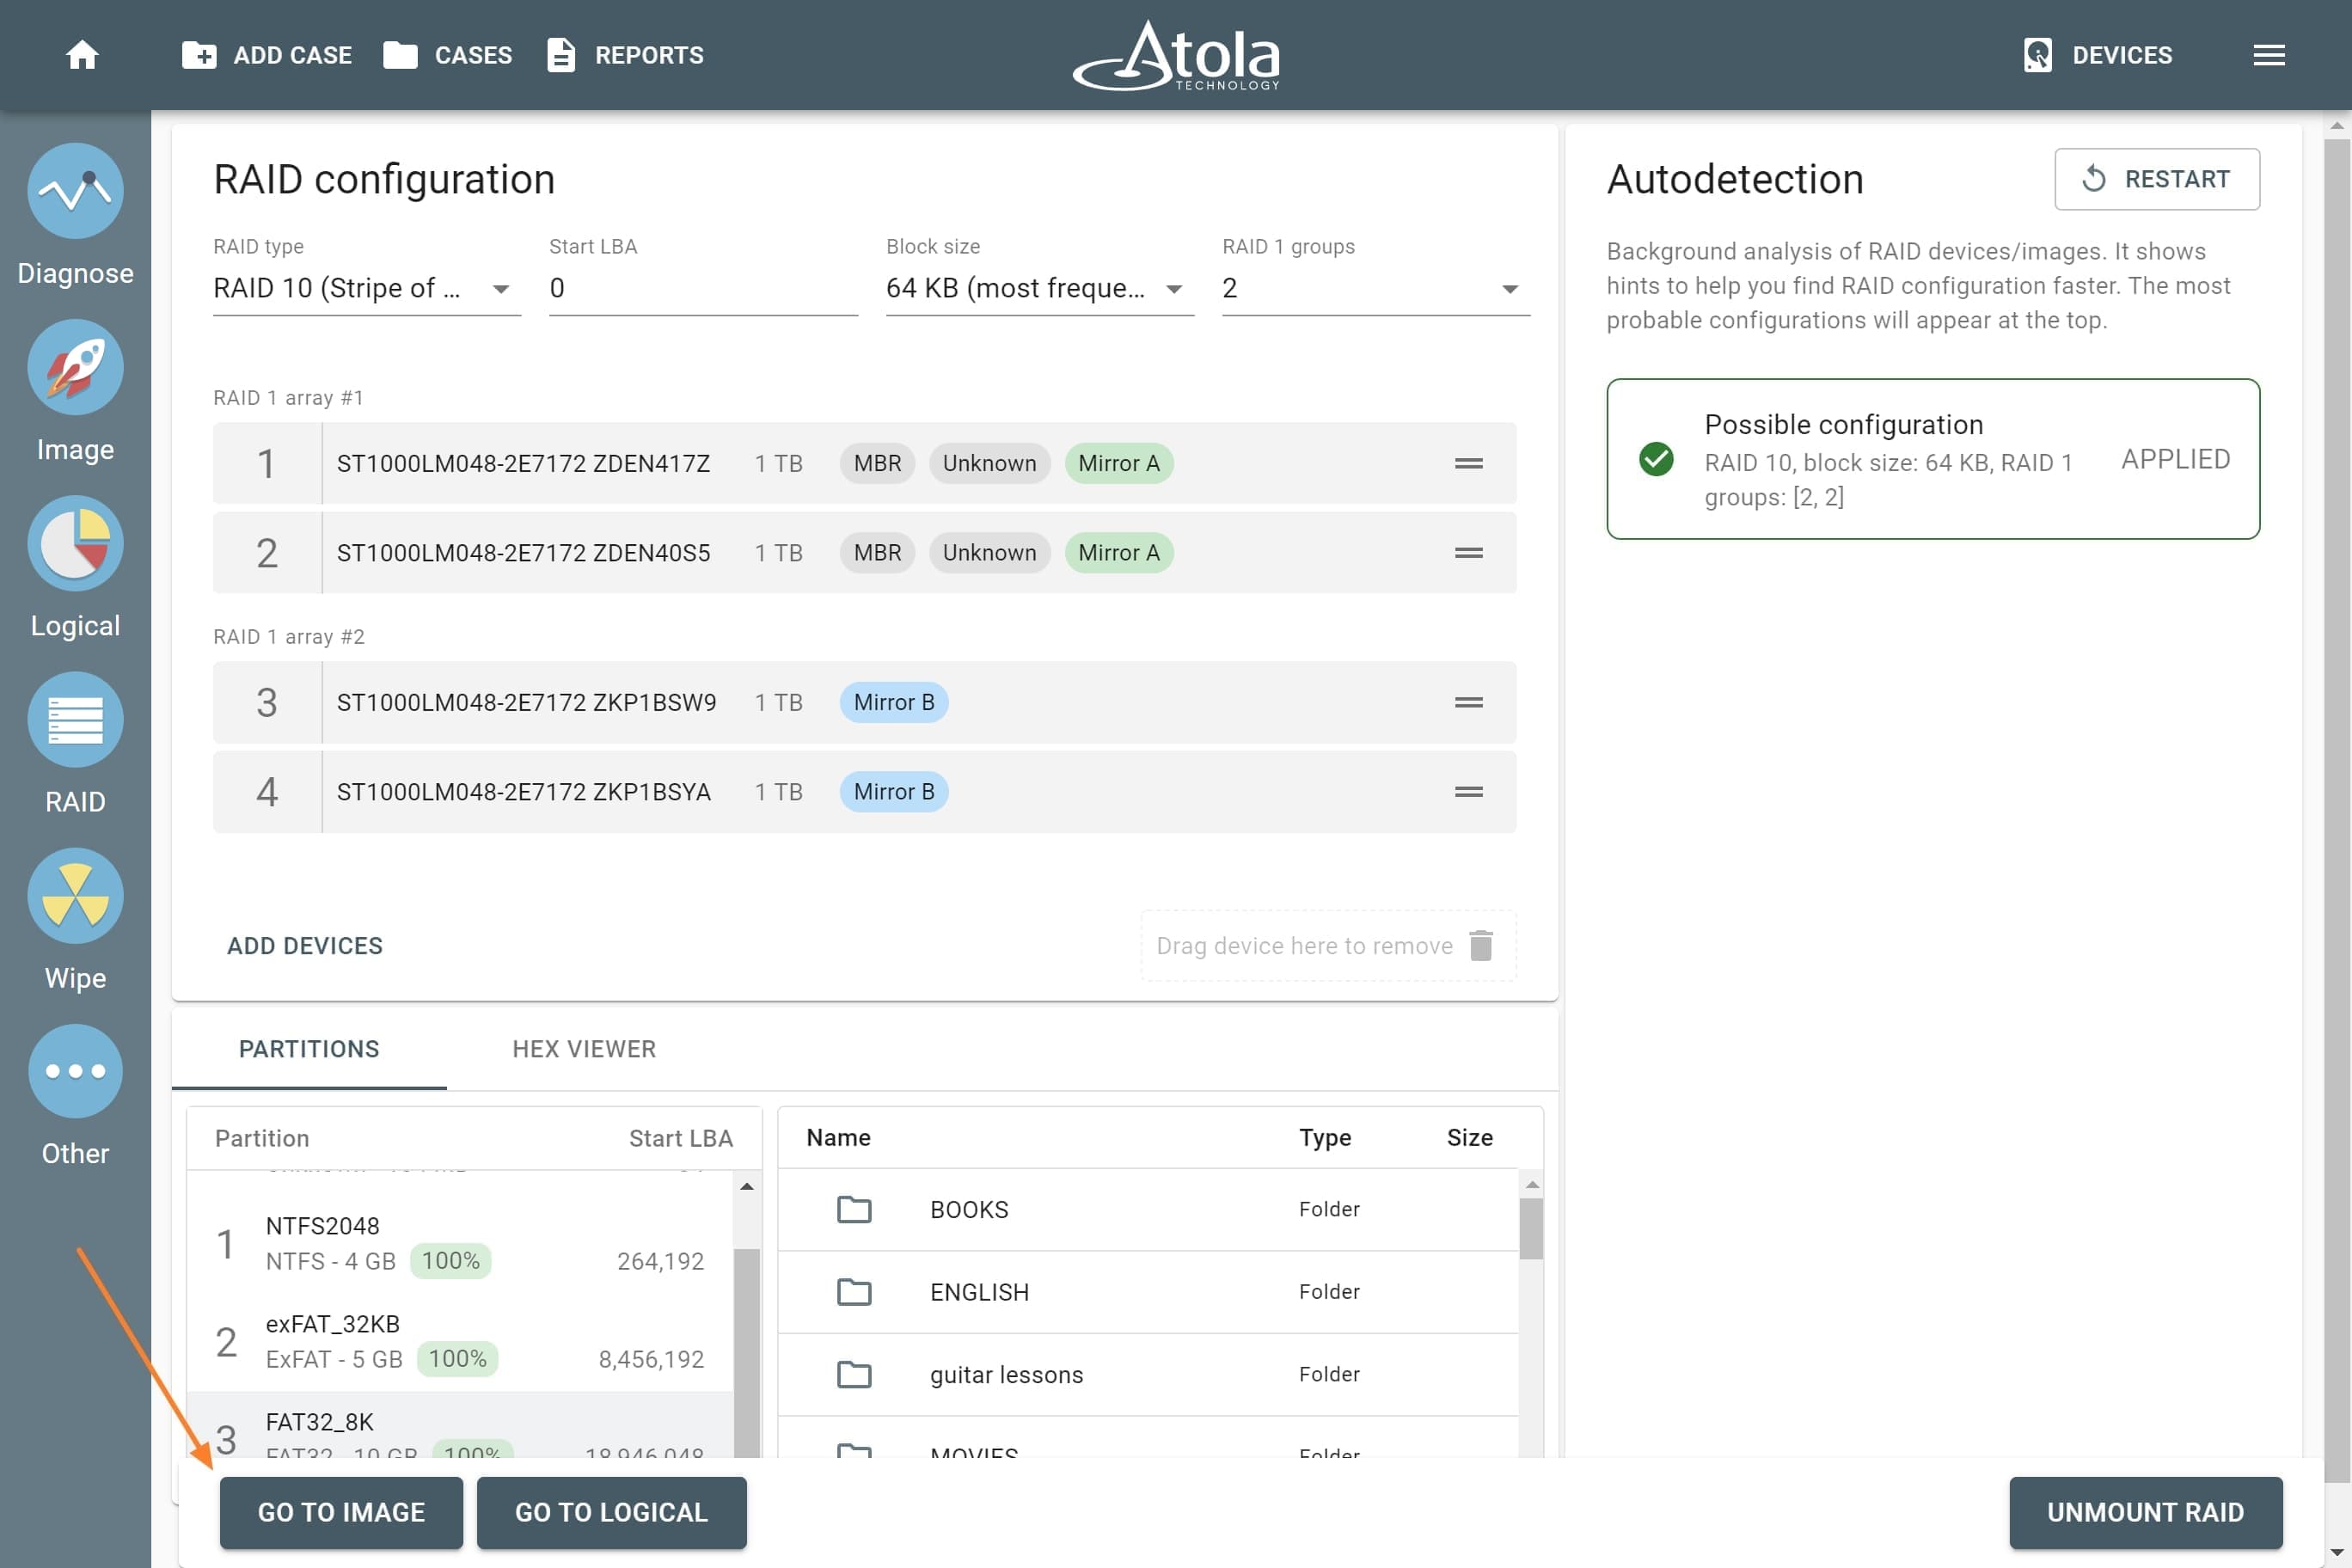
The suggested RAID configuration applied, partitions preview shows partitions.
- Select your target device and click Continue.
- On the imaging Settings page, click the imaging pass to adjust the imaging range.
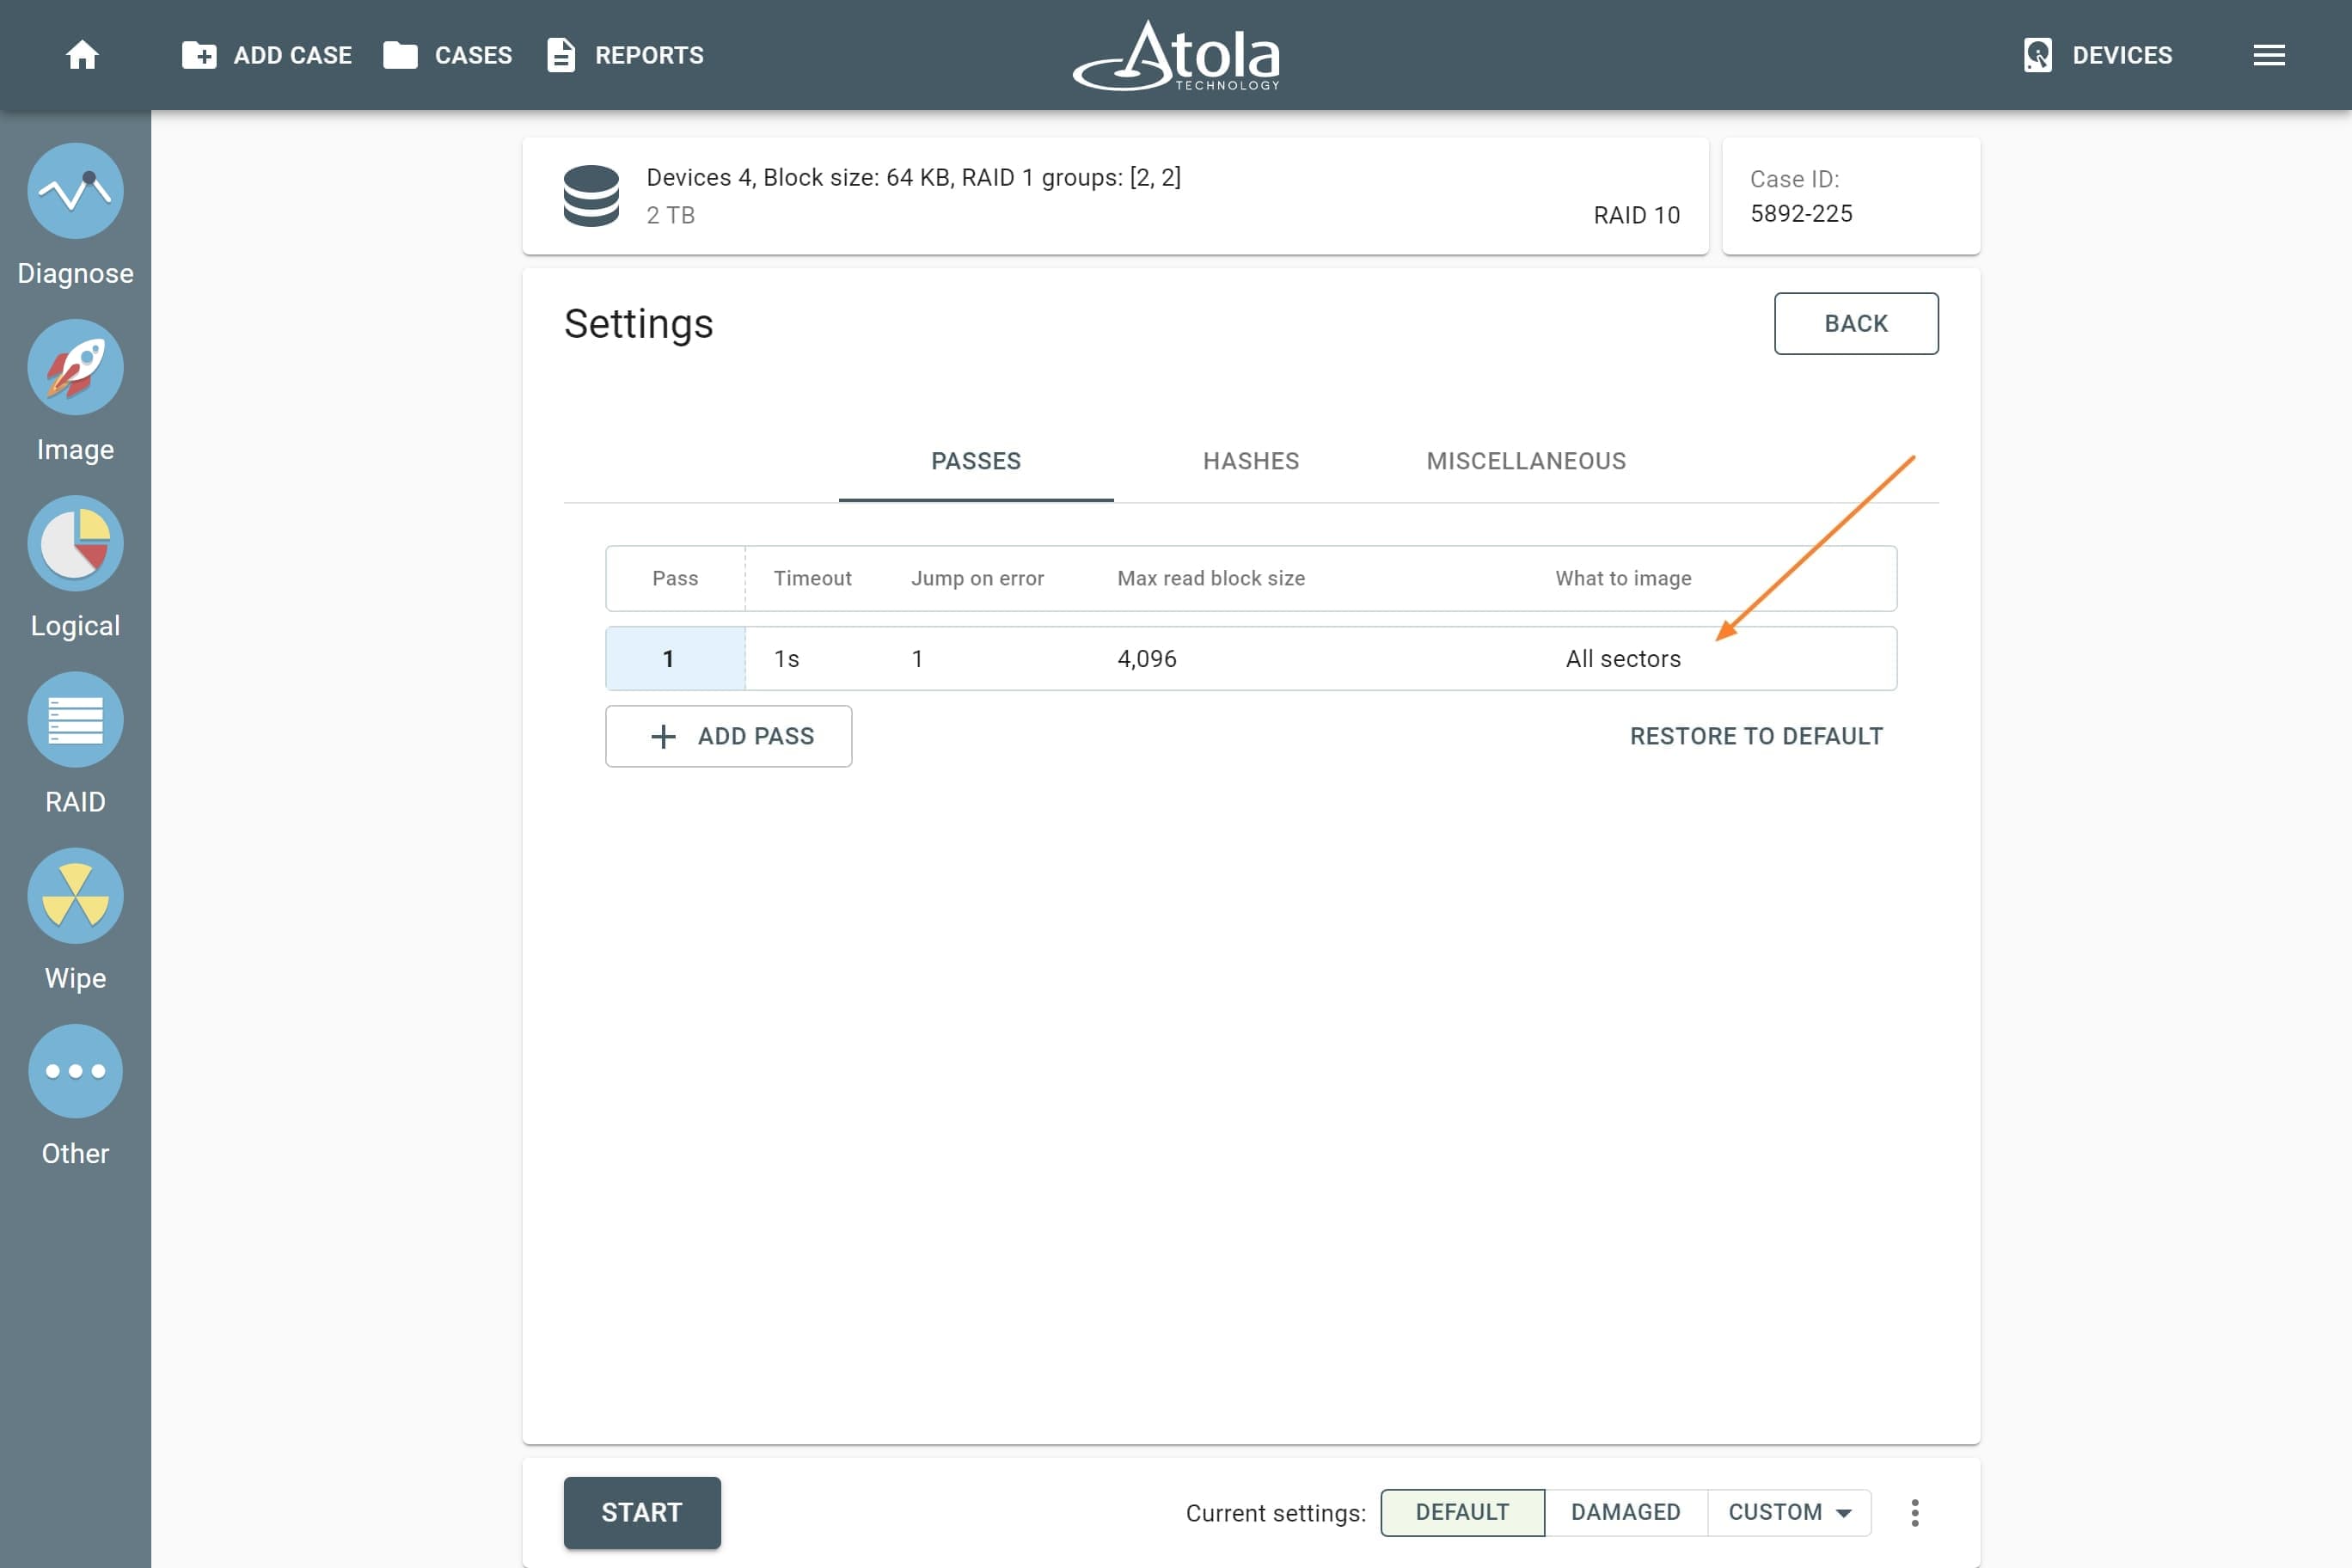
The suggested RAID configuration applied, partitions preview shows partitions.
- In the Edit imaging pass dialog, click on the What to image and select Sectors with data.
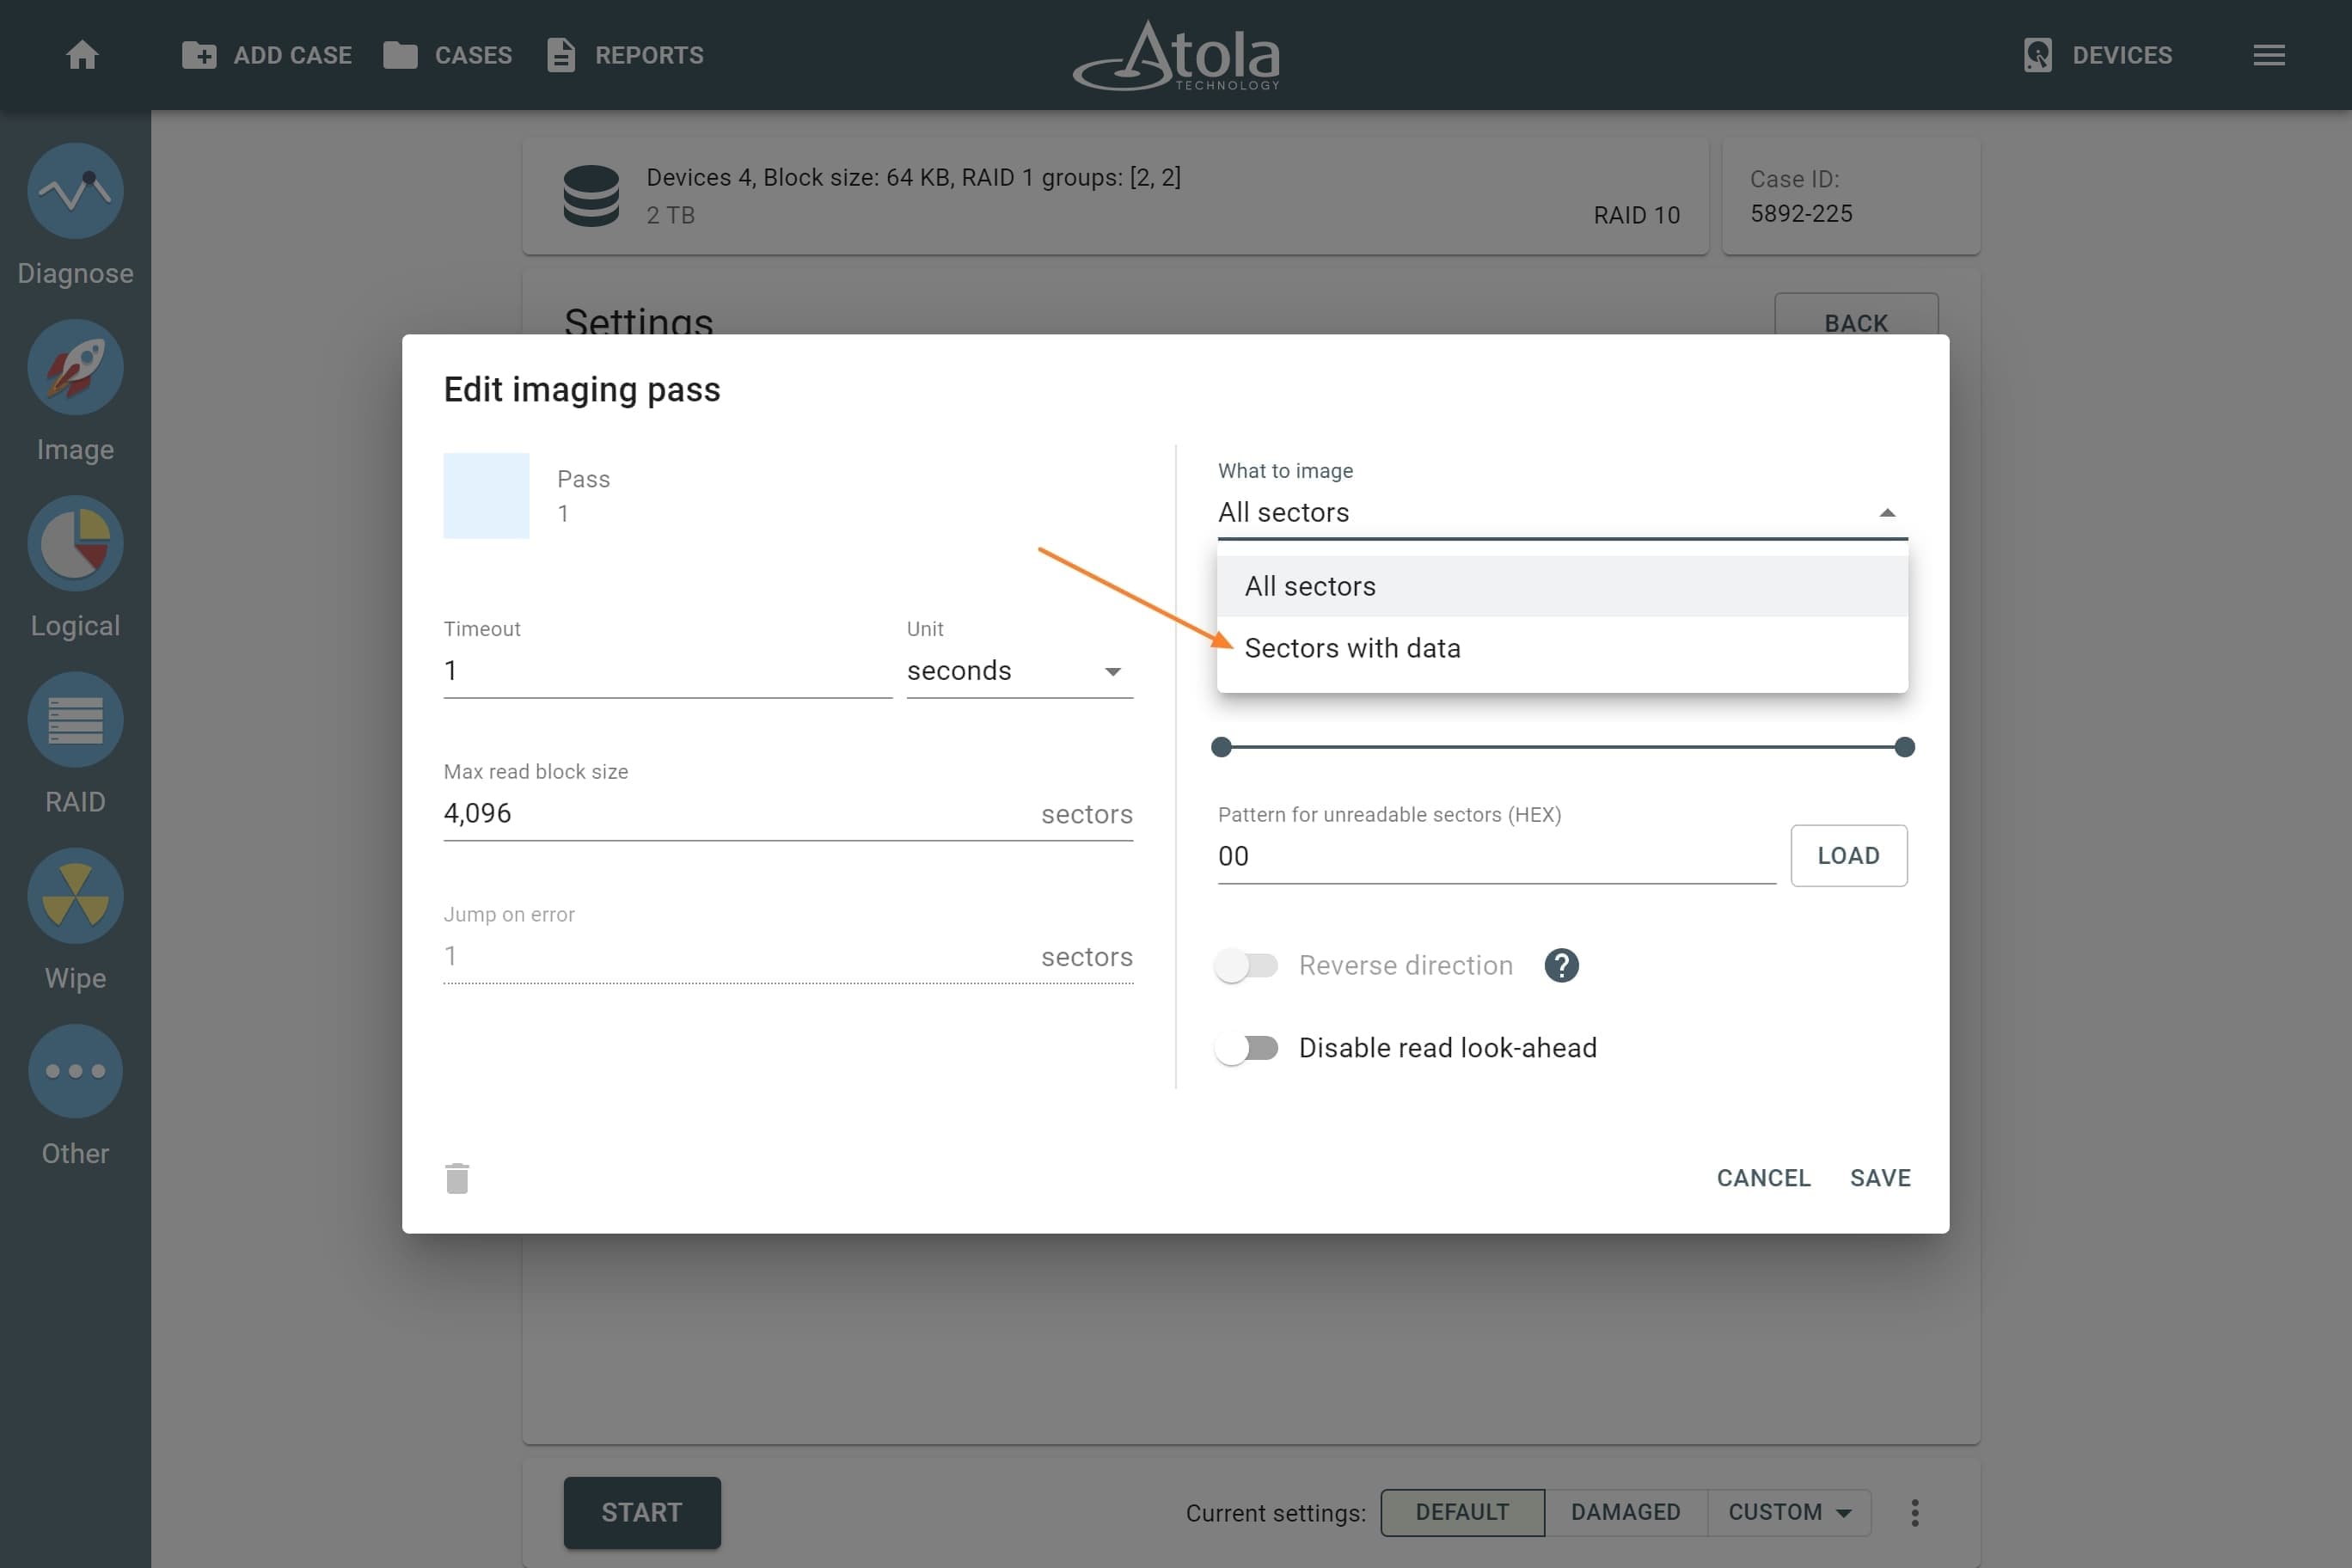
Selecting only sectors with data from the What to image list.
- Unselect the partitions you do not need and click Apply. Then click Save to keep this change.
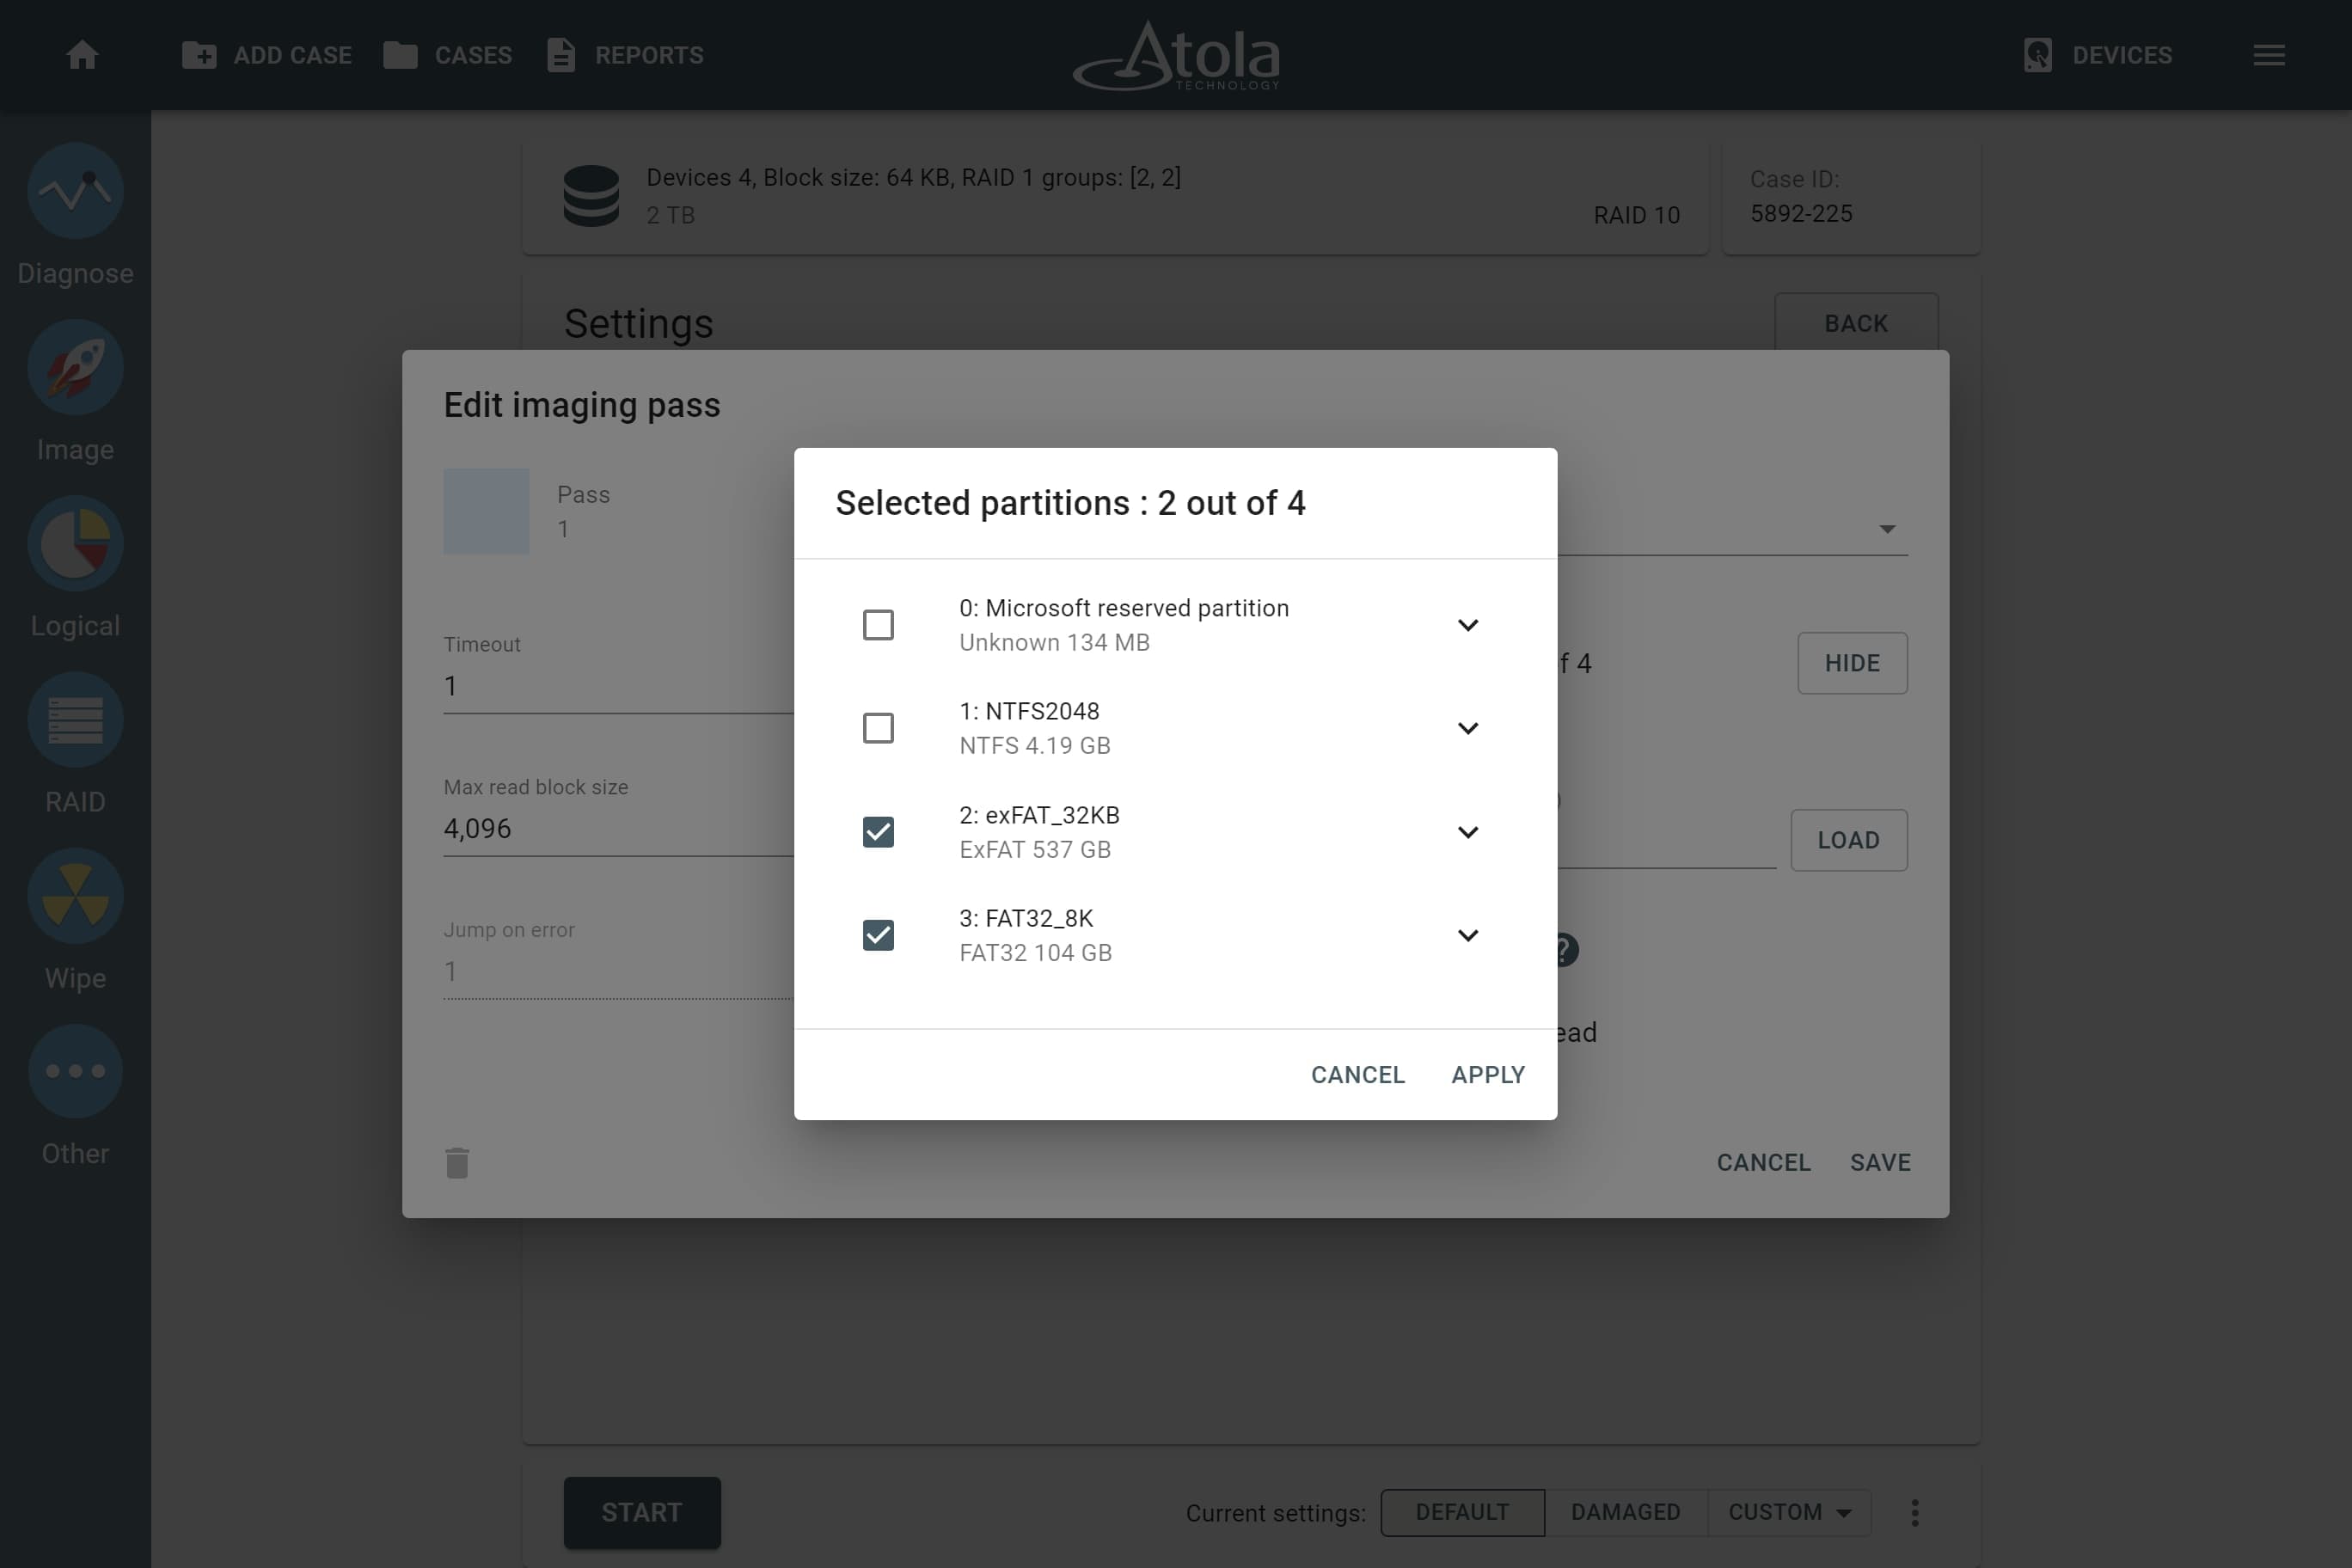
Select partitions for imaging
- To launch your imaging session, click Start.

The suggested RAID configuration applied, partitions preview shows partitions
Imaging report
TaskForce 2 generates the Imaging completed report with all the details of the RAID:
- The imaged range.
- Time stamps.
- A link to the file with the segmented hash, calculated for the imaged range.
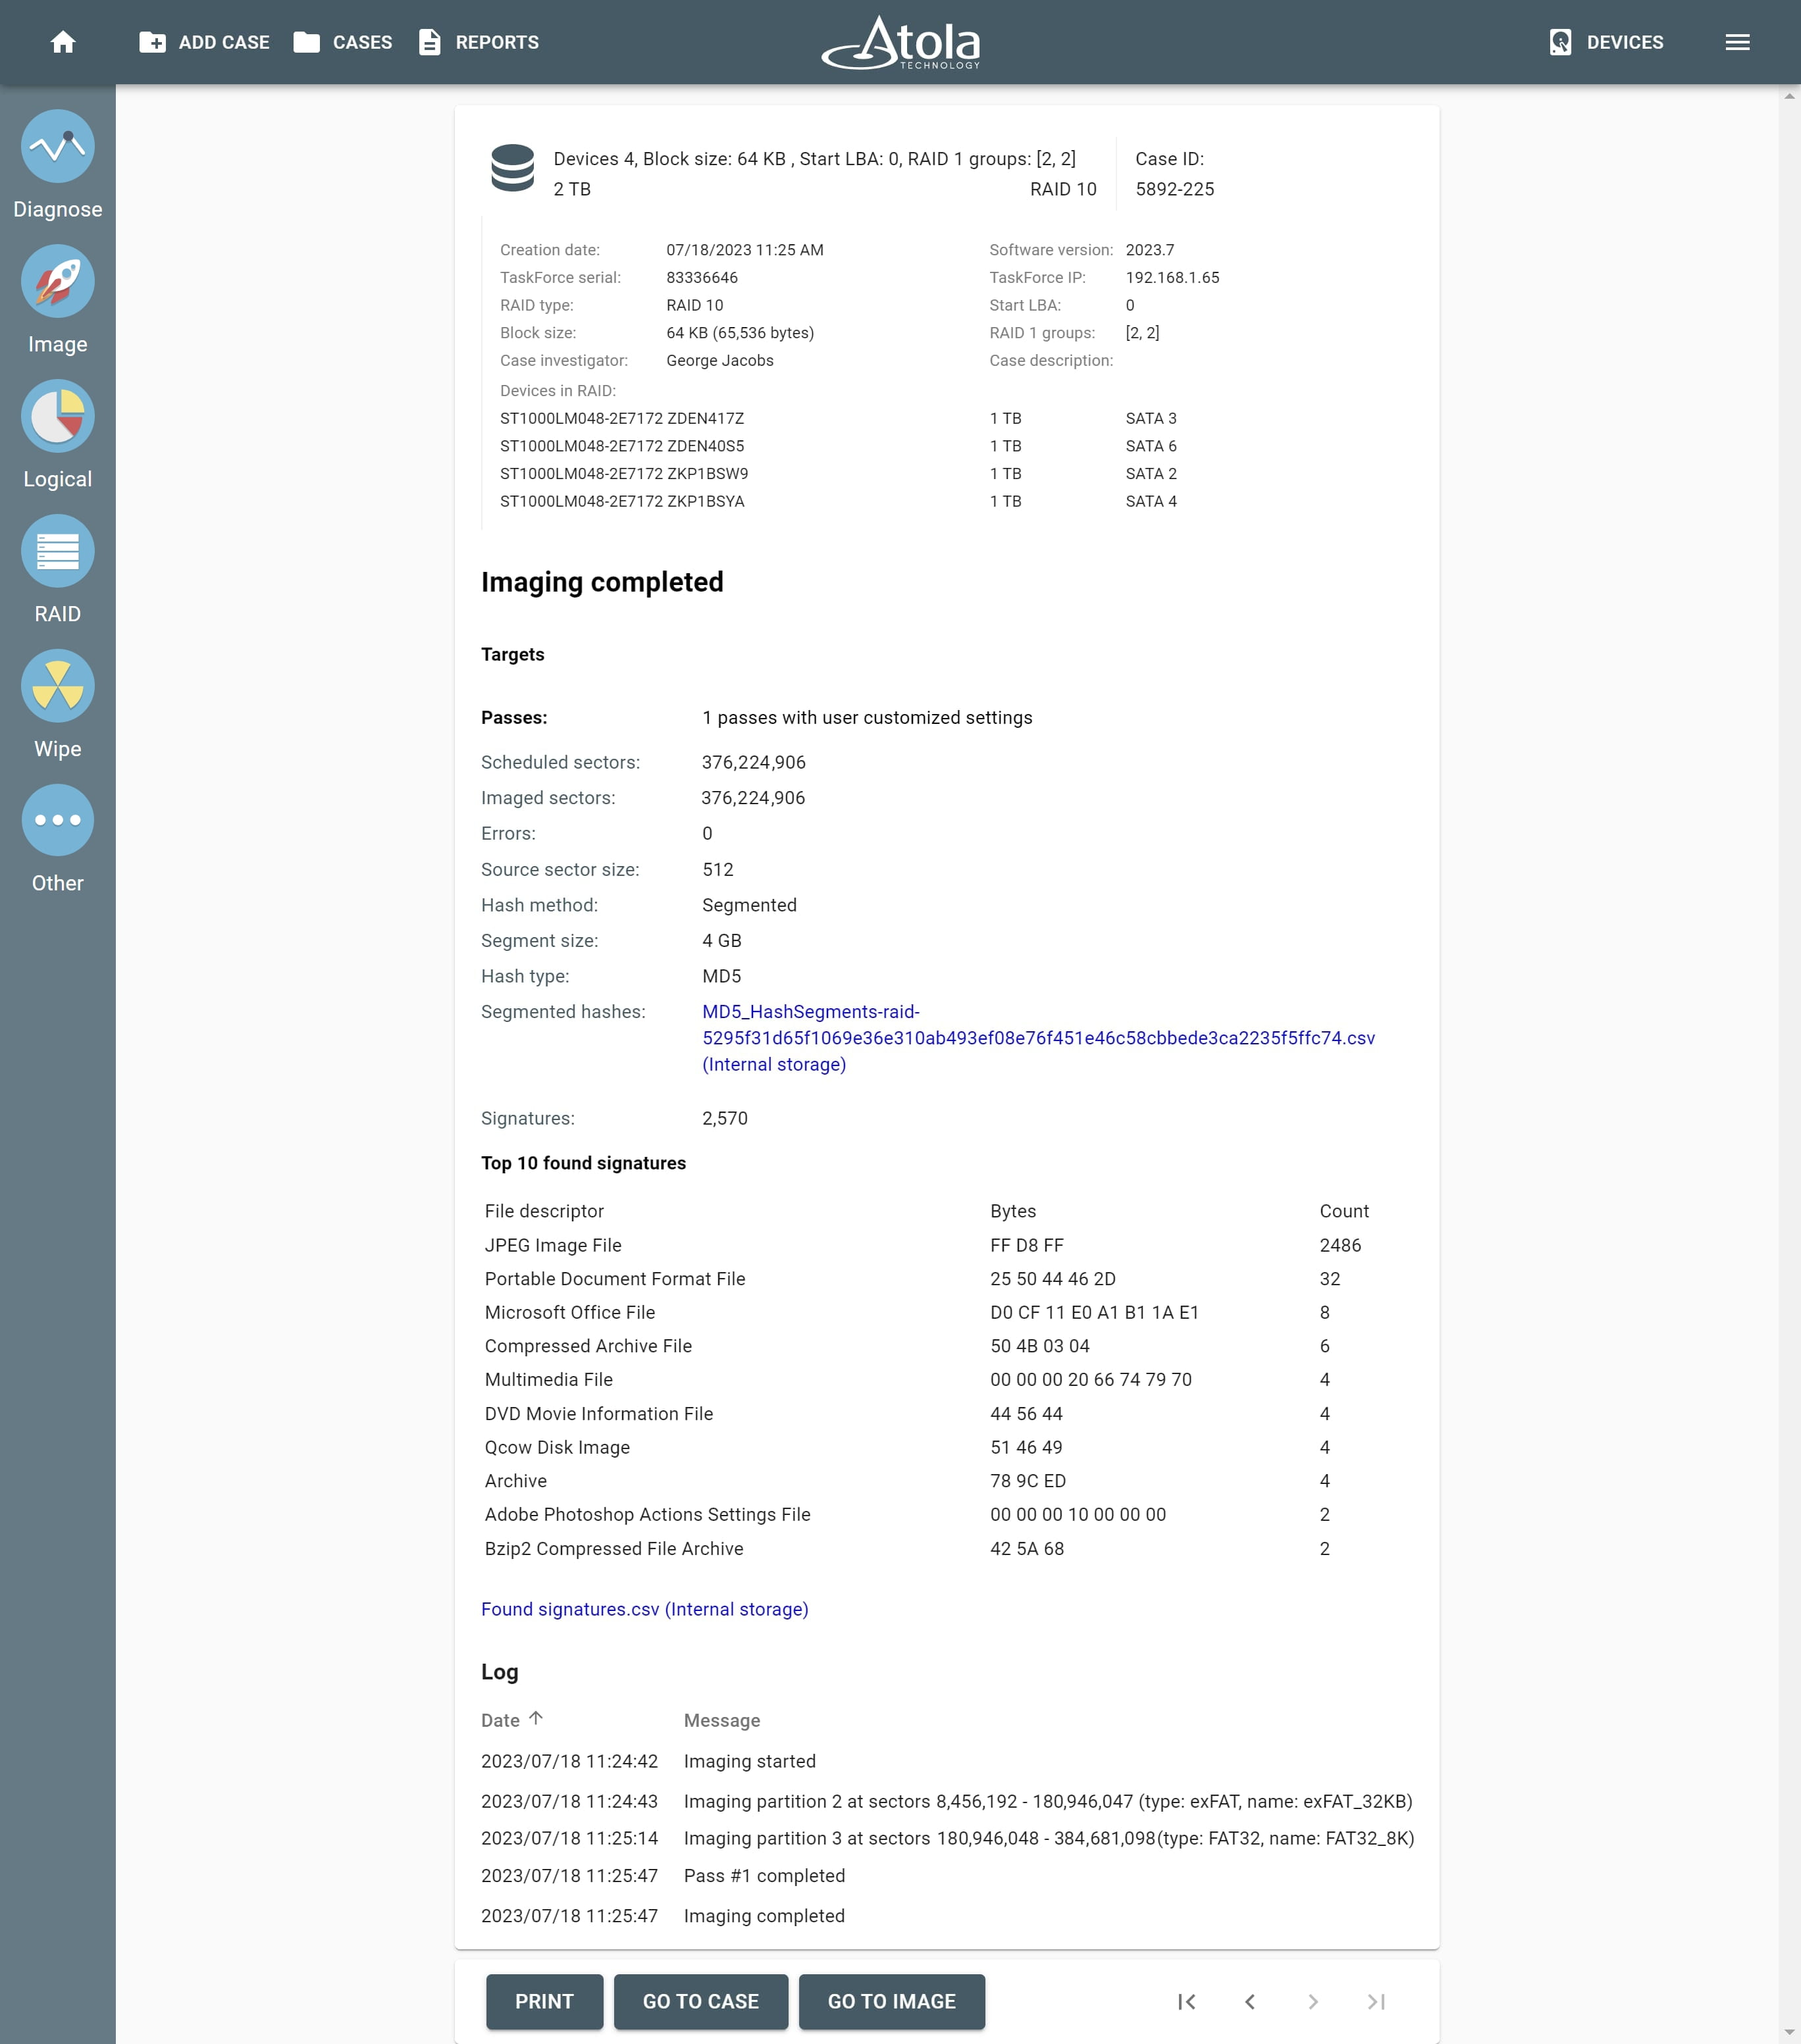
The Imaging completed report