Accessing password-protected servers
Accessing password-protected servers allows saving image files on such servers, imaging or calculating hash of the files located there, etc.
To create an image file on a password-protected server:
- In the TaskForce main window, click Image.
- Select a source device.
- Optional: On the Imaging sessions page, click Start new.
- On the Select target devices panel, switch to the Files tab and click Create file.
- In the Select image file window, choose the server from the list. If the server does not appear in the list, click the Refresh icon to search for all available directories. If the server still does not appear in the list, click Connect.
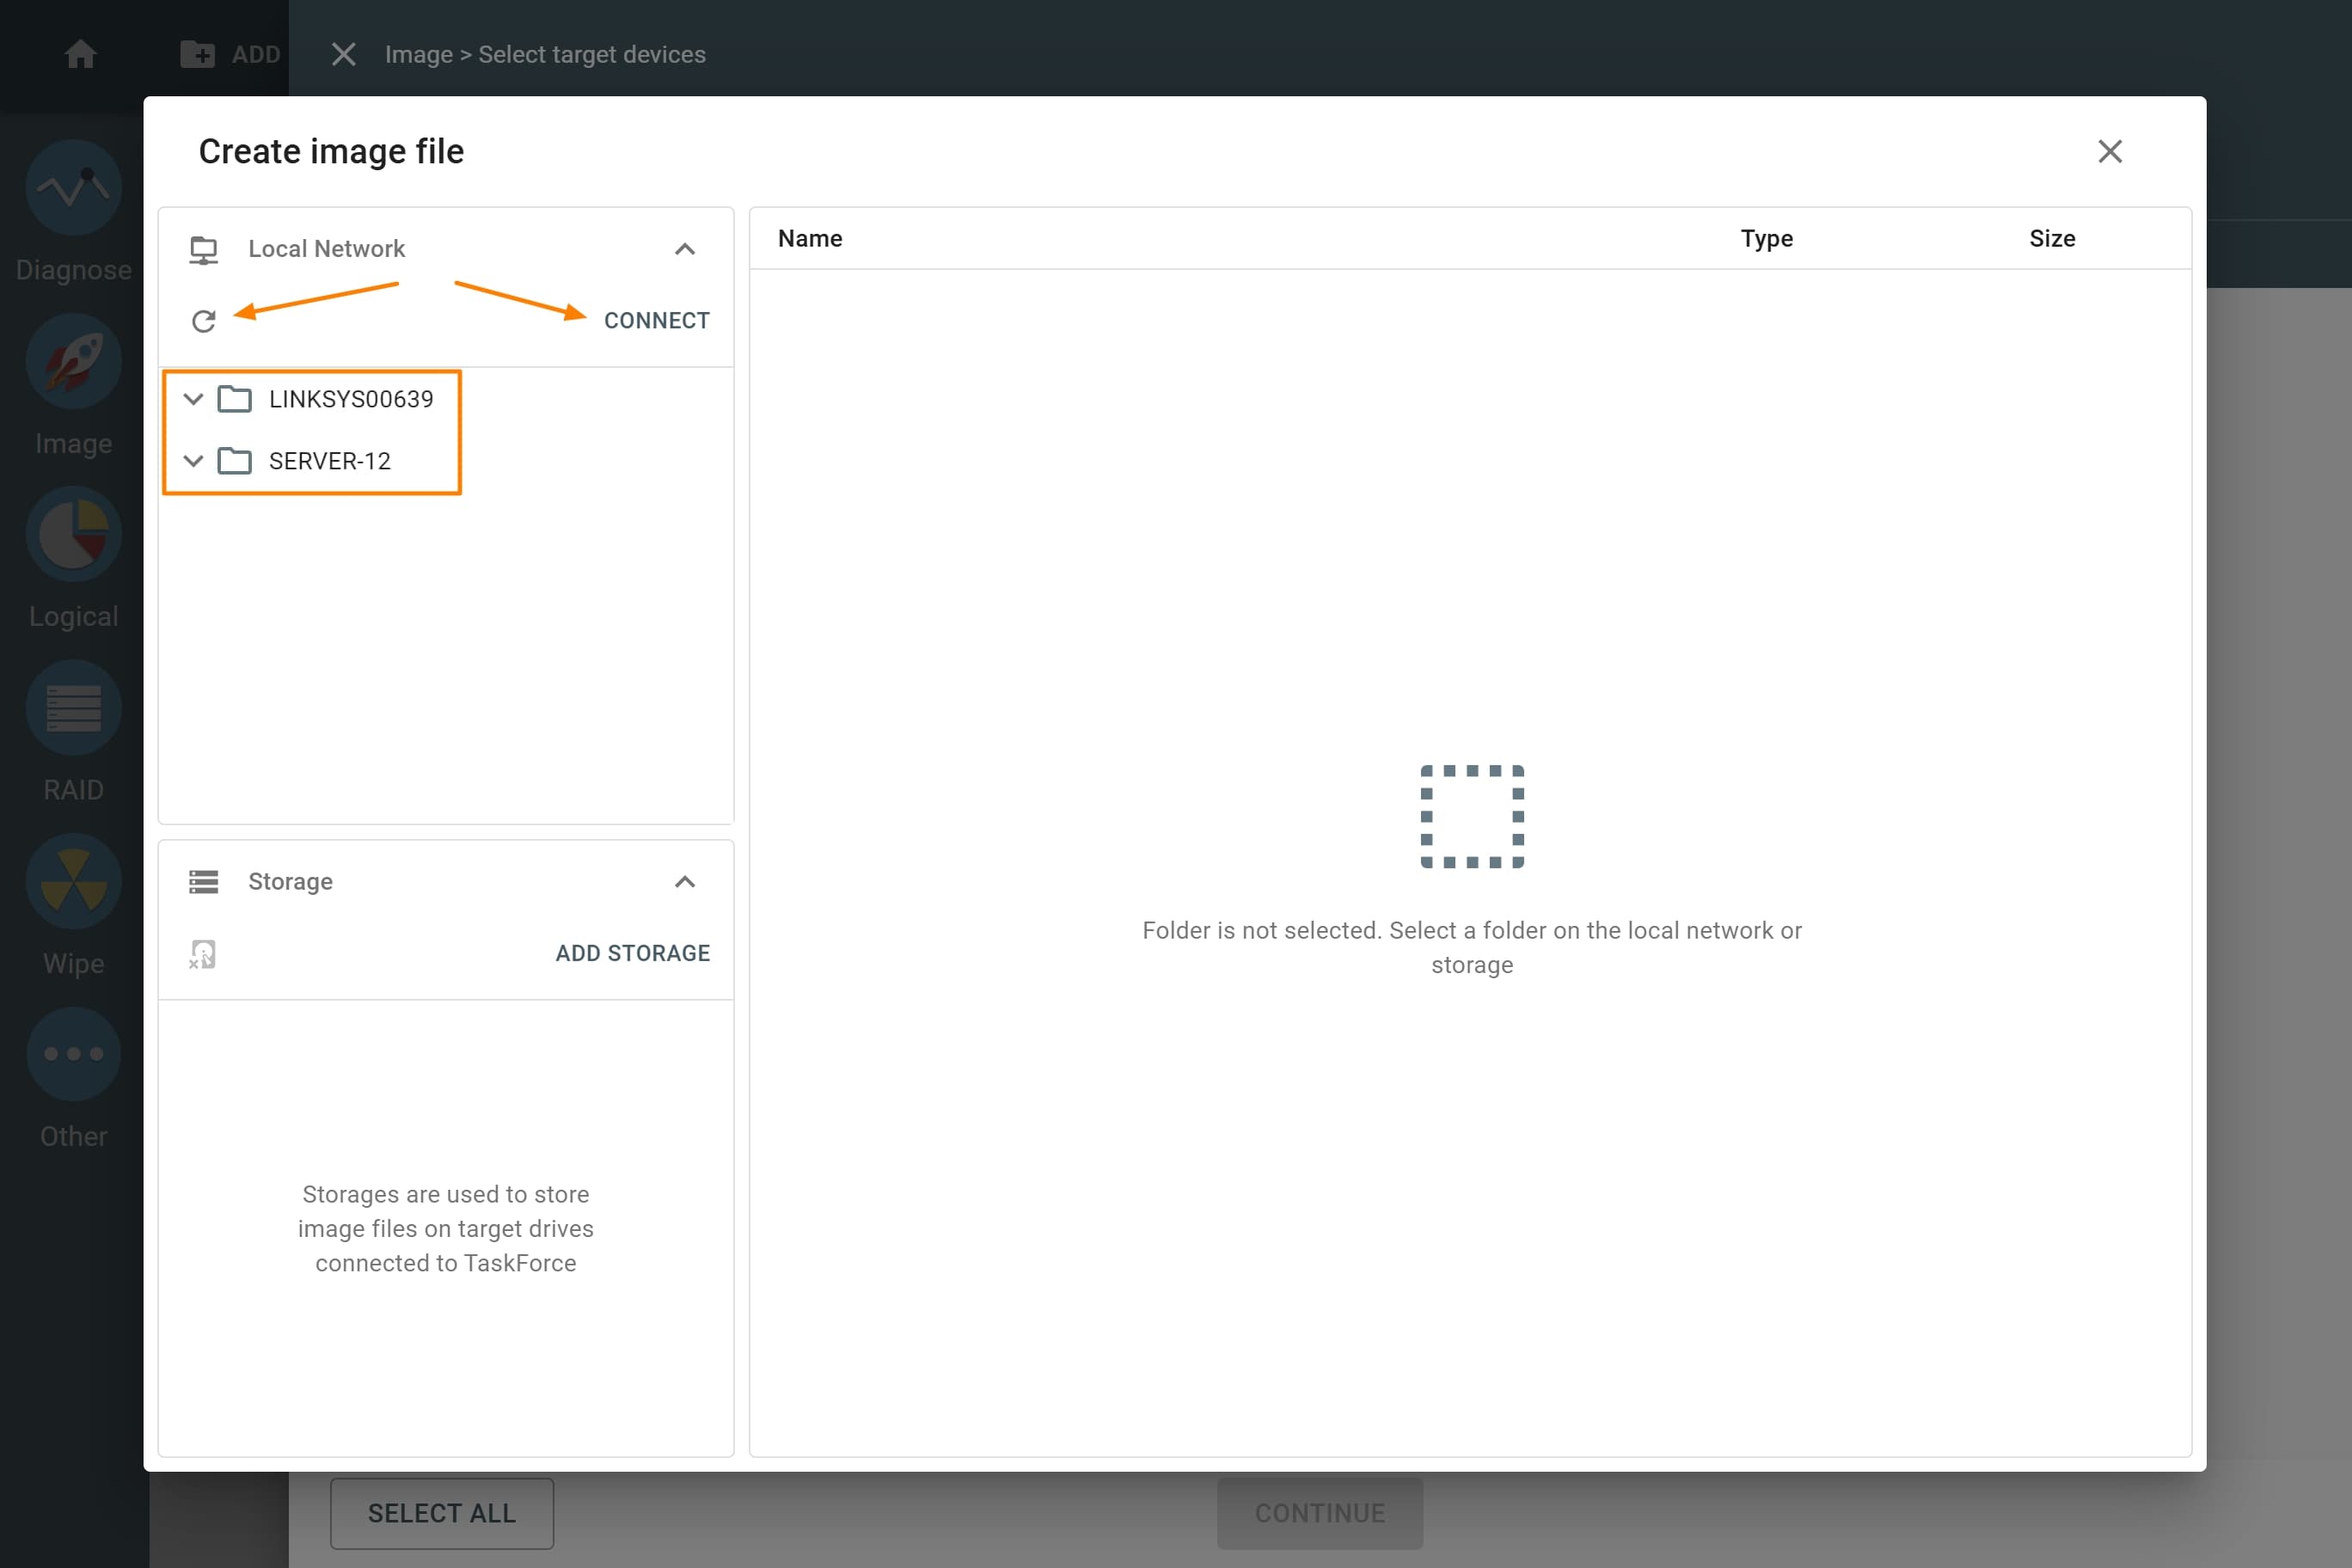
Selecting a server from the list.
-
The Connect to server dialog opens. Enter the name of the server and fill out login details, including domain or workgroup, and then click Connect. To learn these details, contact your network administrator.
Additionally, in the Advanced section of the dialog, you can:
- Select the version of the SMB (Server Message Block) Protocol
- Enter mount options for the CIFS (Common Internet File System) Protocol
- Enable the use of the mount.cifs Linux tool for DNS lookup
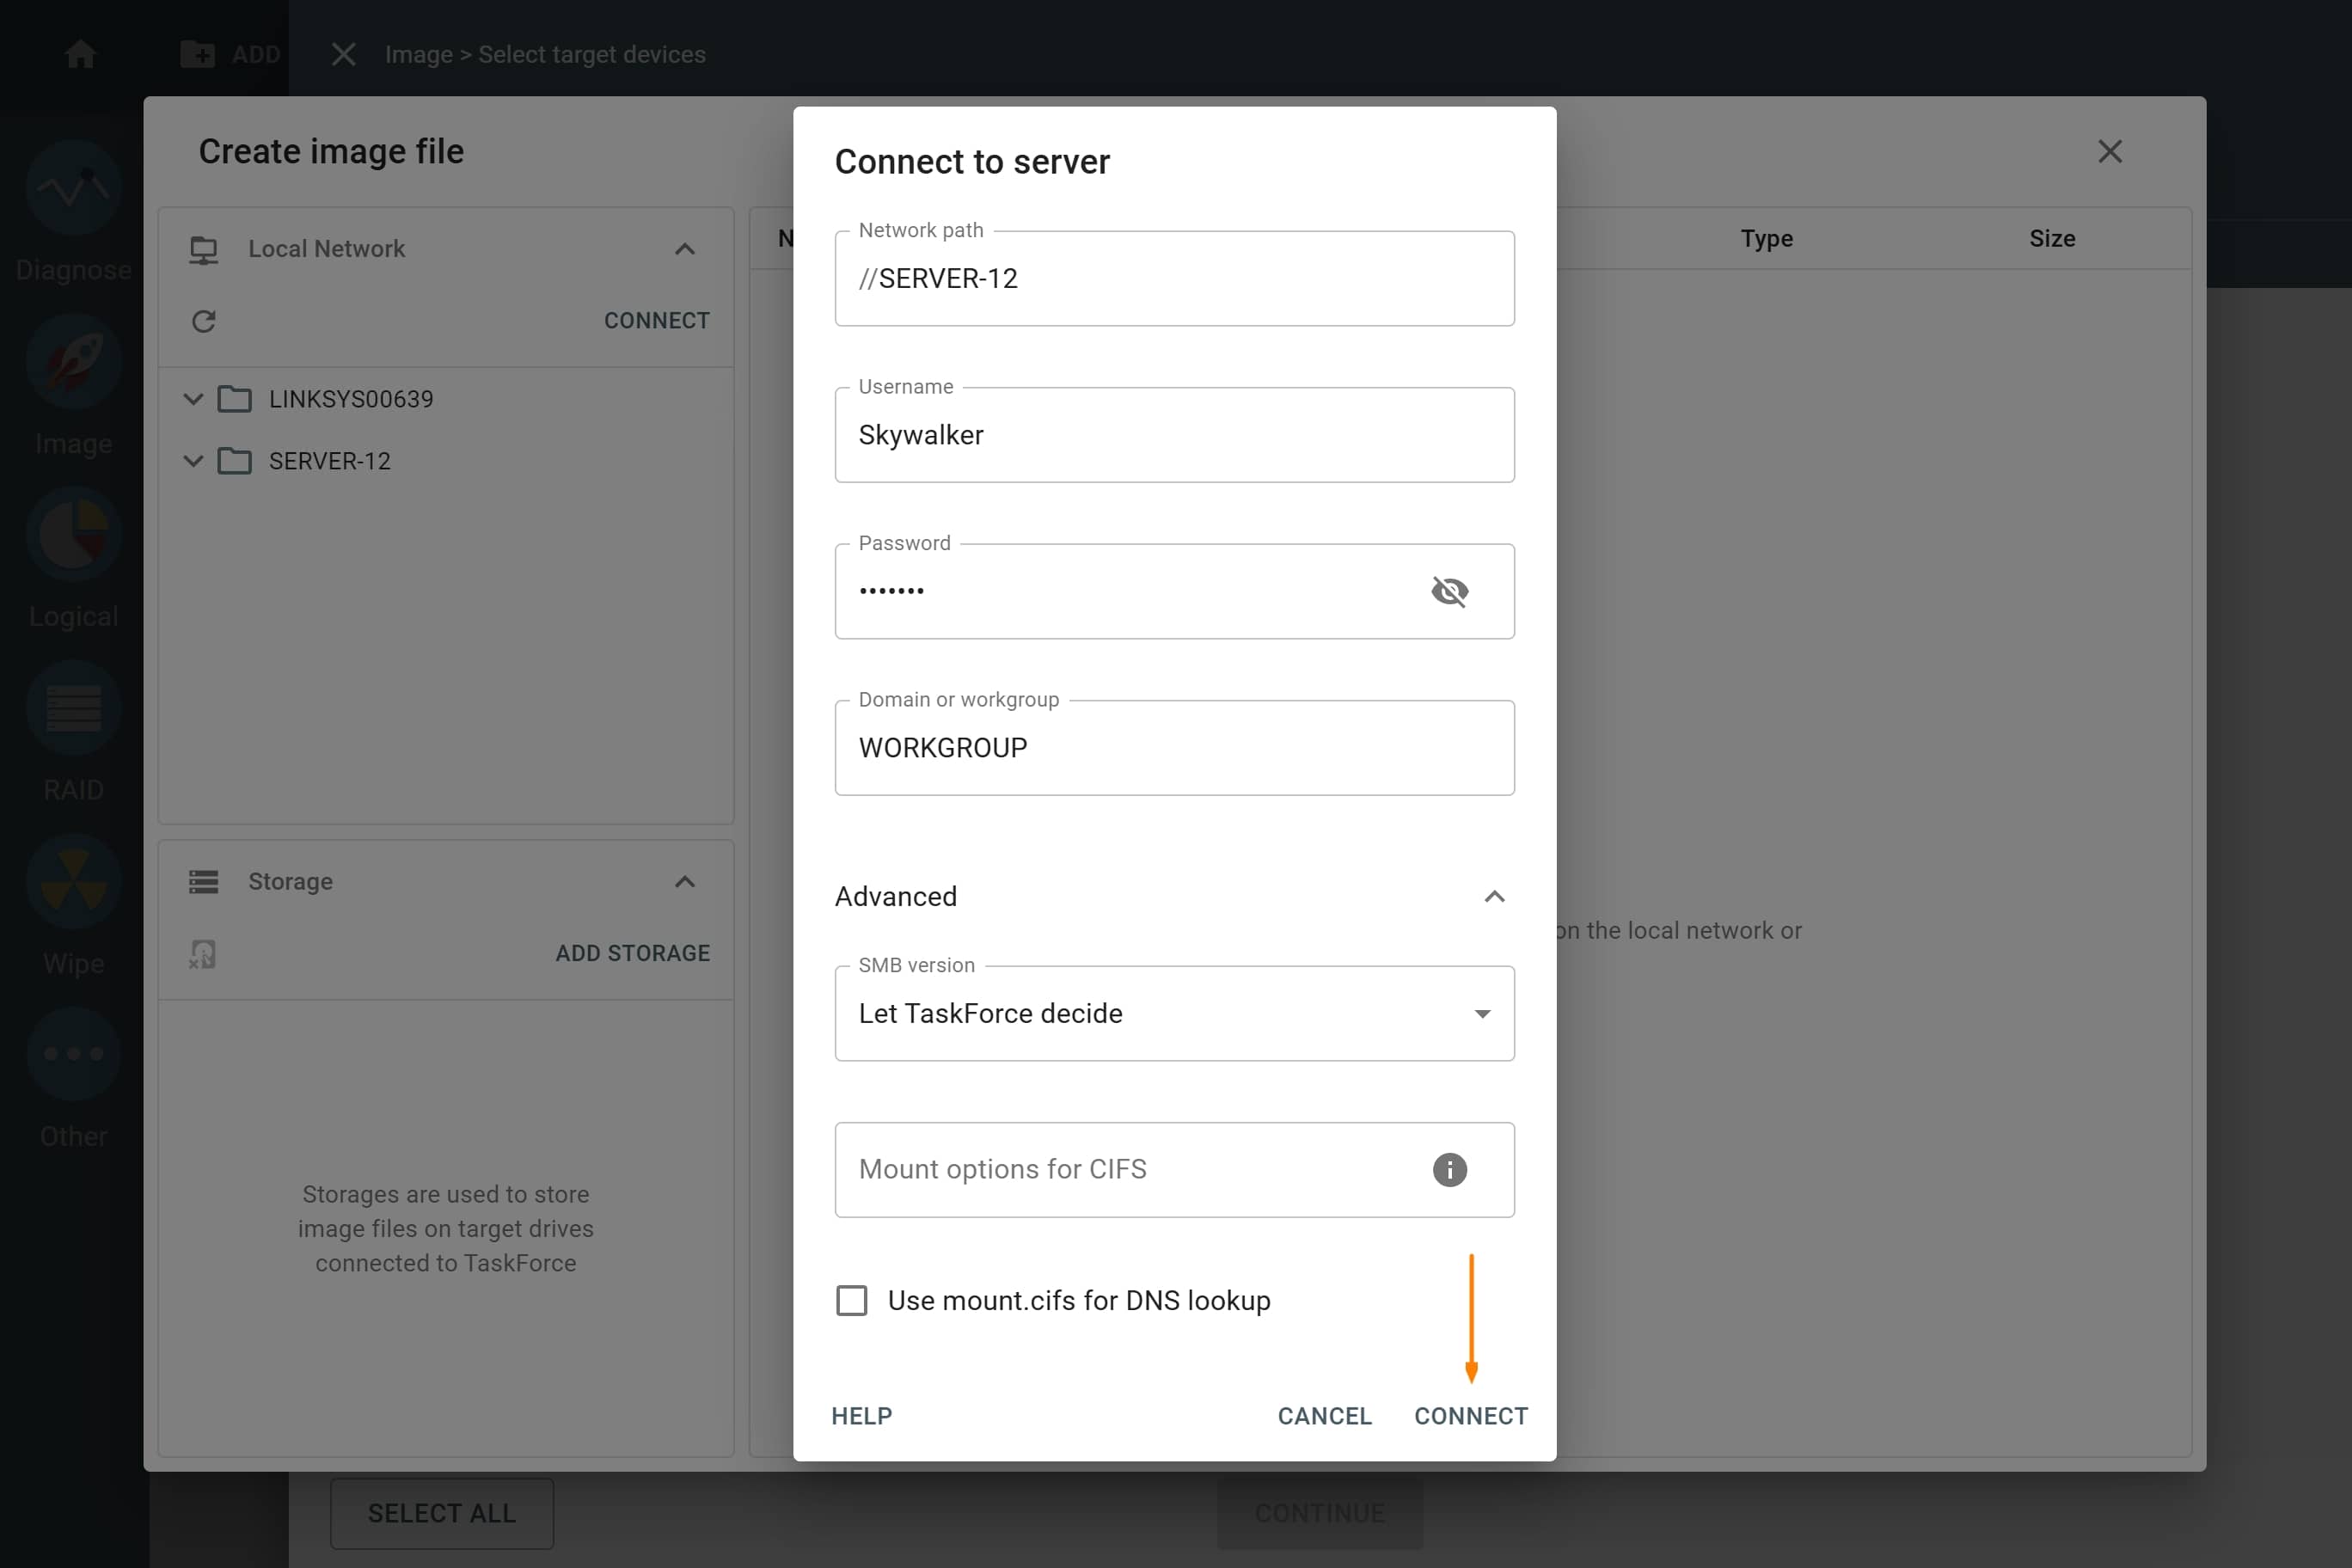
Entering server and login details.
- Go to the folder on the server where you need to store your image and click the Plus icon in the right bottom corner of the window.
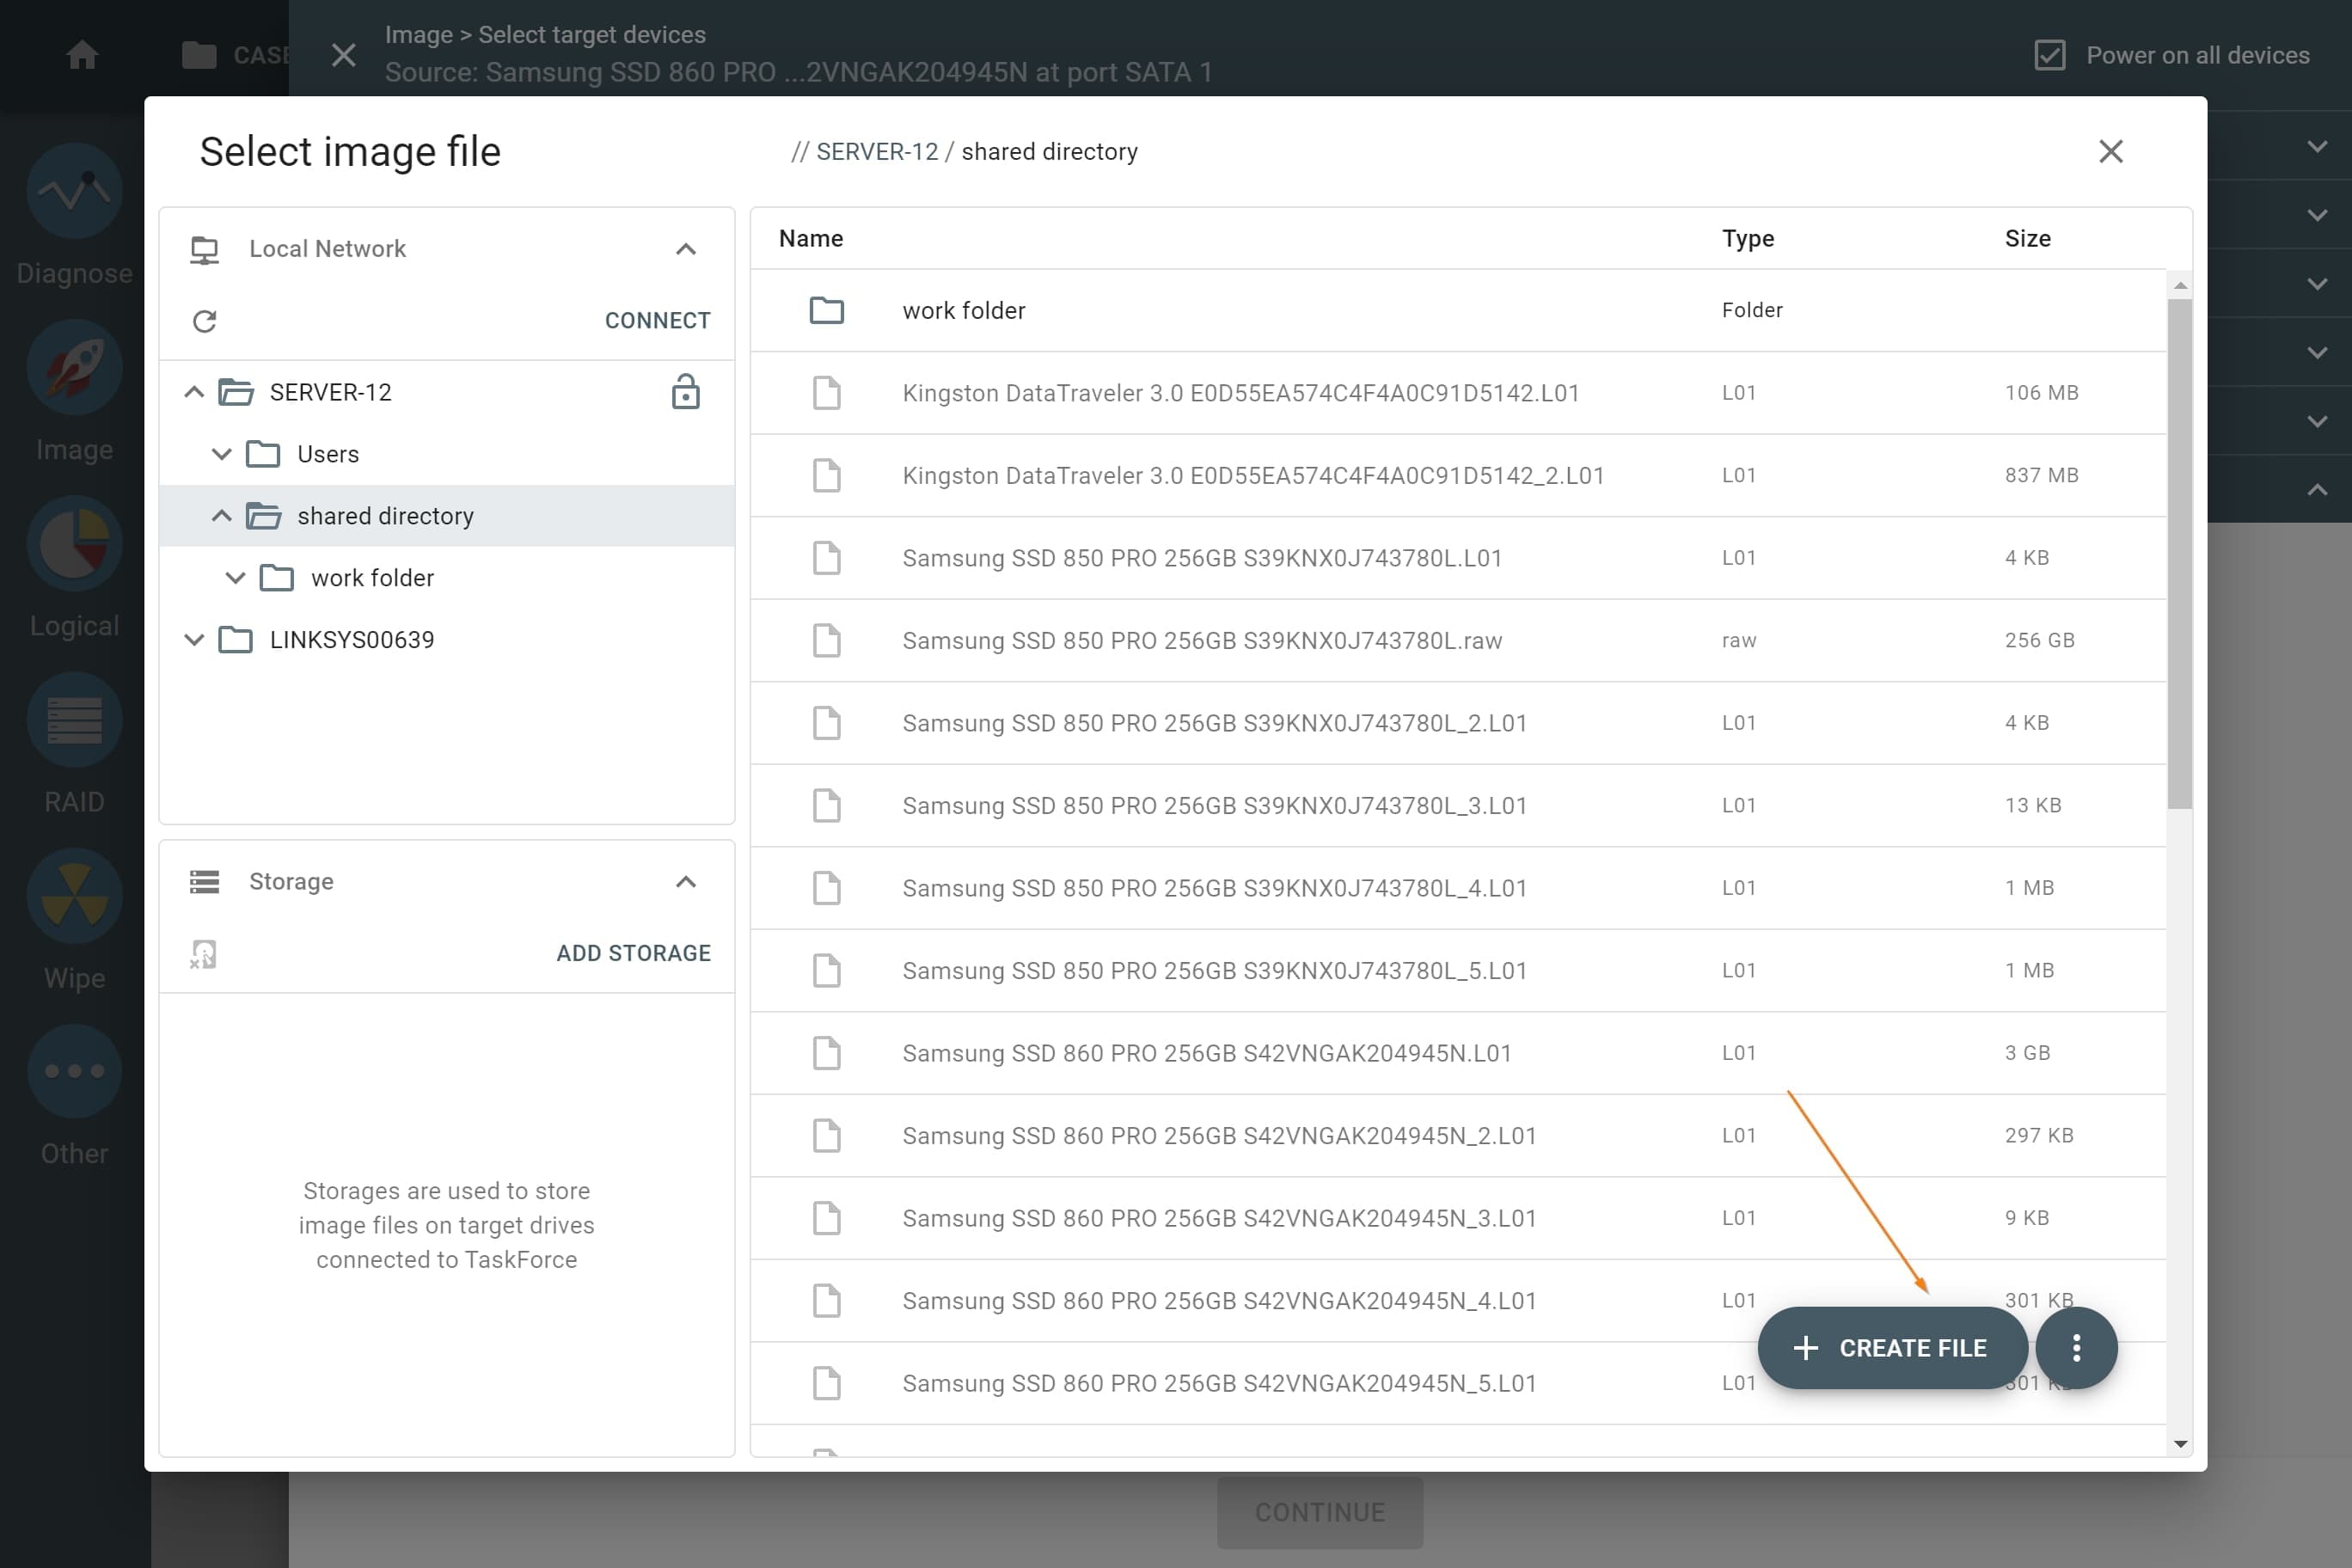
Creating a new file in the directory.
- Enter the name of the new image file and select the format. Click Create.
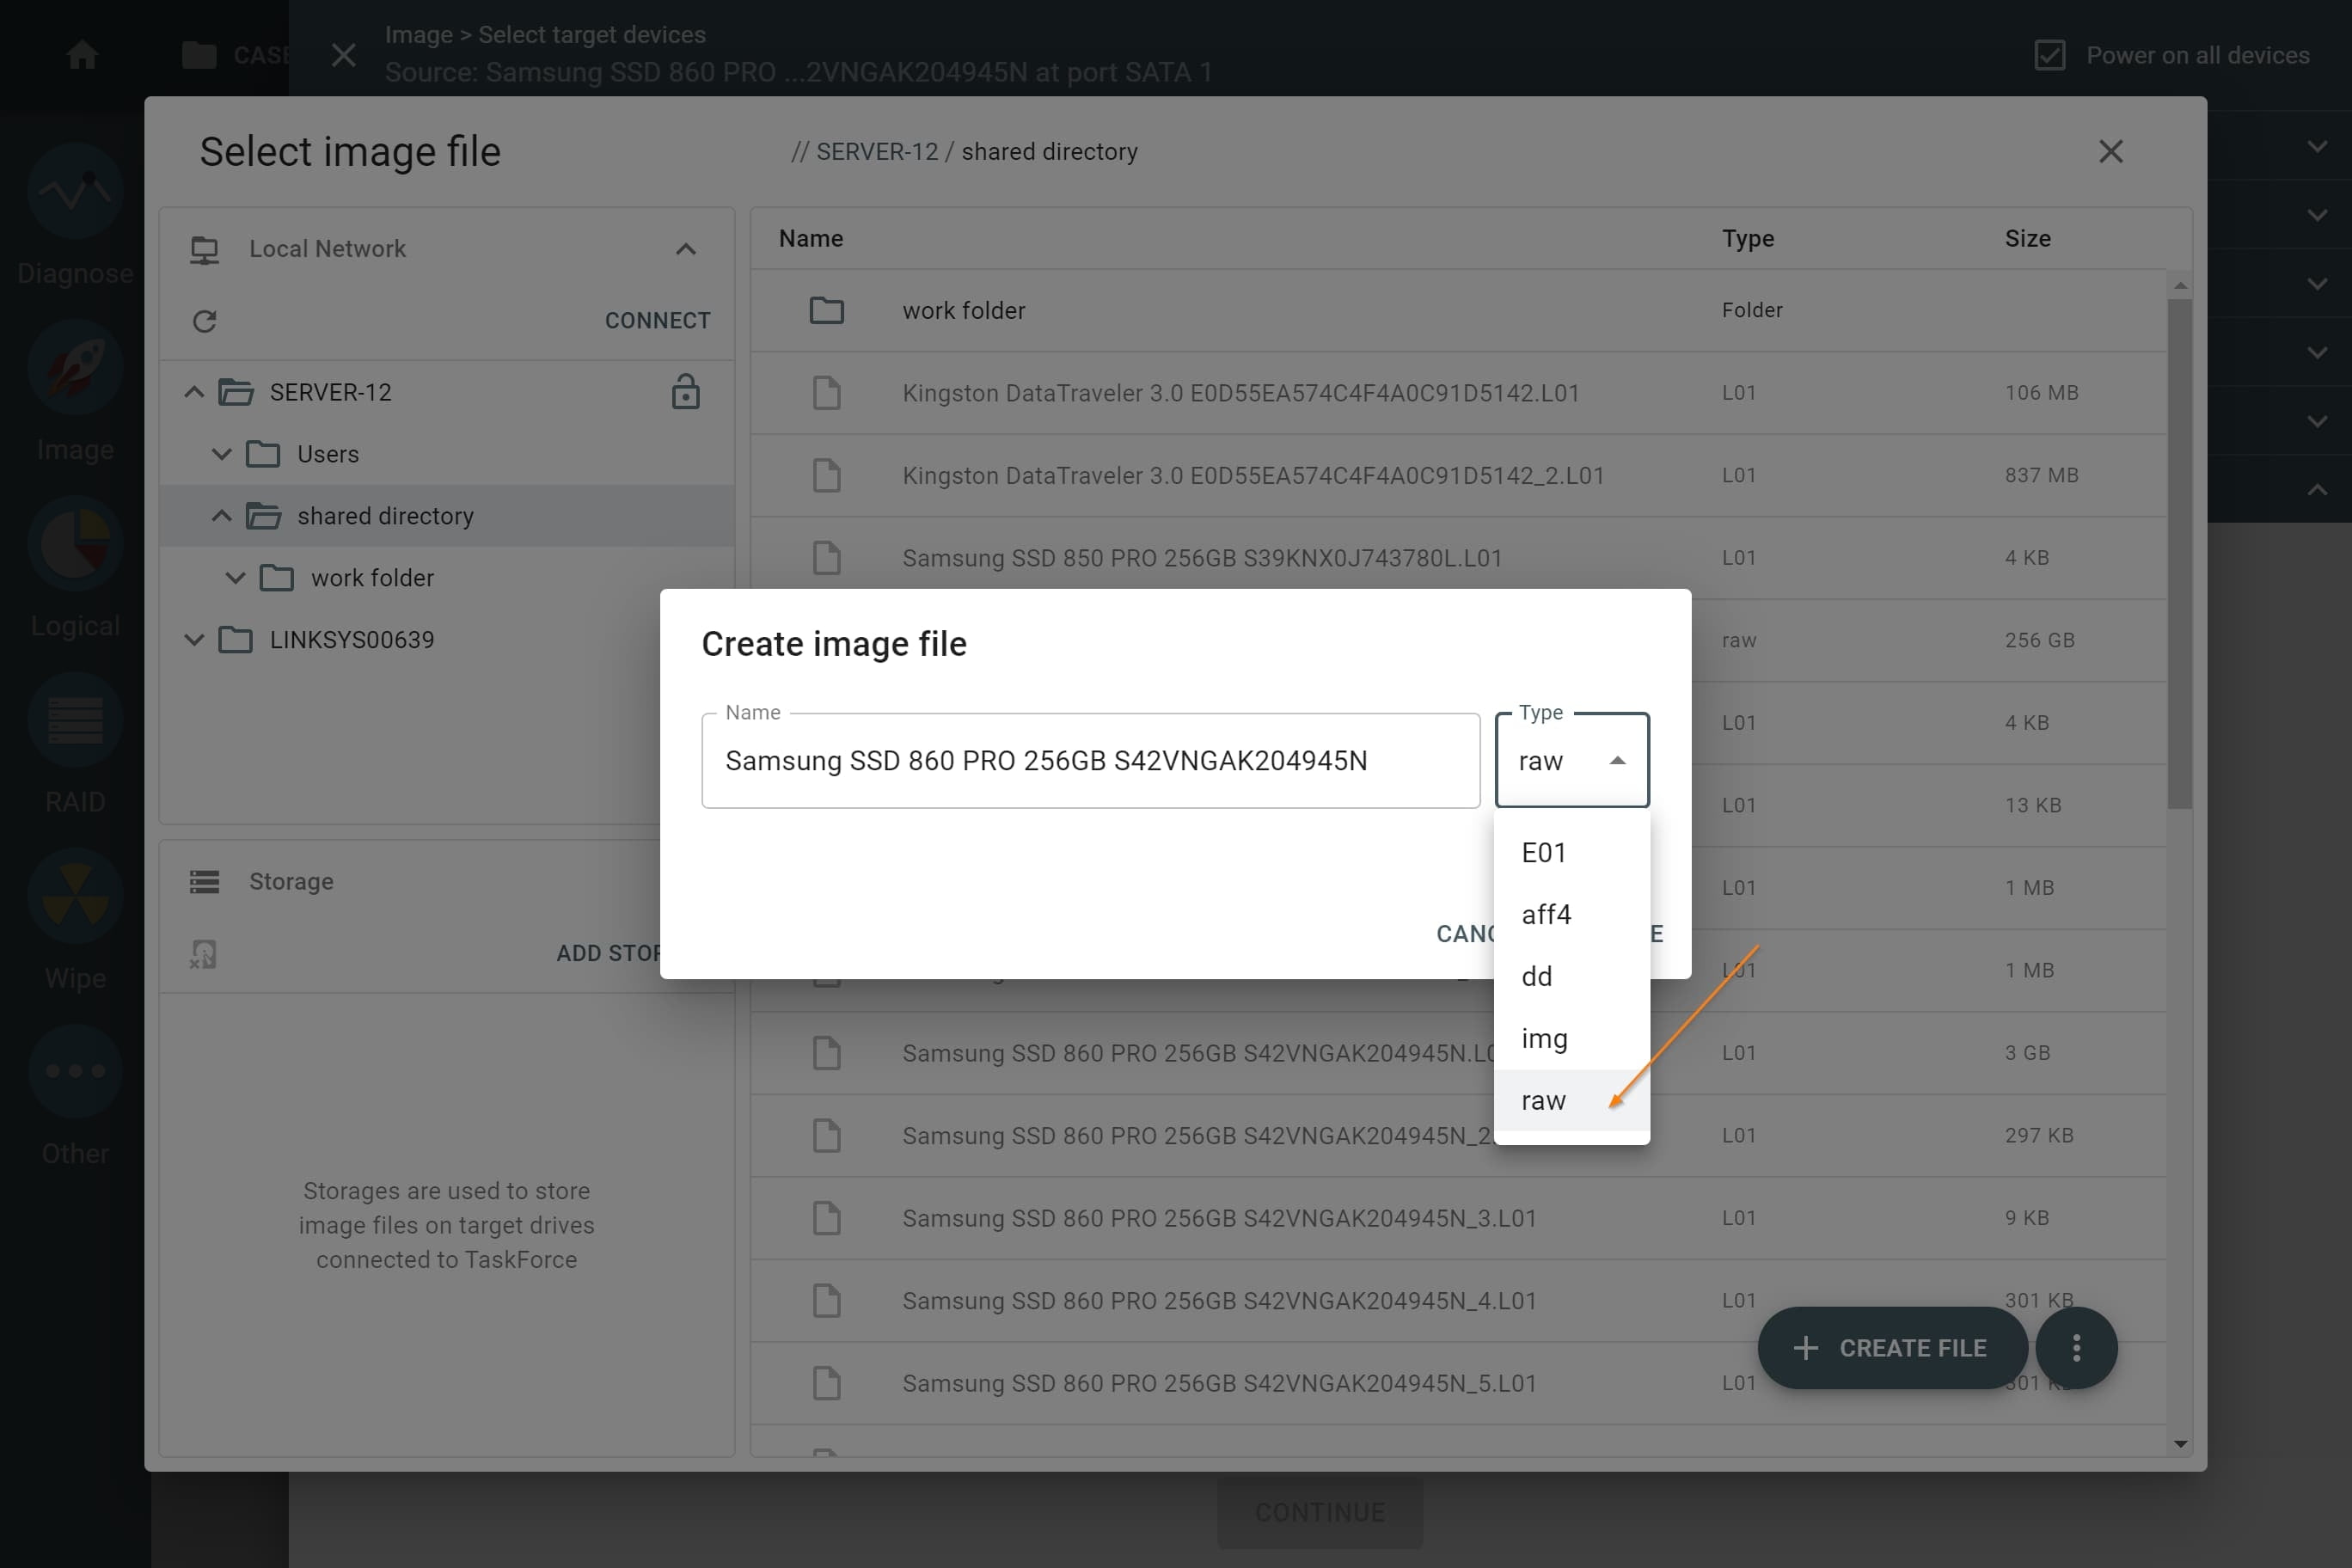
Entering the name and selecting the format of the new image file.
- On the Select target devices panel, click Continue.
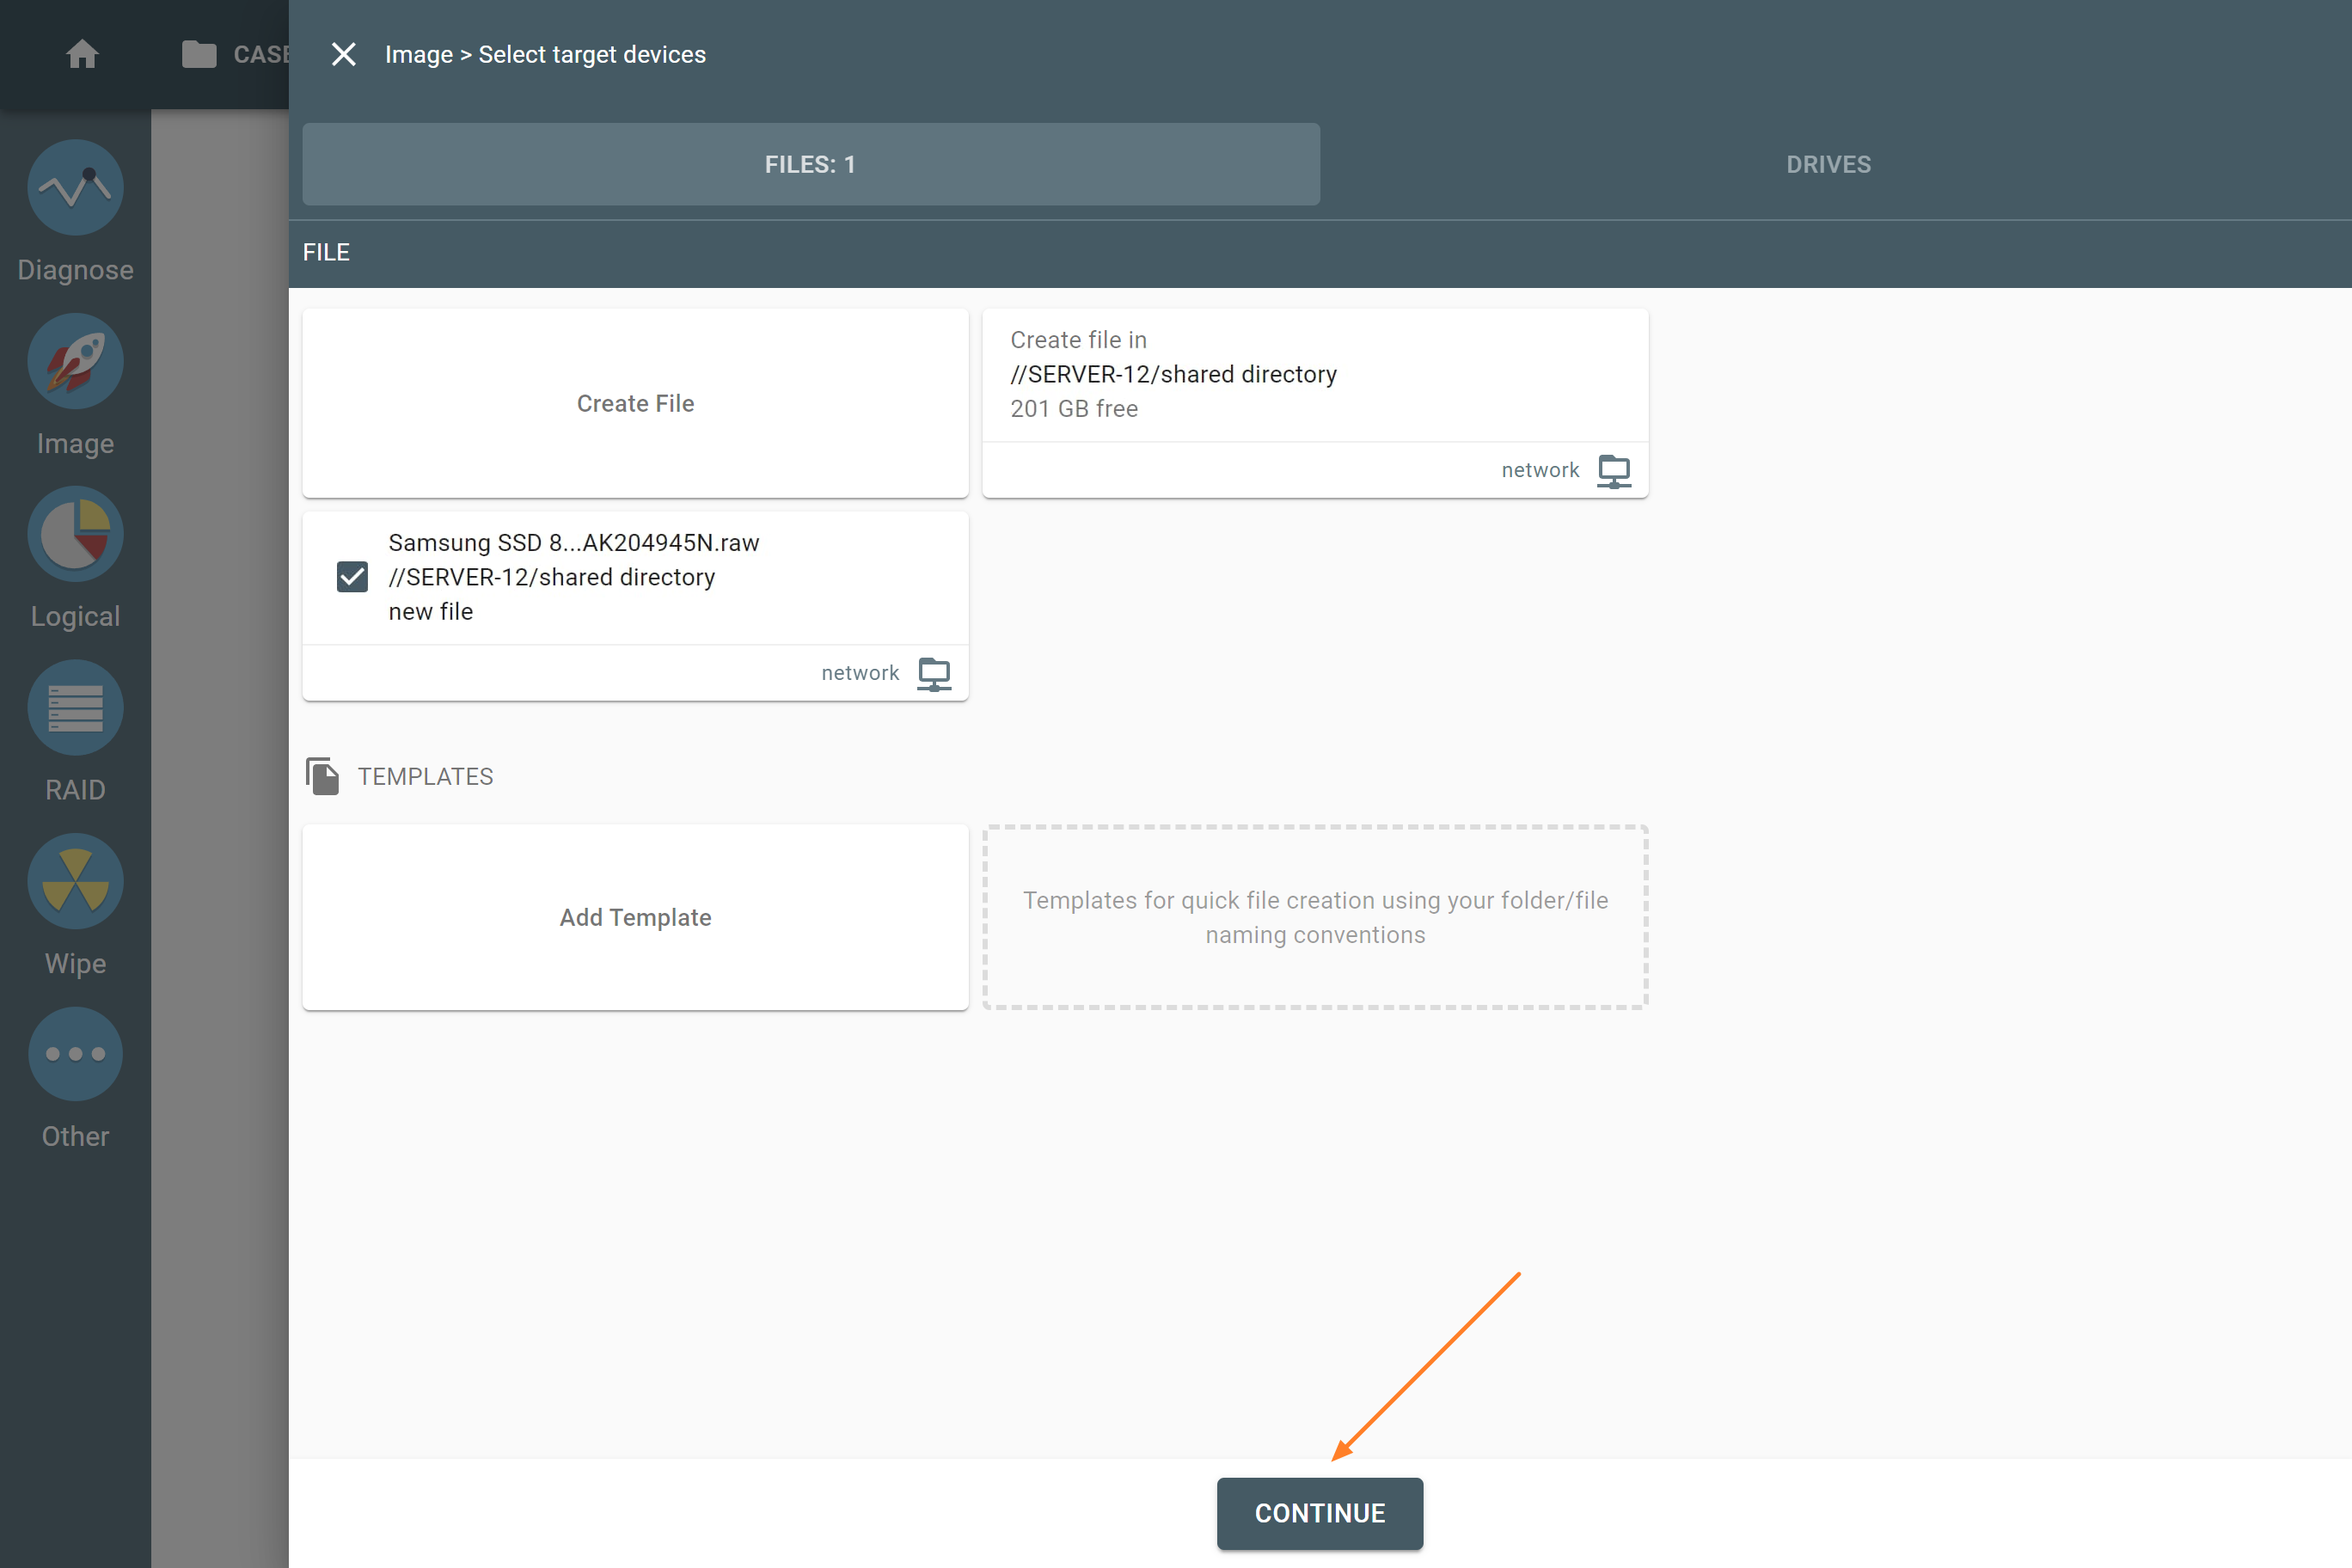
The Continue button on the Select target devices panel.
- Check your imaging settings and click Start to proceed with imaging.
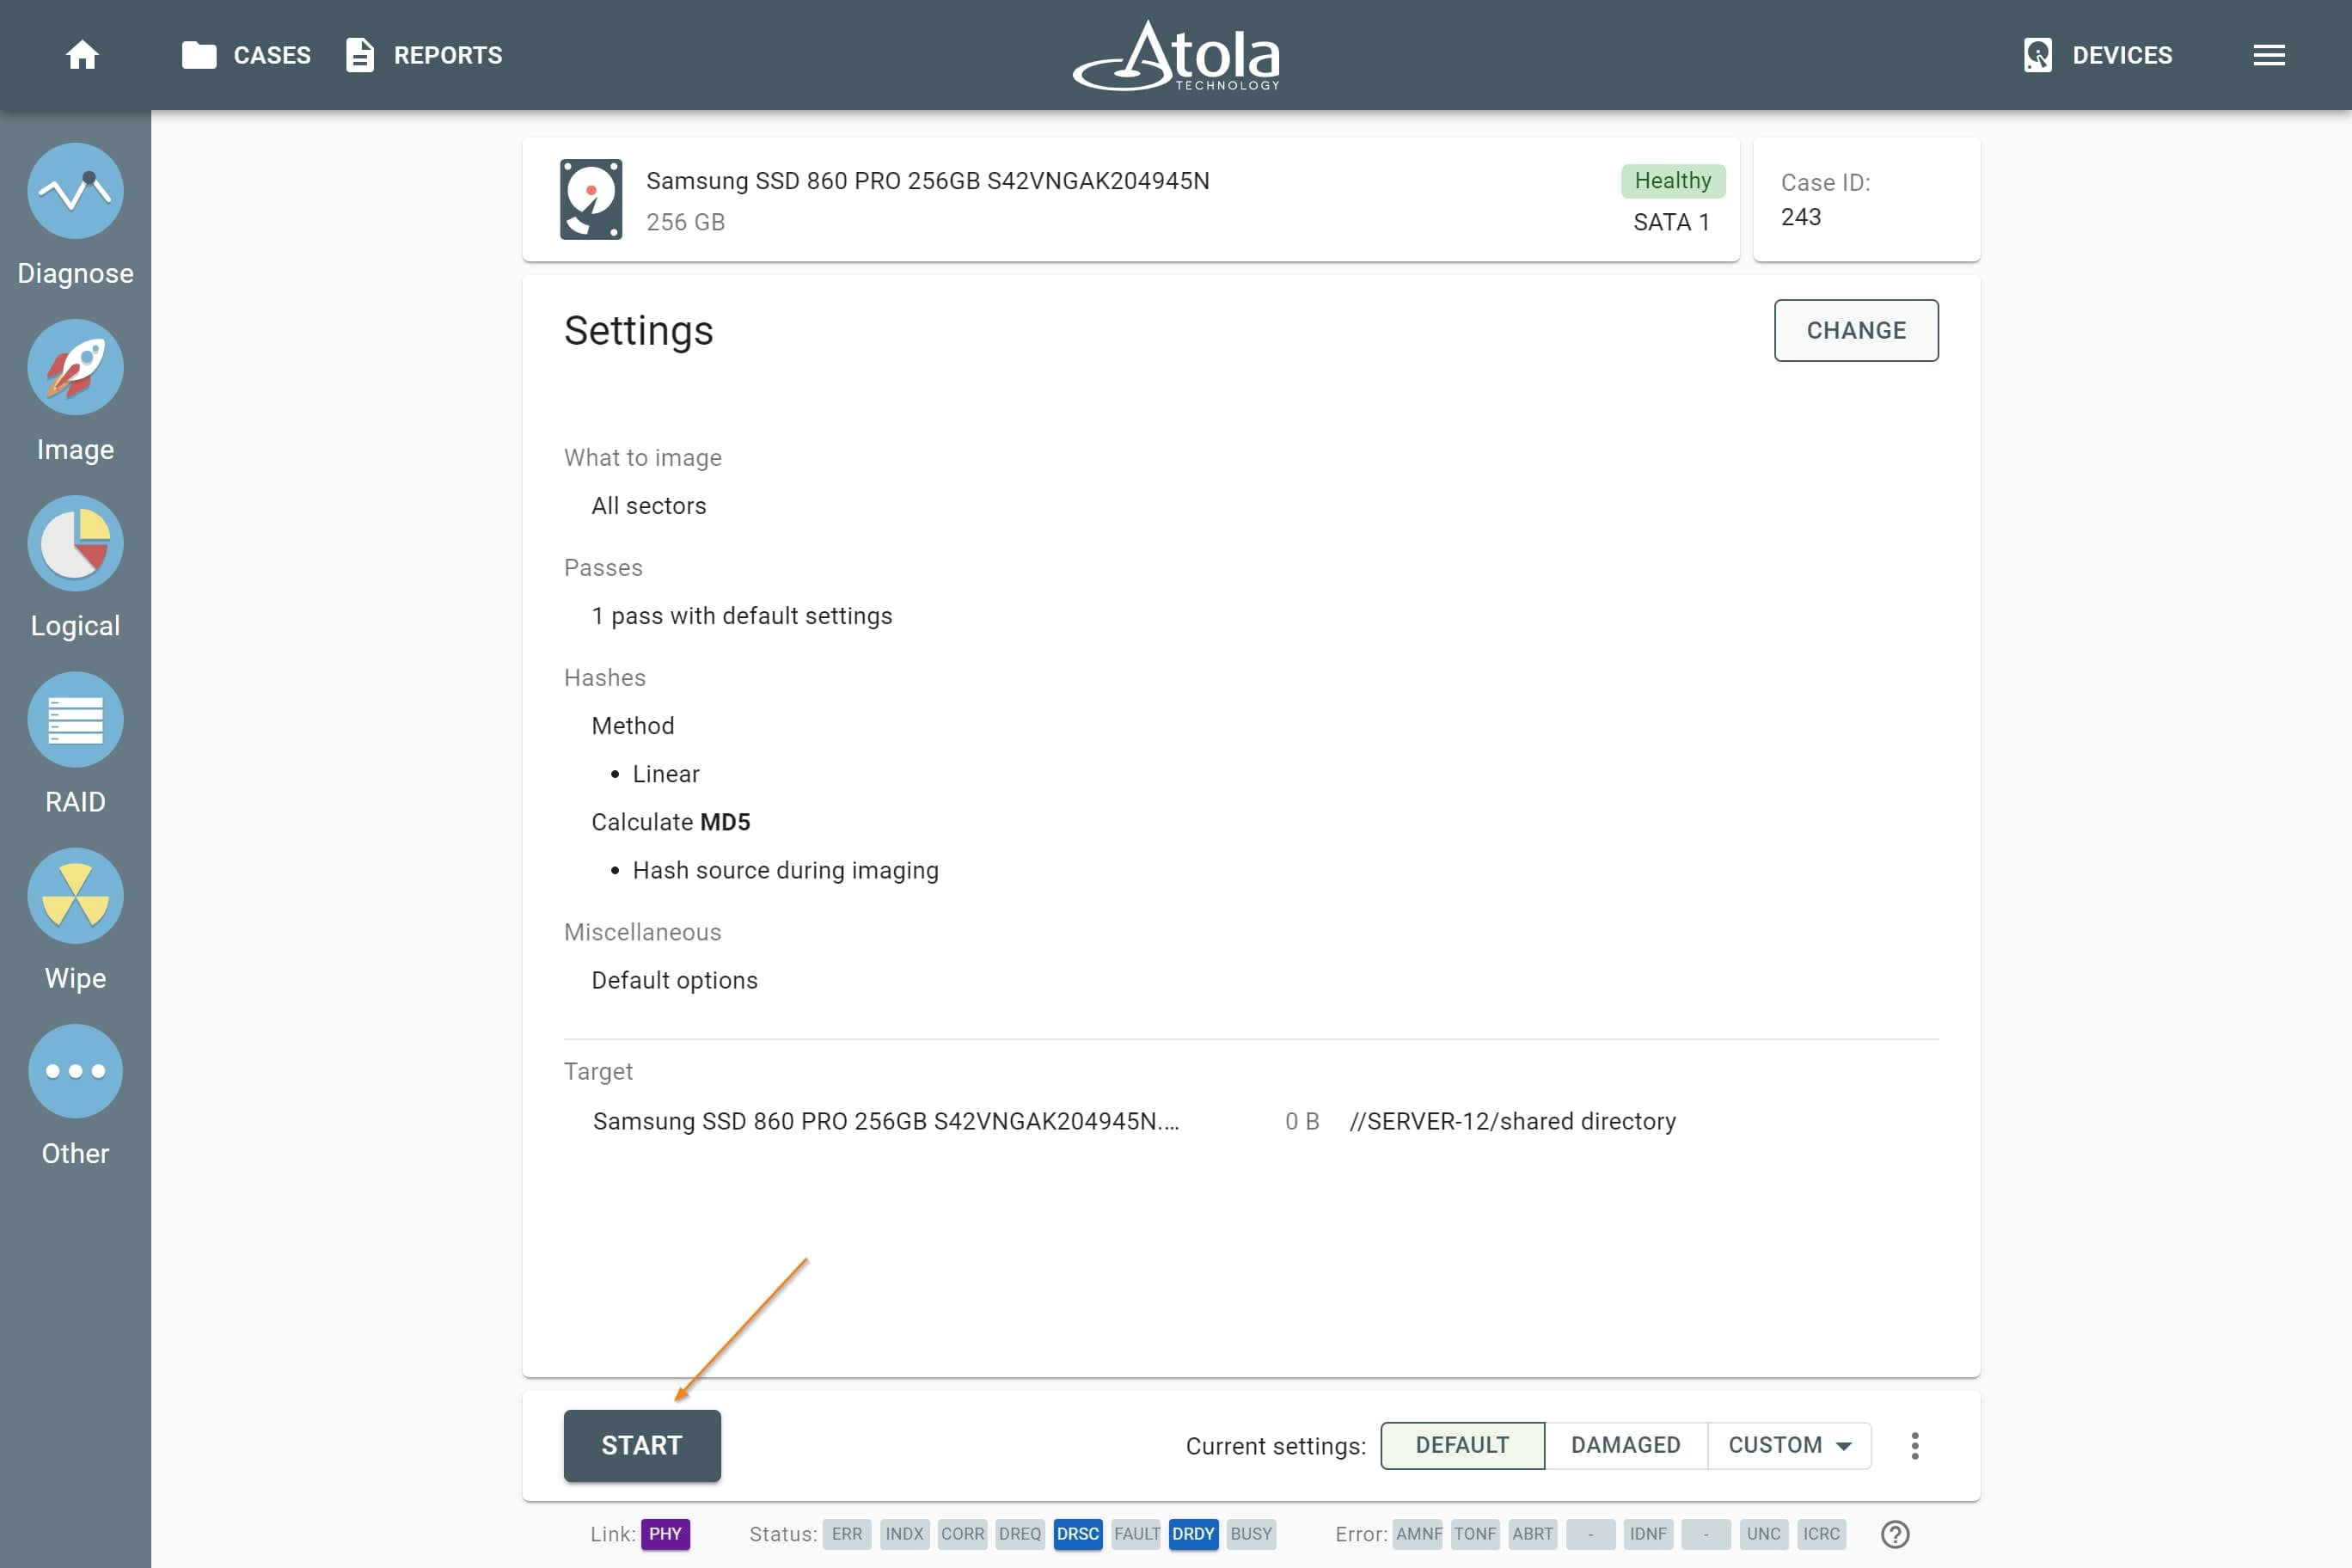
The Start button on the Imaging settings page.