Logical imaging
The logical imaging module in Atola Insight Forensic creates an L01 file with a forensically sound logical copy of folders and files you’ve selected manually or using built-in include and exclude filters.
The resulting L01 file also includes unaltered metadata, such as file attributes and creation dates, as well as hashes calculated during the imaging process. An L01 file can be compressed to save storage space.
Once the logical imaging process is complete, Insight also generates a comprehensive report with details about the source, target, number of imaged files and bytes and more.
Key features of logical imaging
- Smart include and exclude filters
- L01 format for target image file
- Compression of L01 image file
- Up to 3 parallel logical imaging sessions
- Pause and resume option for each imaging session
- Supported source drive types: SATA, USB, IDE, NVMe, SAS, MacBook
- Supported image file located on a source drive: RAW, E01, AFF4
- Supported file systems: NTFS, APFS, XFS, ext4/3/2, exFAT, Btrfs, HFS/HFS+, FAT32, FAT16
Logical imaging workflow
To create a logical image of your source device, follow these steps:
Select source device
As a source for logical imaging, you can use:
-
Physical drives, connected directly or via extension modules
- SATA
- USB
- IDE
- NVMe via M.2 extension module
- SAS via SAS extension module
- MacBook drives via Apple PCIe SSD or Thunderbolt extension modules
- Image files from a Source drive
- RAW
- E01
- AFF4
To launch the Logical imaging module:
- On the Devices panel, select the source drive or file.
- On the Sidebar, click Logical imaging.
- Click the Find partitions button.
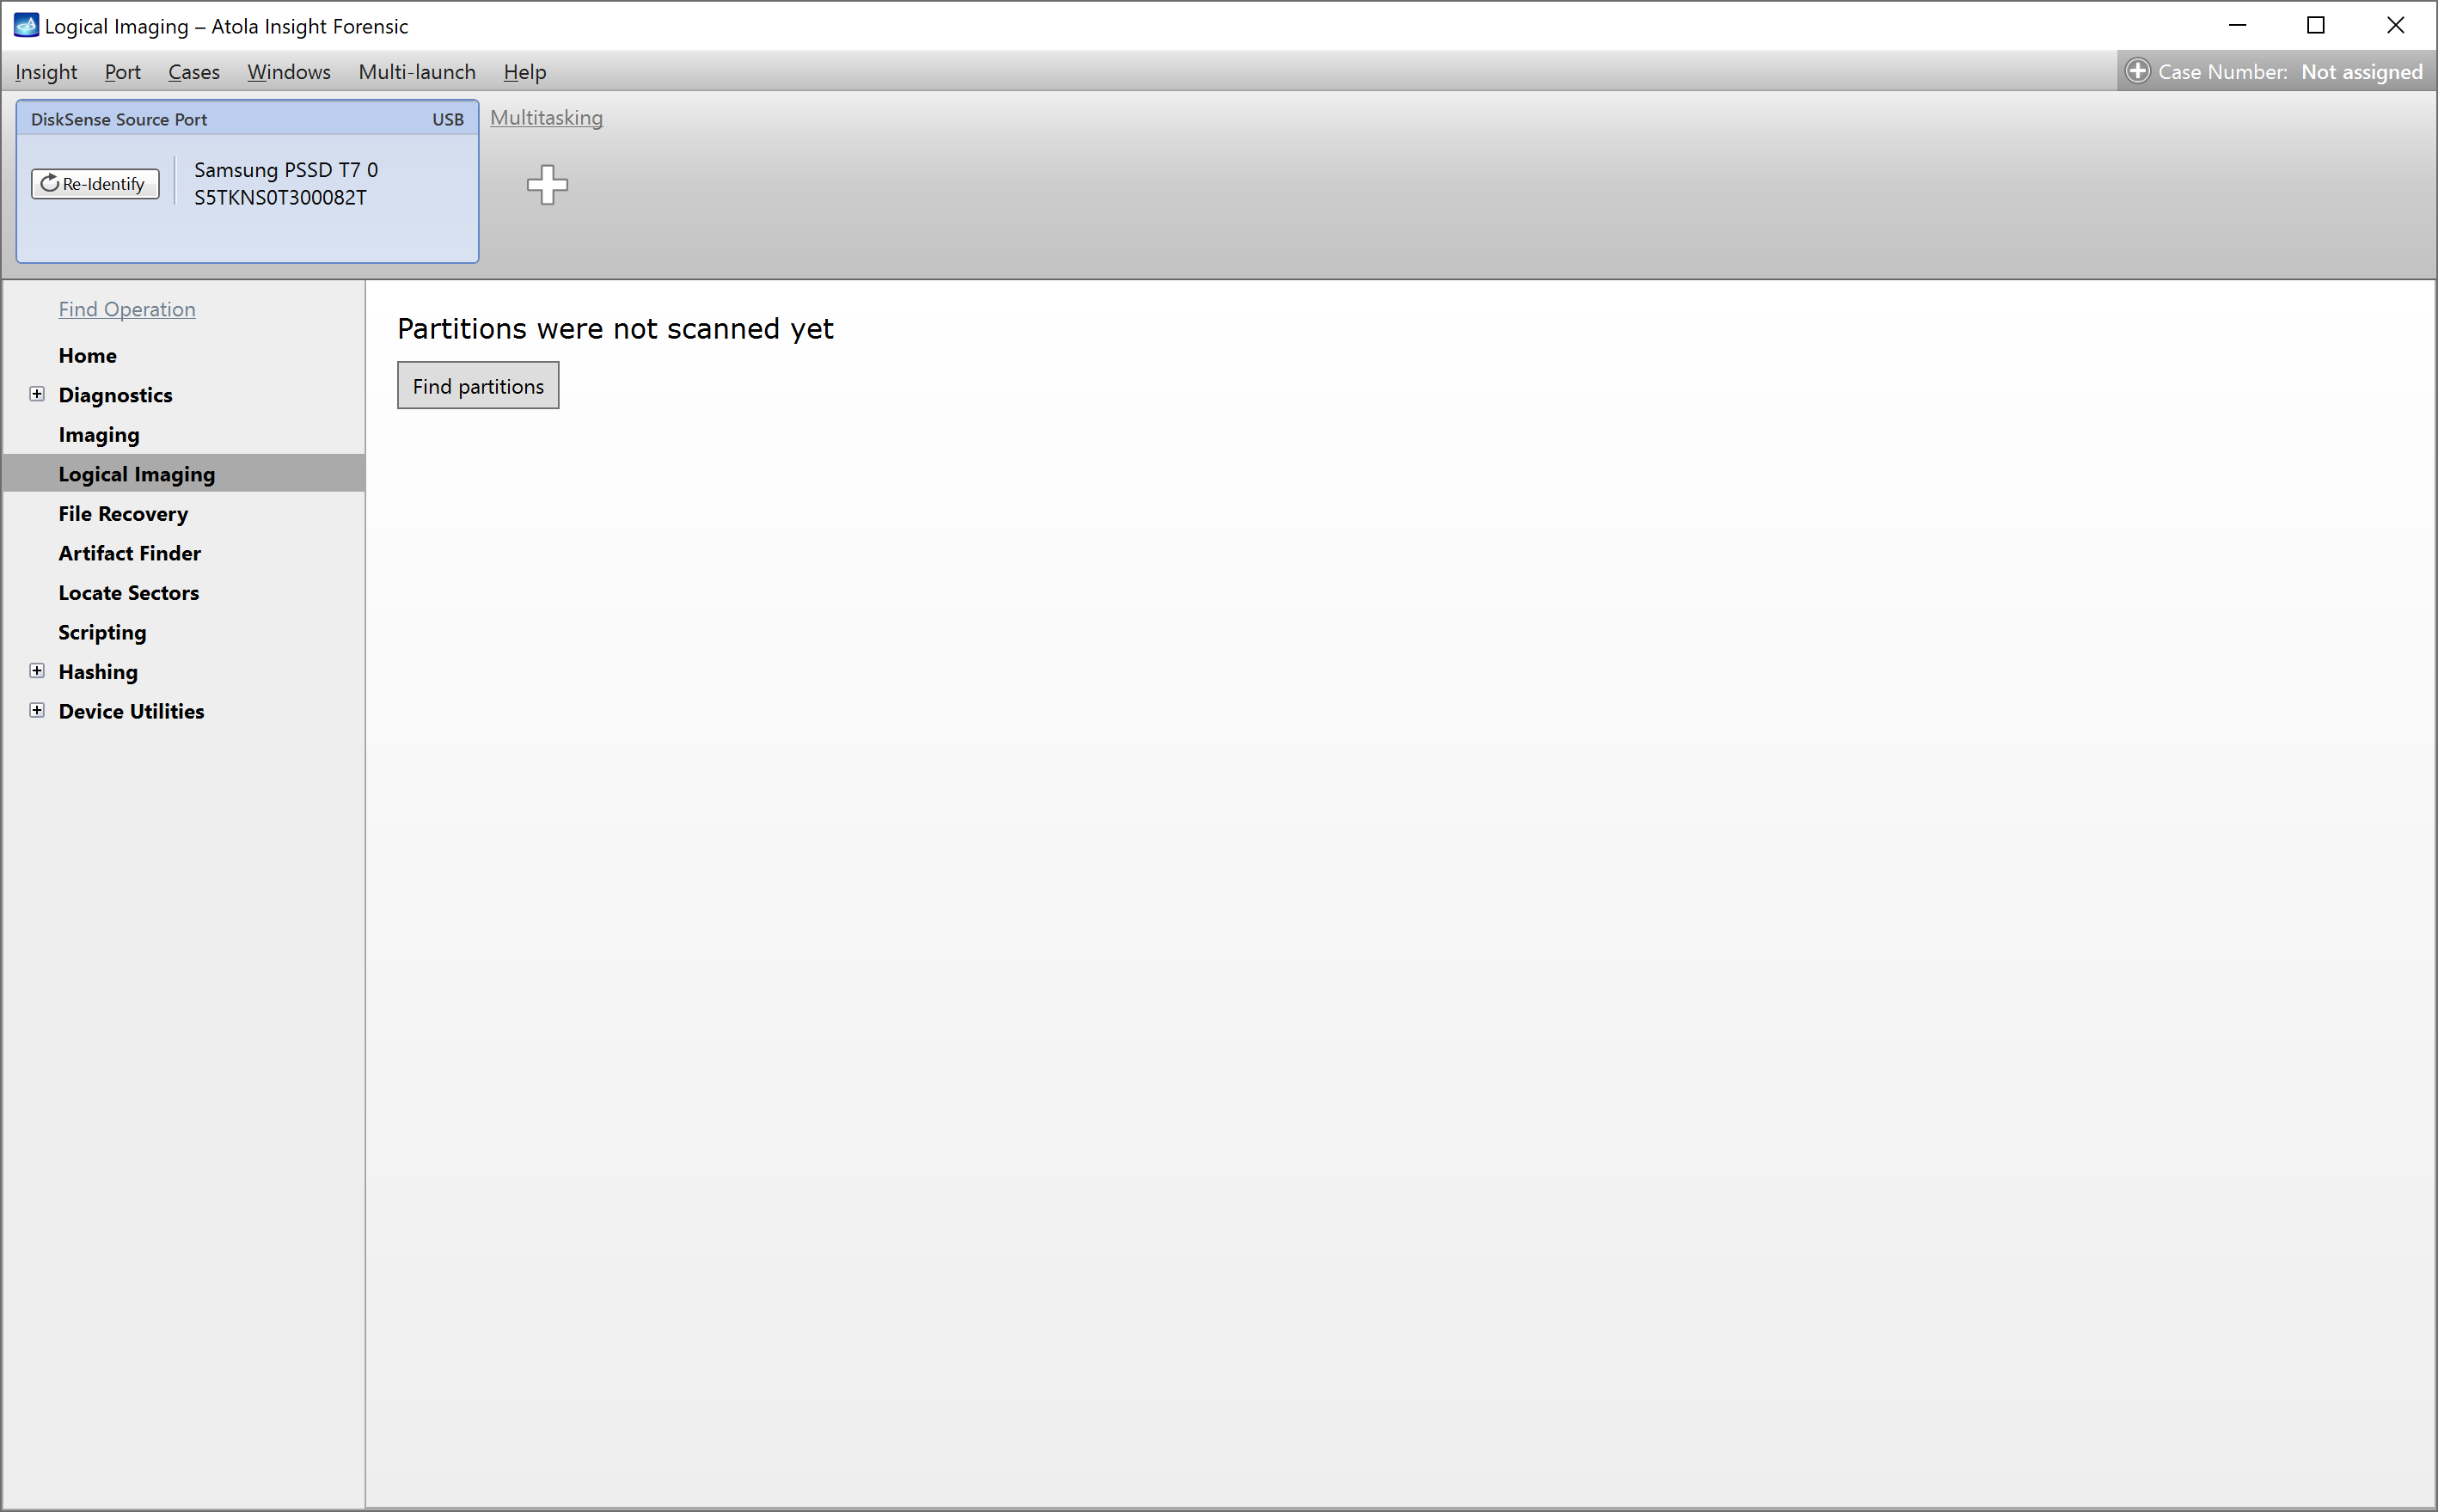
The ‘Find partitions’ button in the Logical imaging section.
Select partitions, folders or files to image
After scanning partitions on the source device, Insight displays their list on the Partition selection tab.
By default, Insight images all files from all partitions.
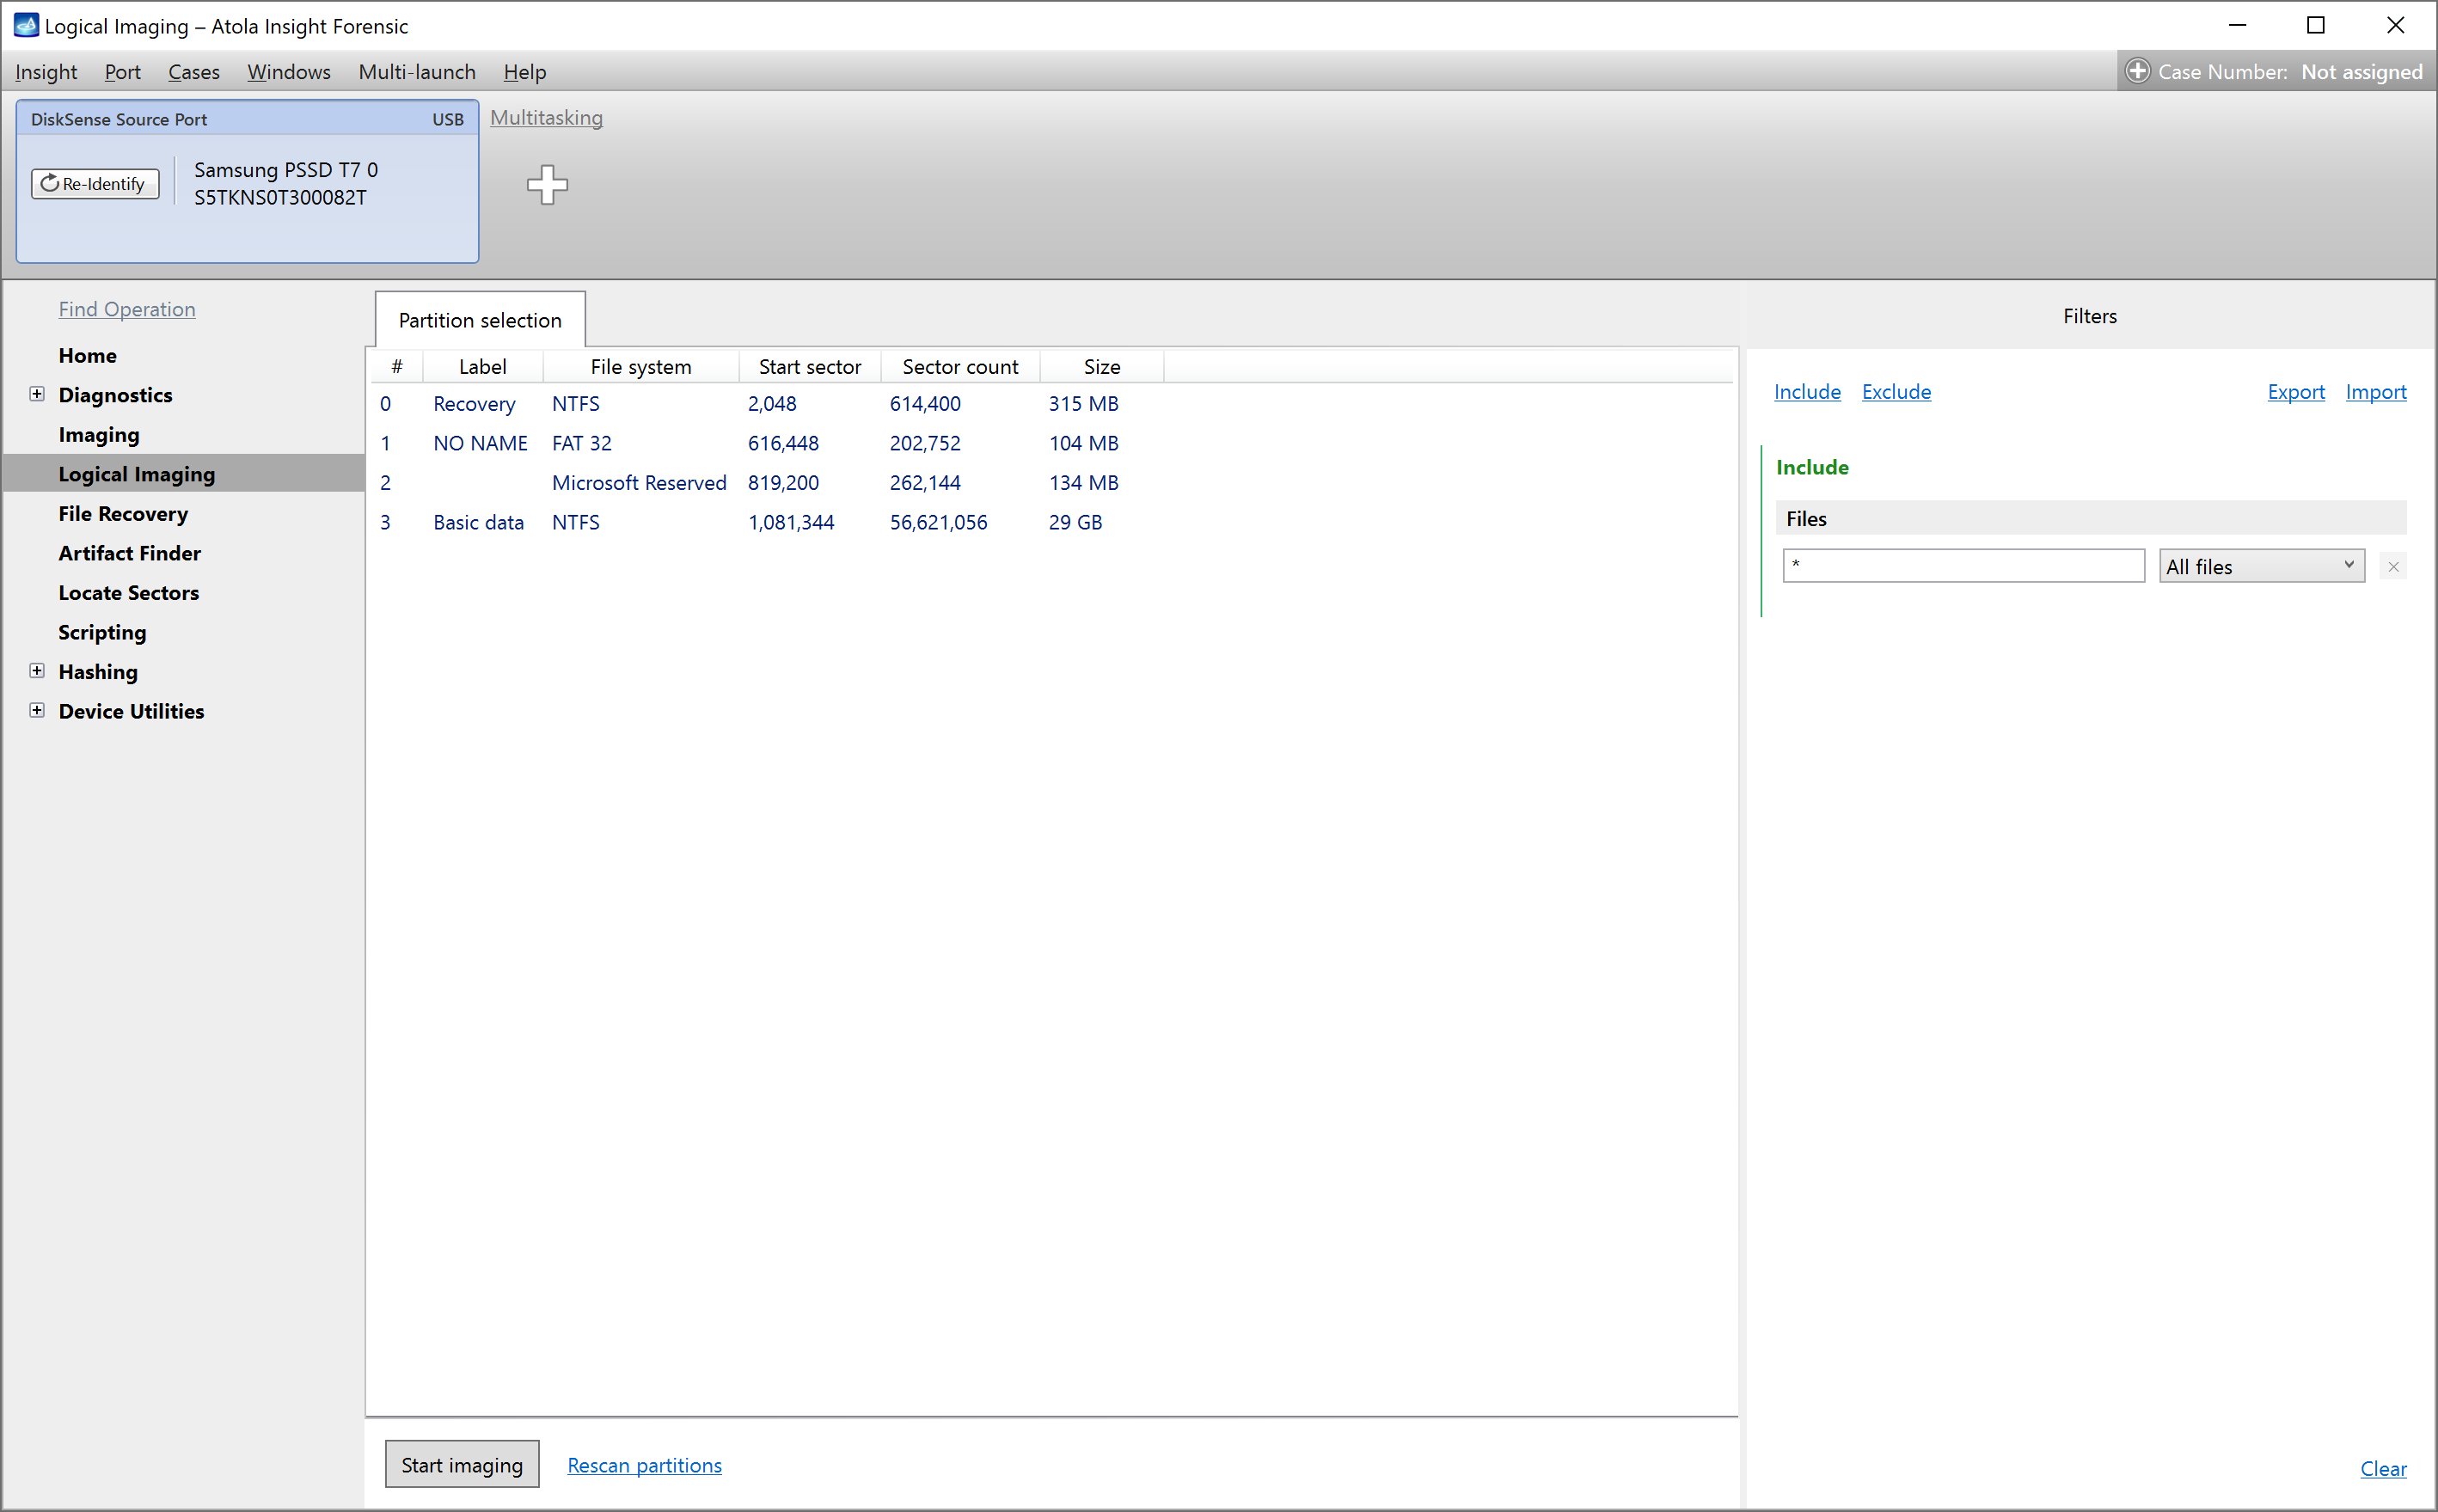
The list of the available partitions.
Preview, select or deselect partition
To preview the partition contents, double-click its name on the Partition selection tab. The separate Partition tab opens, displaying the partition folder structure and file list.
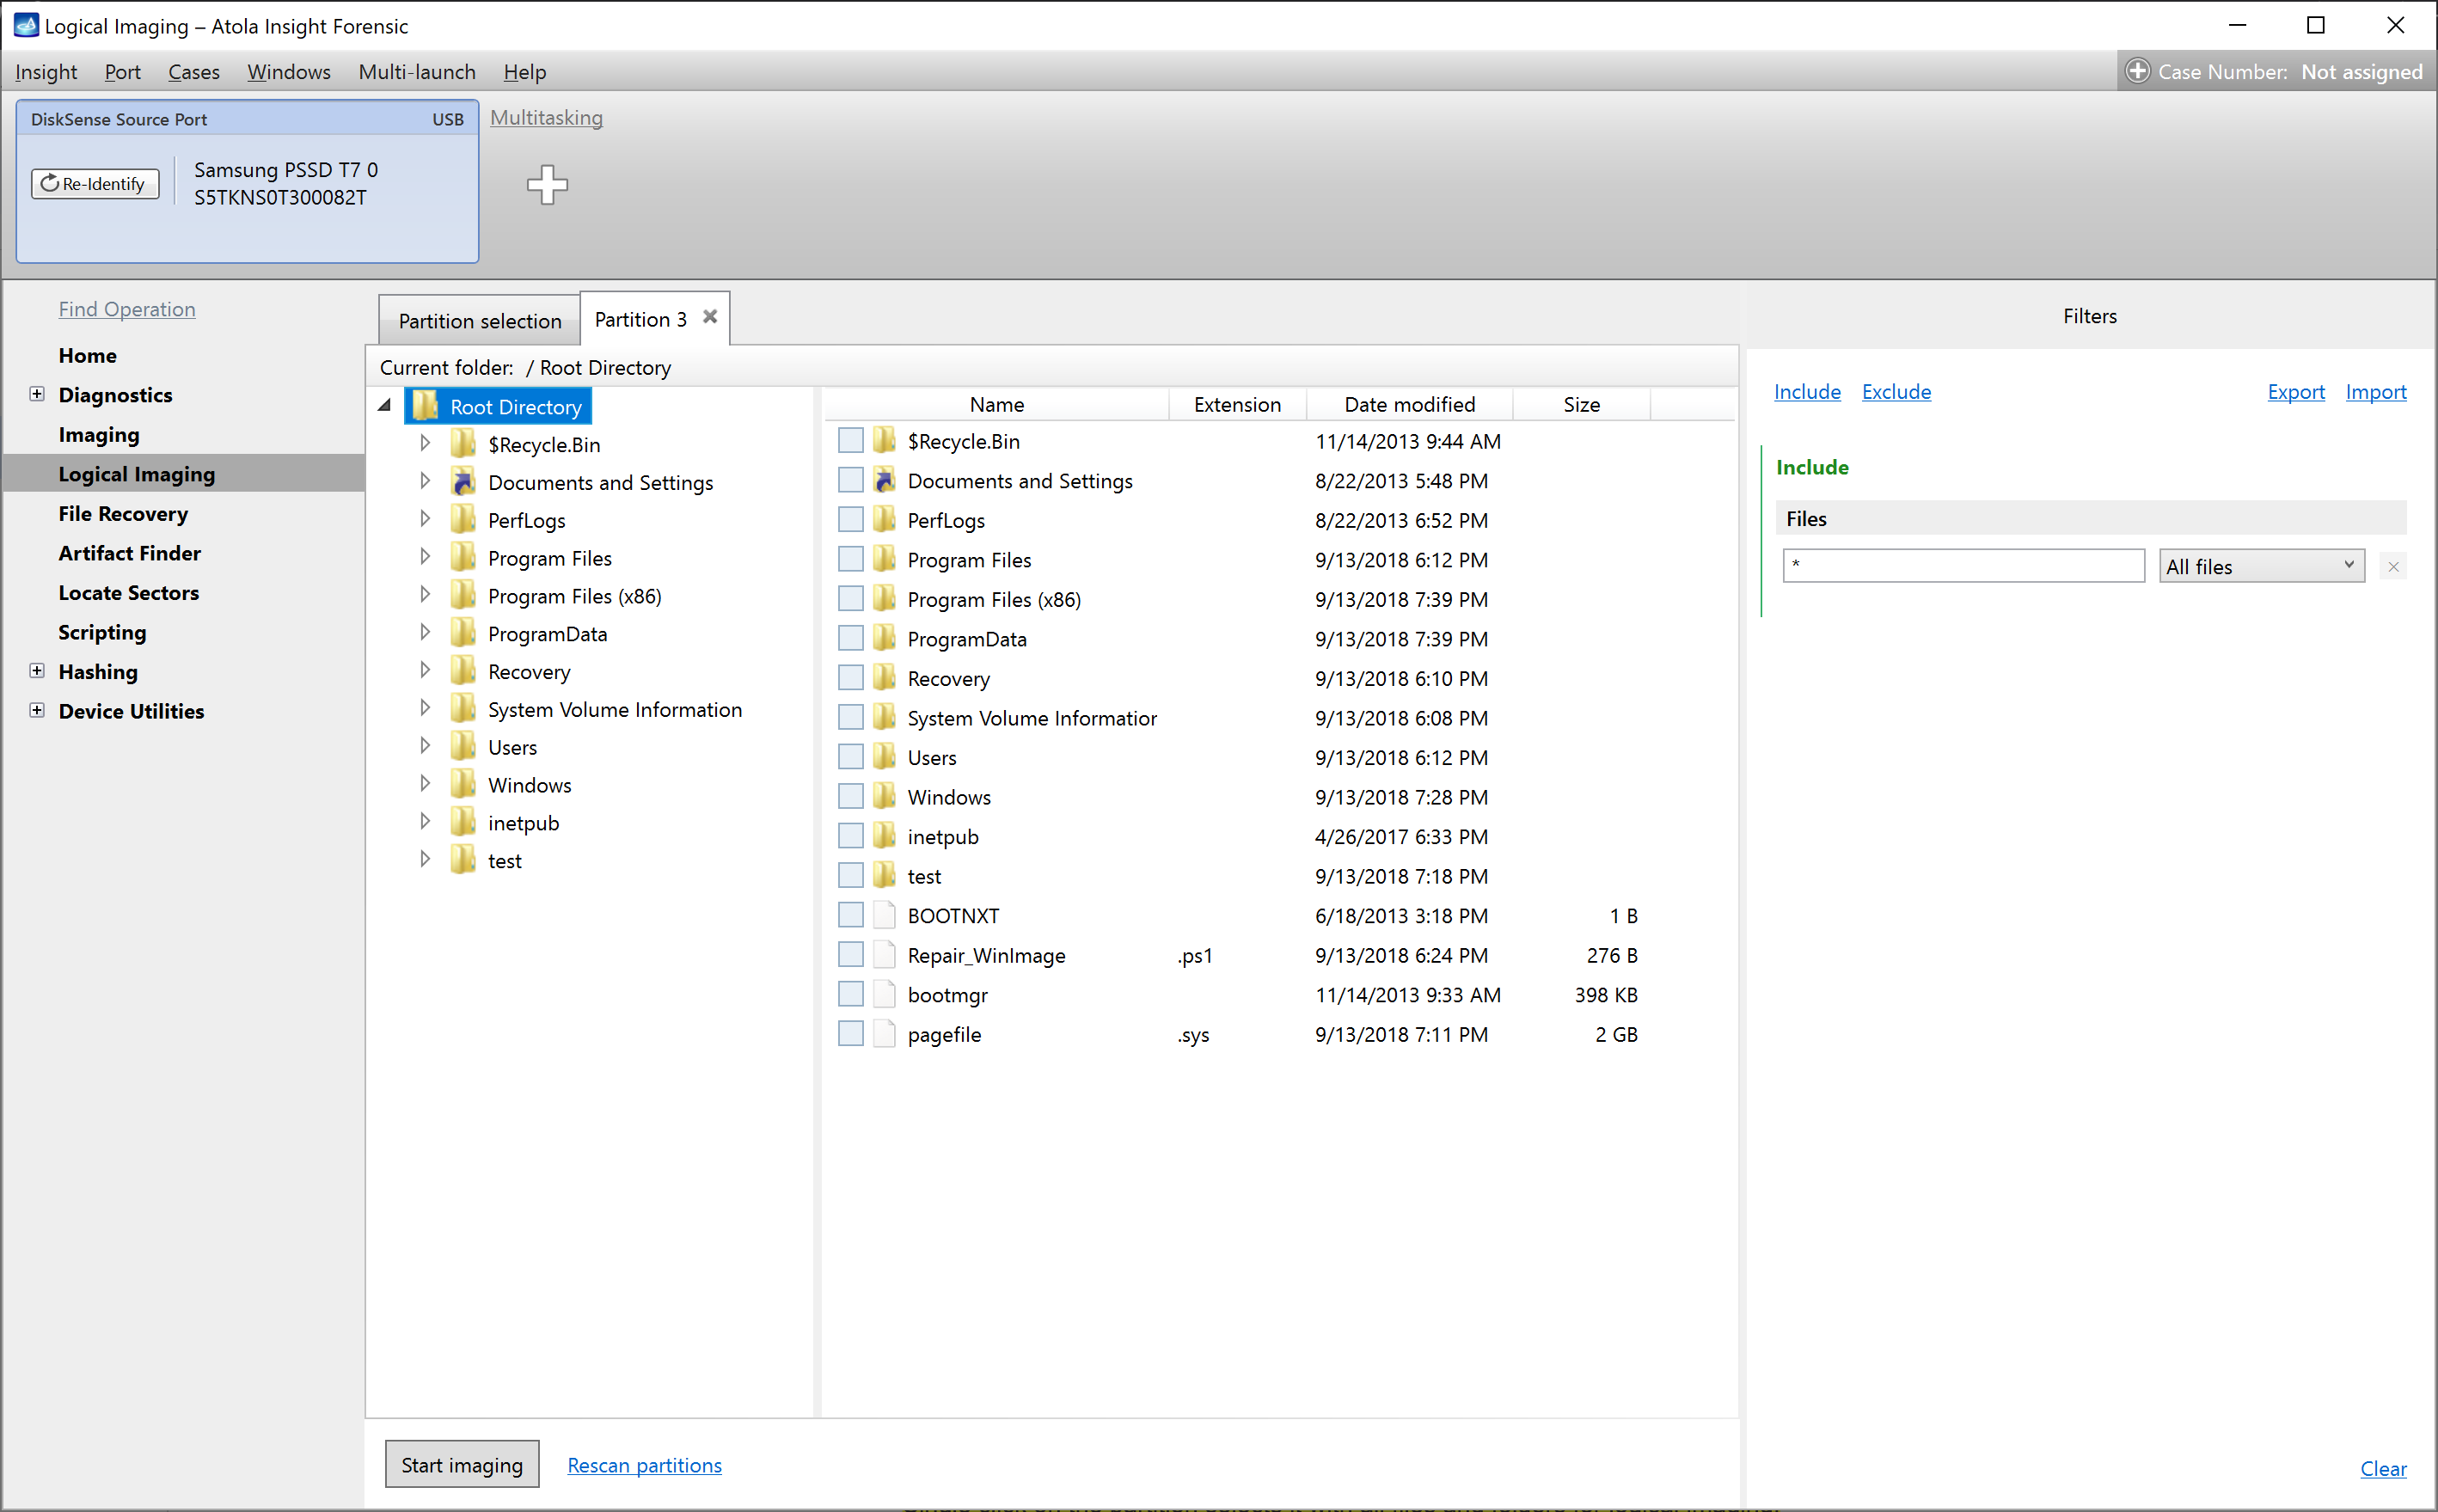
The partition preview, displaying the folder structure and file list.
Important: By default, all files from all partitions are selected for logical imaging.
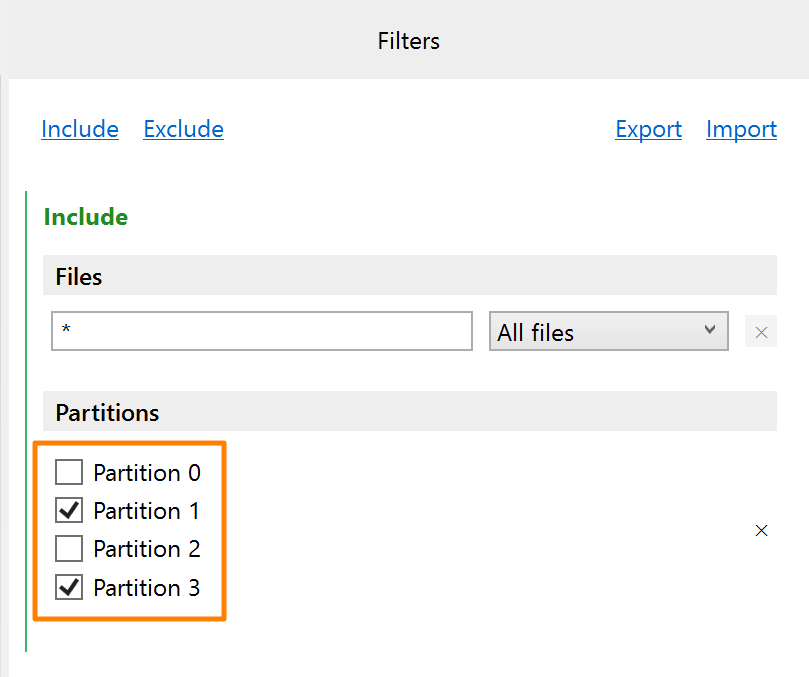
To exclude a partition:
- On the Filters panel, click the Include link at the top.
- Select Partitions from the list.
- Clear the checkboxes next to the partitions you want to exclude.
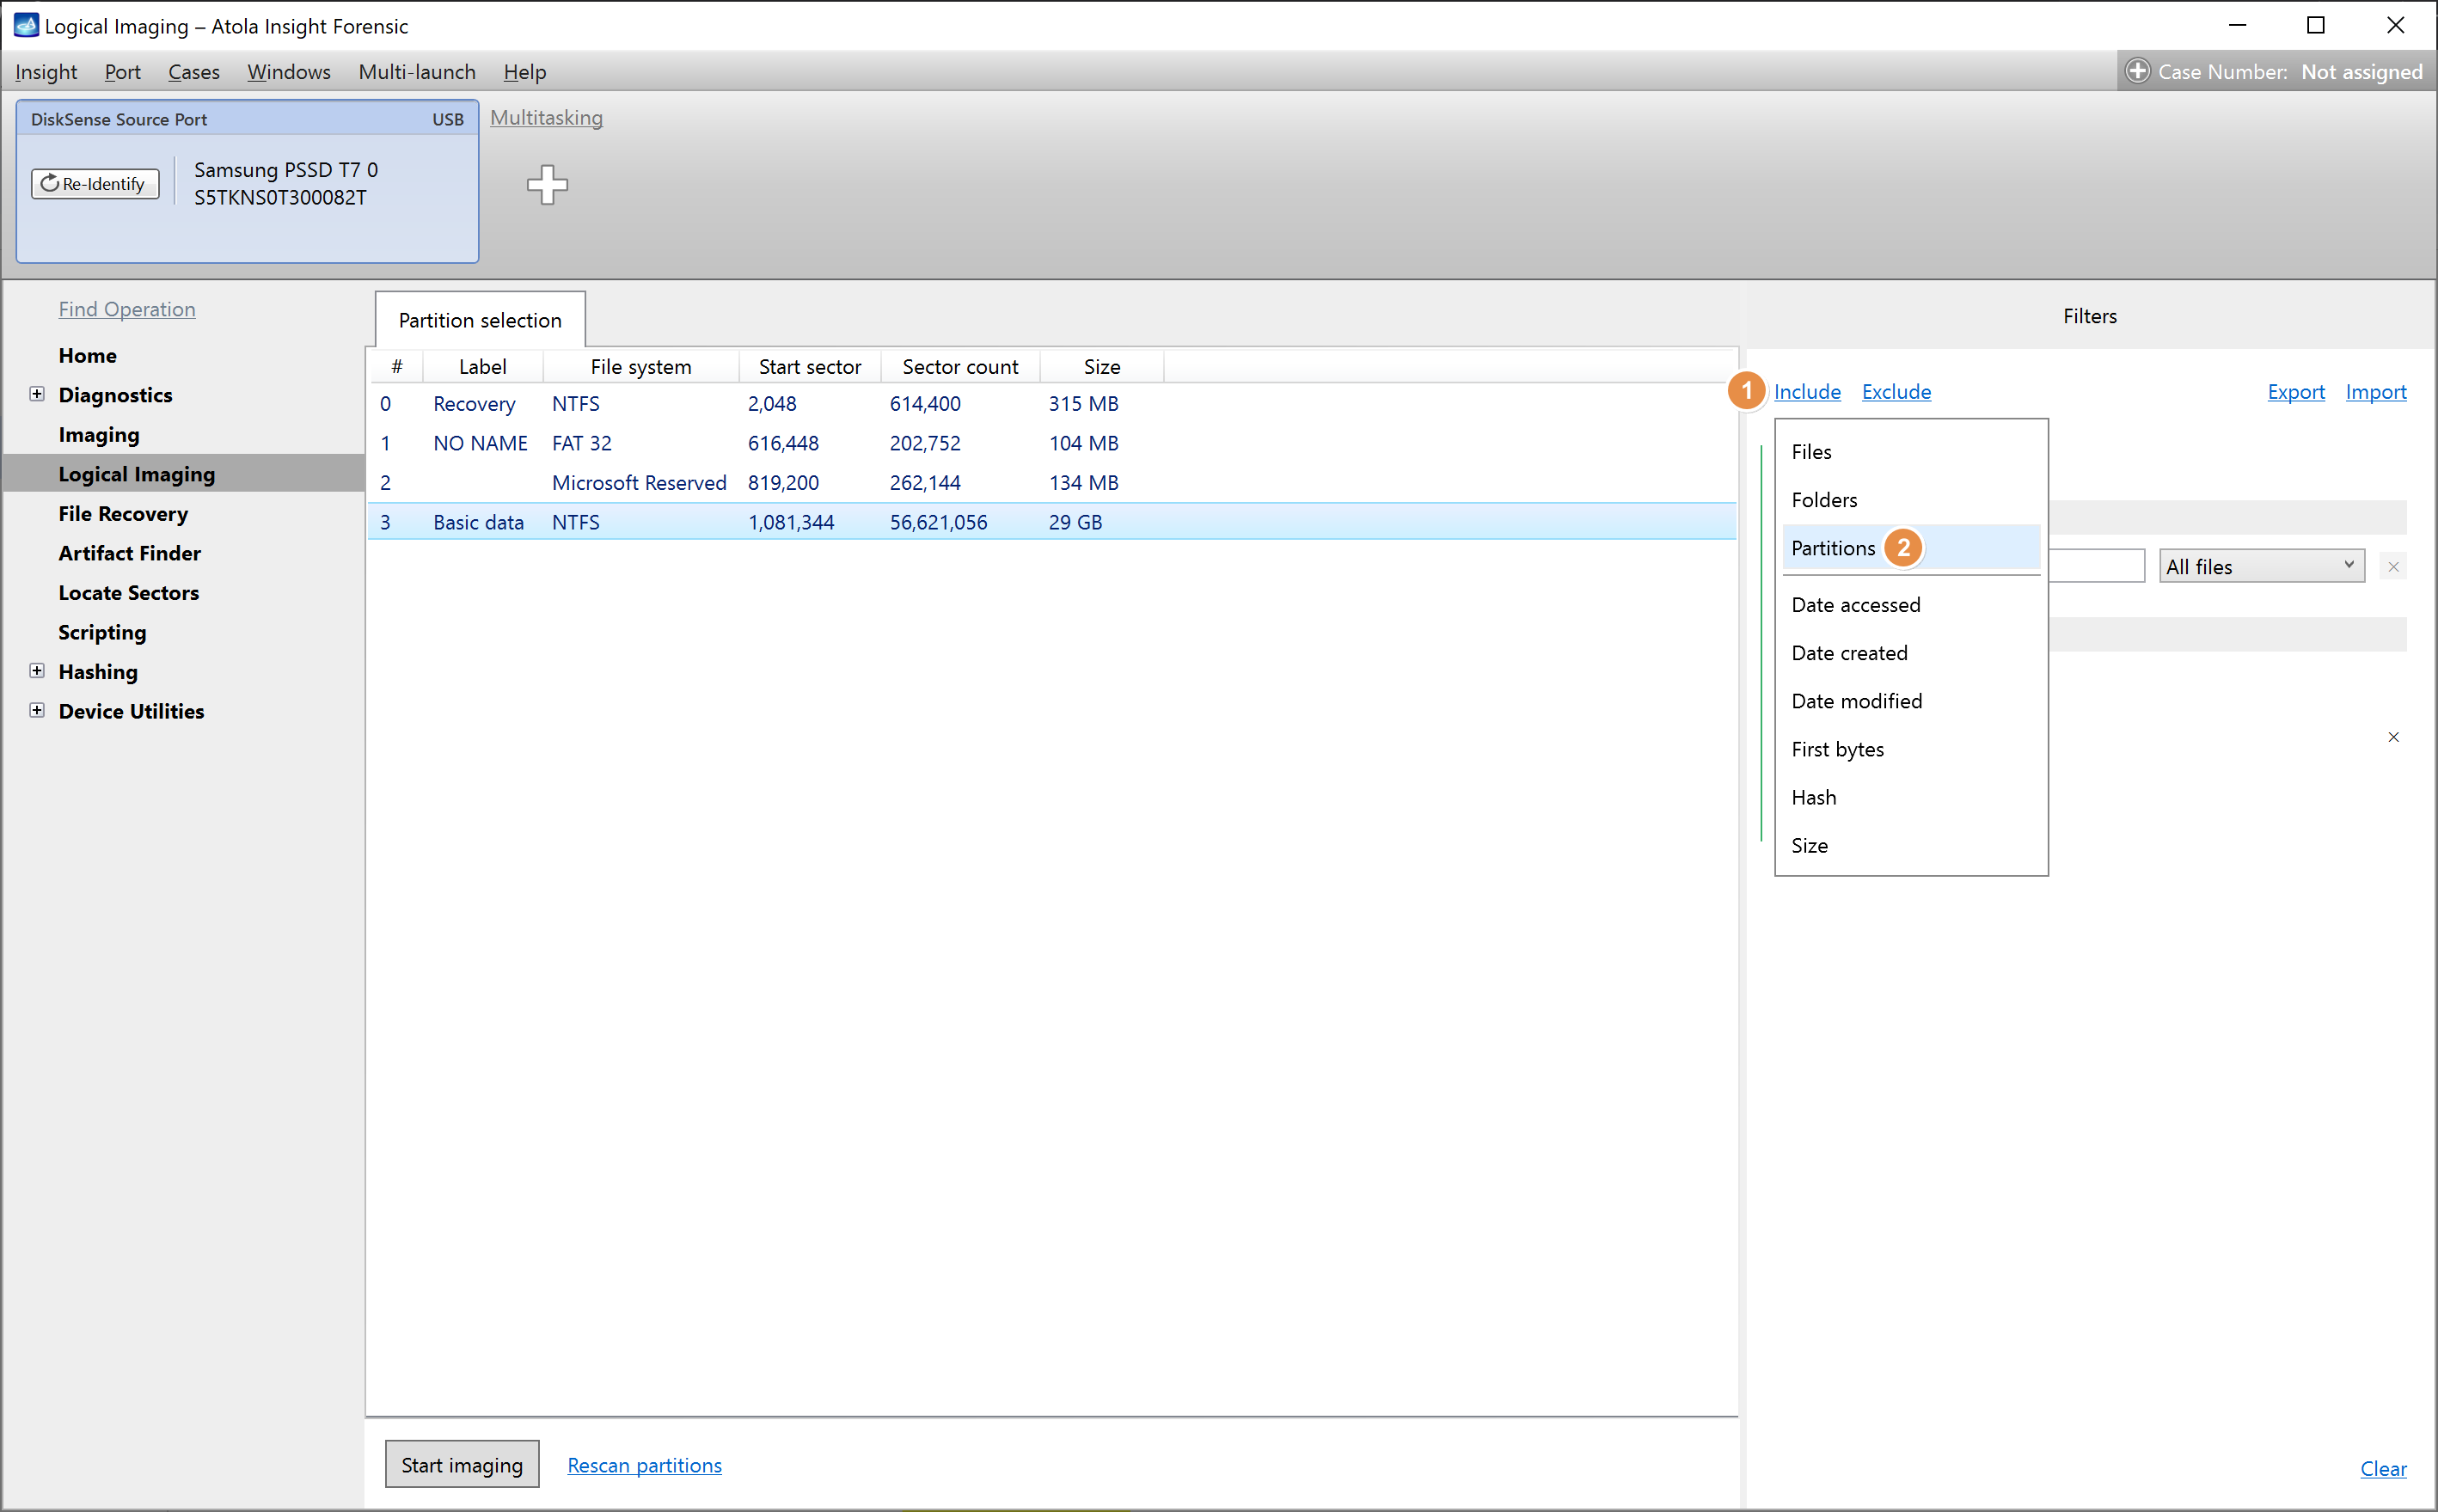
The partitions filter.
To include a partition again, select the checkbox.
Your selection is saved automatically.
Preview folder, manually include or exclude folders and files
The Partition tab displays the partition folder structure and the file list.
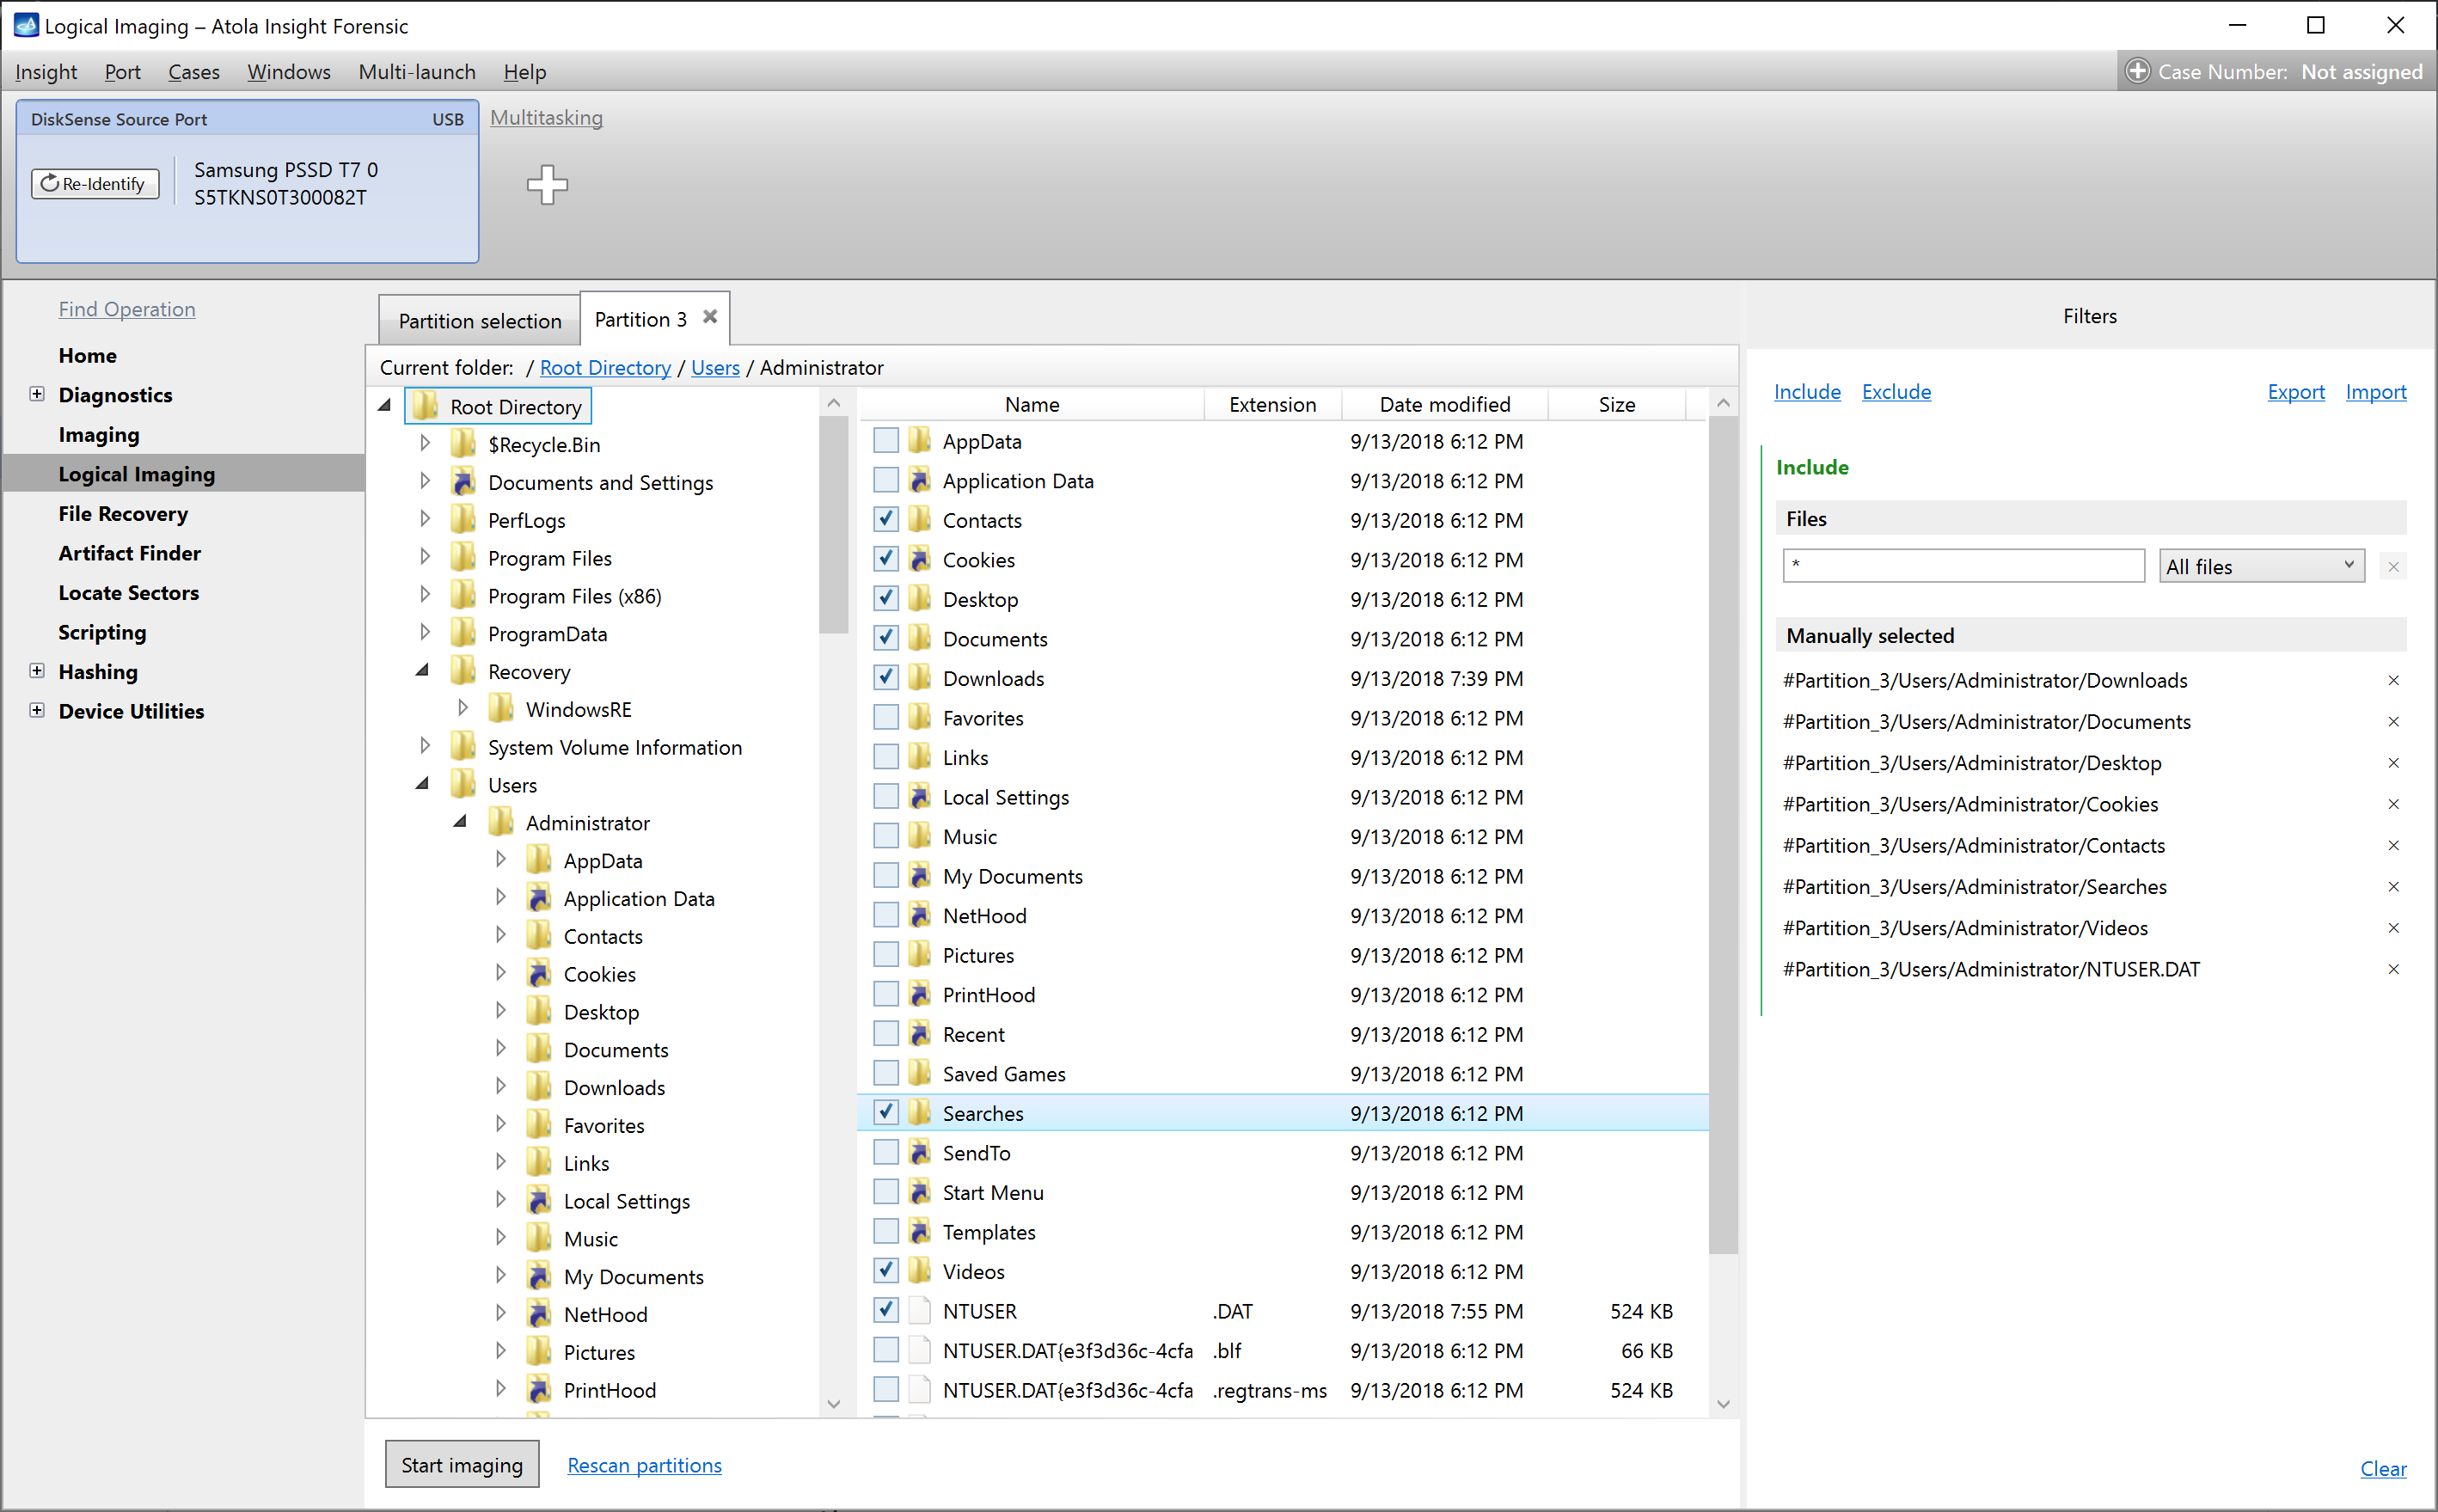
Manually selecting folders and files for logical imaging.
- To preview a folder's contents, click the folder name in the folder tree.
- To manually include a folder or file for imaging, click the checkbox next to its name. The folder or file appears on the Filters panel on the right as manually selected.
- To manually exclude a folder or file from the selection, clear its checkbox or use the x icon on the Filters panel on the right. The folder or file disappears from the panel.
- To deselect all the selected folders and files, click the Clear link at the bottom of the Filters panel.
Use smart filters and presets for selecting folders or files
By default, Insight images all files from all partitions.
On the Filters panel, you can automatically include or exclude folders and files for imaging by applying the built-in smart filters or custom filtering presets.
Filtering folders and files
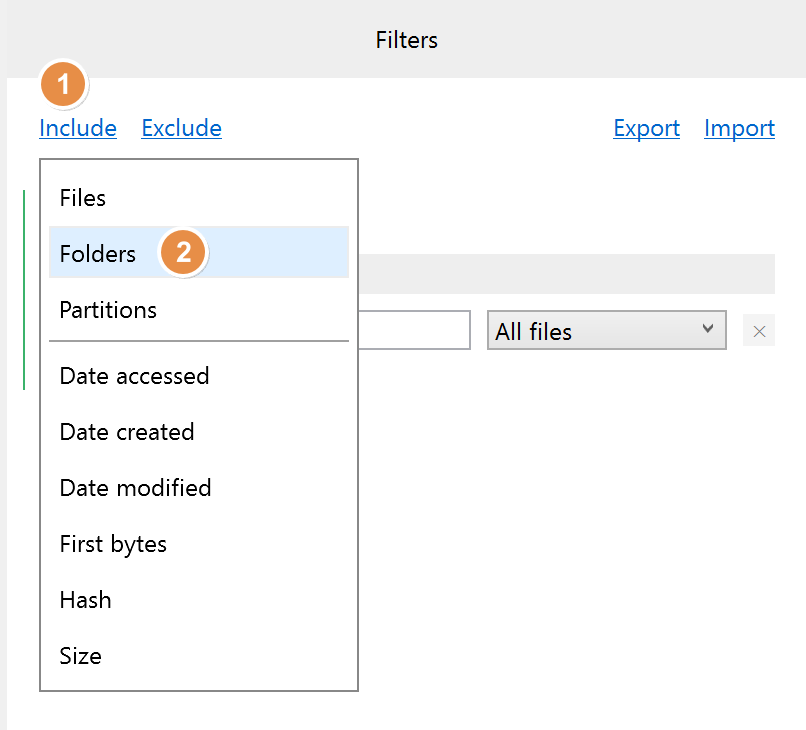
To automatically include or exclude specific files or folders:
- On the Filters panel, click the Include or Exclude link at the top.
- Select Folders or Files from the list that appears.
-
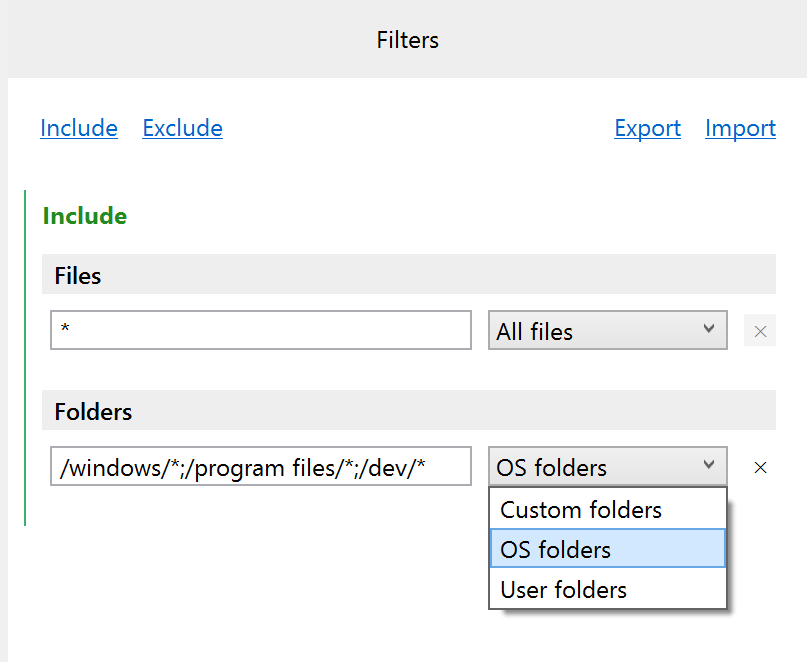
The respective section on the Filters panel appears. In that section, select one of the predefined options from the list:
- For folders:
- OS folders
- User folders
- Custom folders – Filter folders using user-defined patterns with wildcard support. Use wildcards to match multiple folders at once (for example,
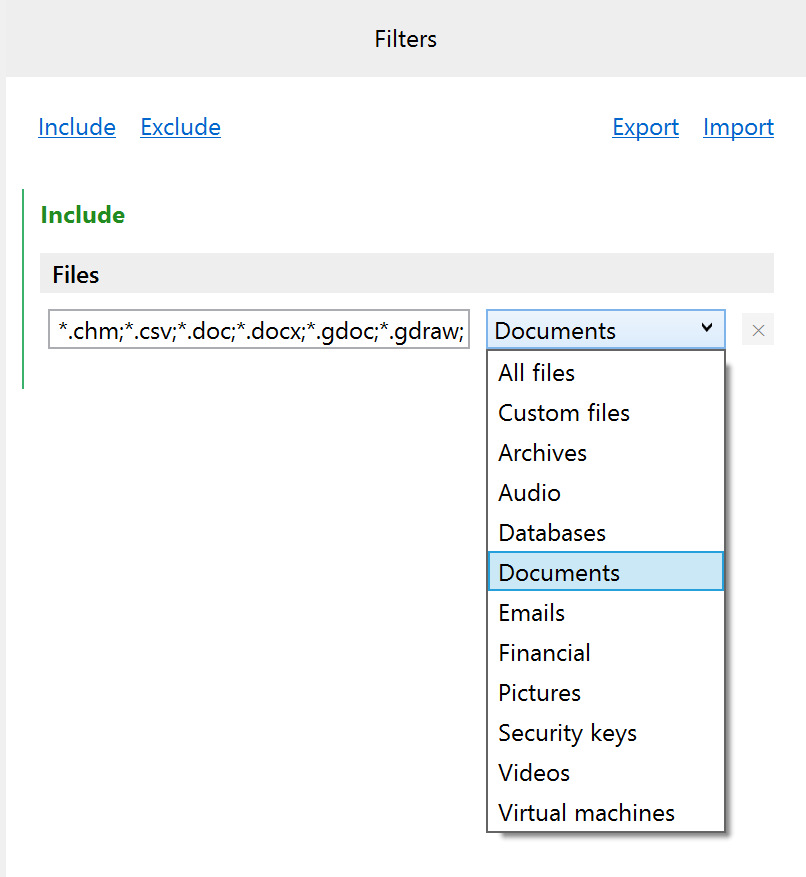
*/tempfor all temp subdirectories, orbackup_202?_*for dated backup folders). - For files:
- Archives
- Audio
- Databases
- Documents
- Emails
- Financial
- Pictures
- Security keys
- Videos
- Virtual machines
- Custom files – Filter files using user-defined patterns with wildcard support. Use wildcards to match multiple files at once (for example,
*.logfor all log files,report_*.pdffor numbered reports, ordata_202?_*.csvfor yearly data files).
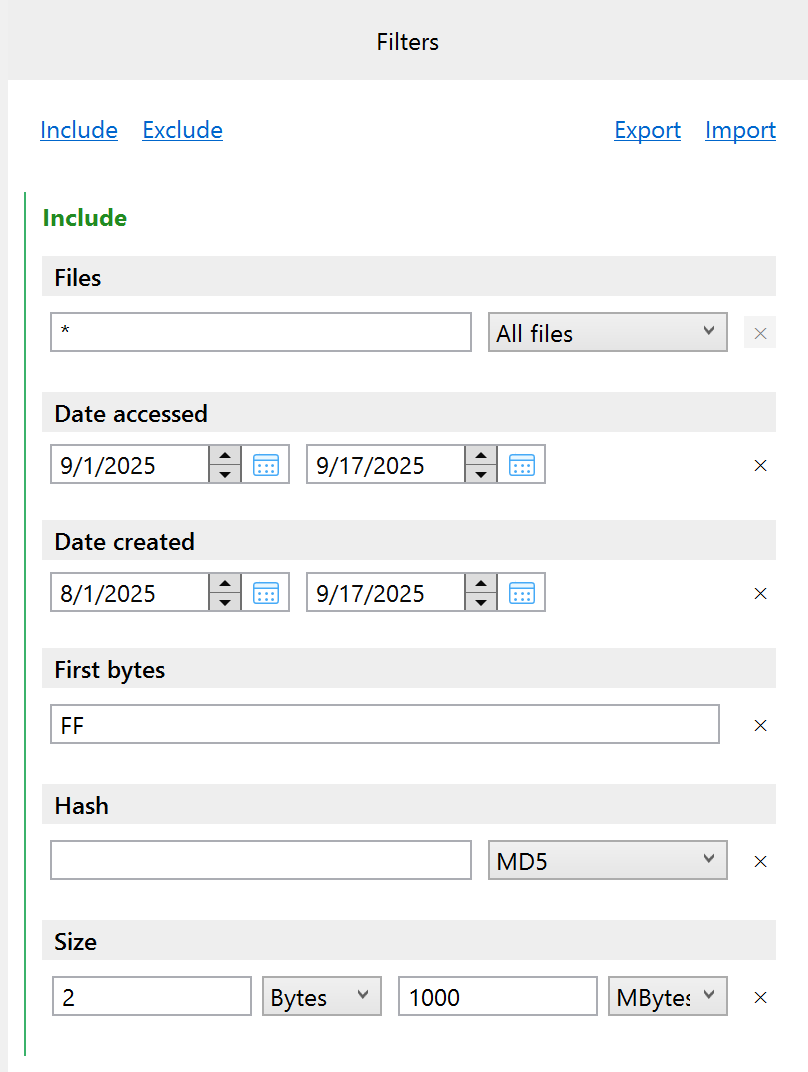
Additional filtering parameters
You can also include or exclude specific files or folders meeting one or more of the following parameters:
- Date accessed
- Date created
- Date modified
- First bytes
- Hash
- Size
To apply additional filtering parameters, do the following:
- On the Filters panel, click the Include or Exclude link at the top.
- Select an additional filtering parameter from the list that appears.
- The respective section on the Filters panel appears. In that section, enter a value for a filtering parameter.
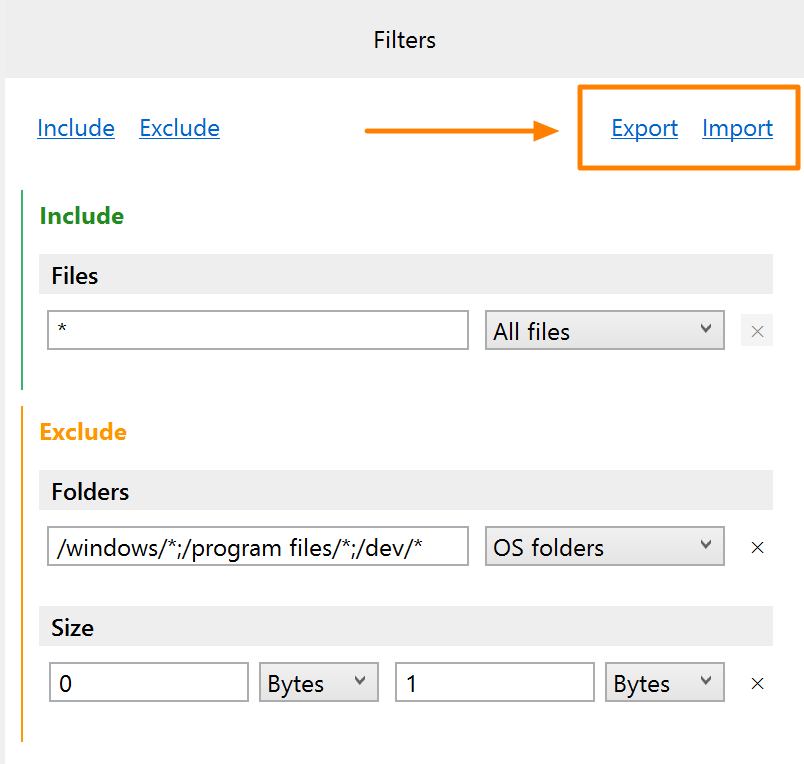
Save filtering settings as a preset
To reuse your filtering settings later or share them with your colleague, save them as a logical imaging preset in JSON format:
- On the Filters panel, click the Export link at the top.
- Enter the name for your preset and click Save.
To apply an existing filter preset, use the Import link at the top of the Filters panel.
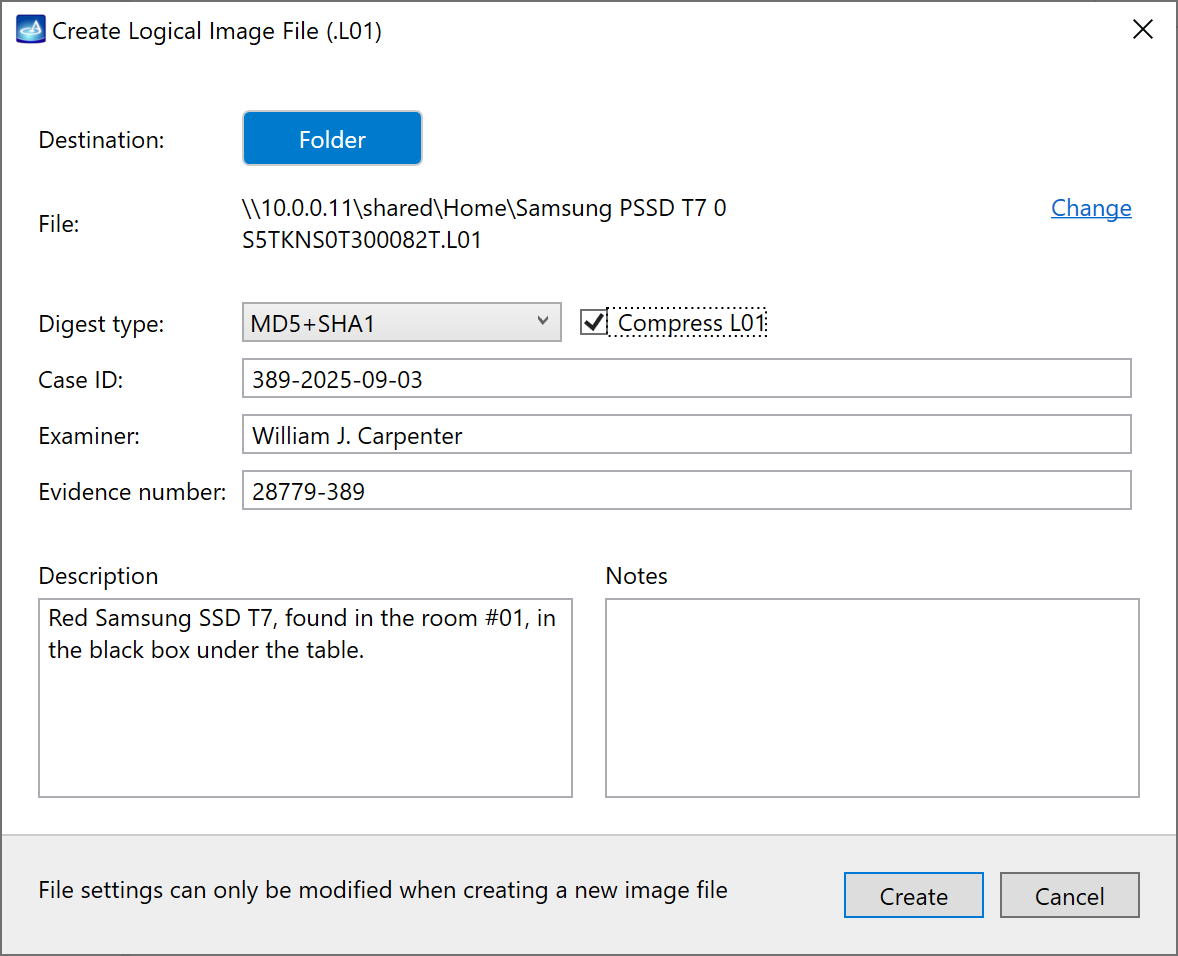
Create a target file
- Once you have adjusted the logical imaging parameters, click the Start imaging button at the bottom.
- The Create Logical Image File dialog opens.
- Select the Destination folder for the target L01 file on the local PC or remote network drive.
- Change the file name if necessary.
- Select the hashing method (Digest type): MD5, SHA1 or MD5+SHA1.
- Enable or disable compression for the L01.
- Fill in other details: Case ID, Examiner name, Evidence number, Description and Notes.
- Click Create.
Logical imaging process. Pause and resume
The logical imaging process starts immediately when you click Create in the Create Logical Image File dialog.
The Logical imaging progress screen.
Once imaging is launched, Insight creates a Logical imaging (started) report. It contains all details about the imaging source and target(s), as well as information about the include or exclude filters. You can find this report on the device Home screen, in the Device history section.
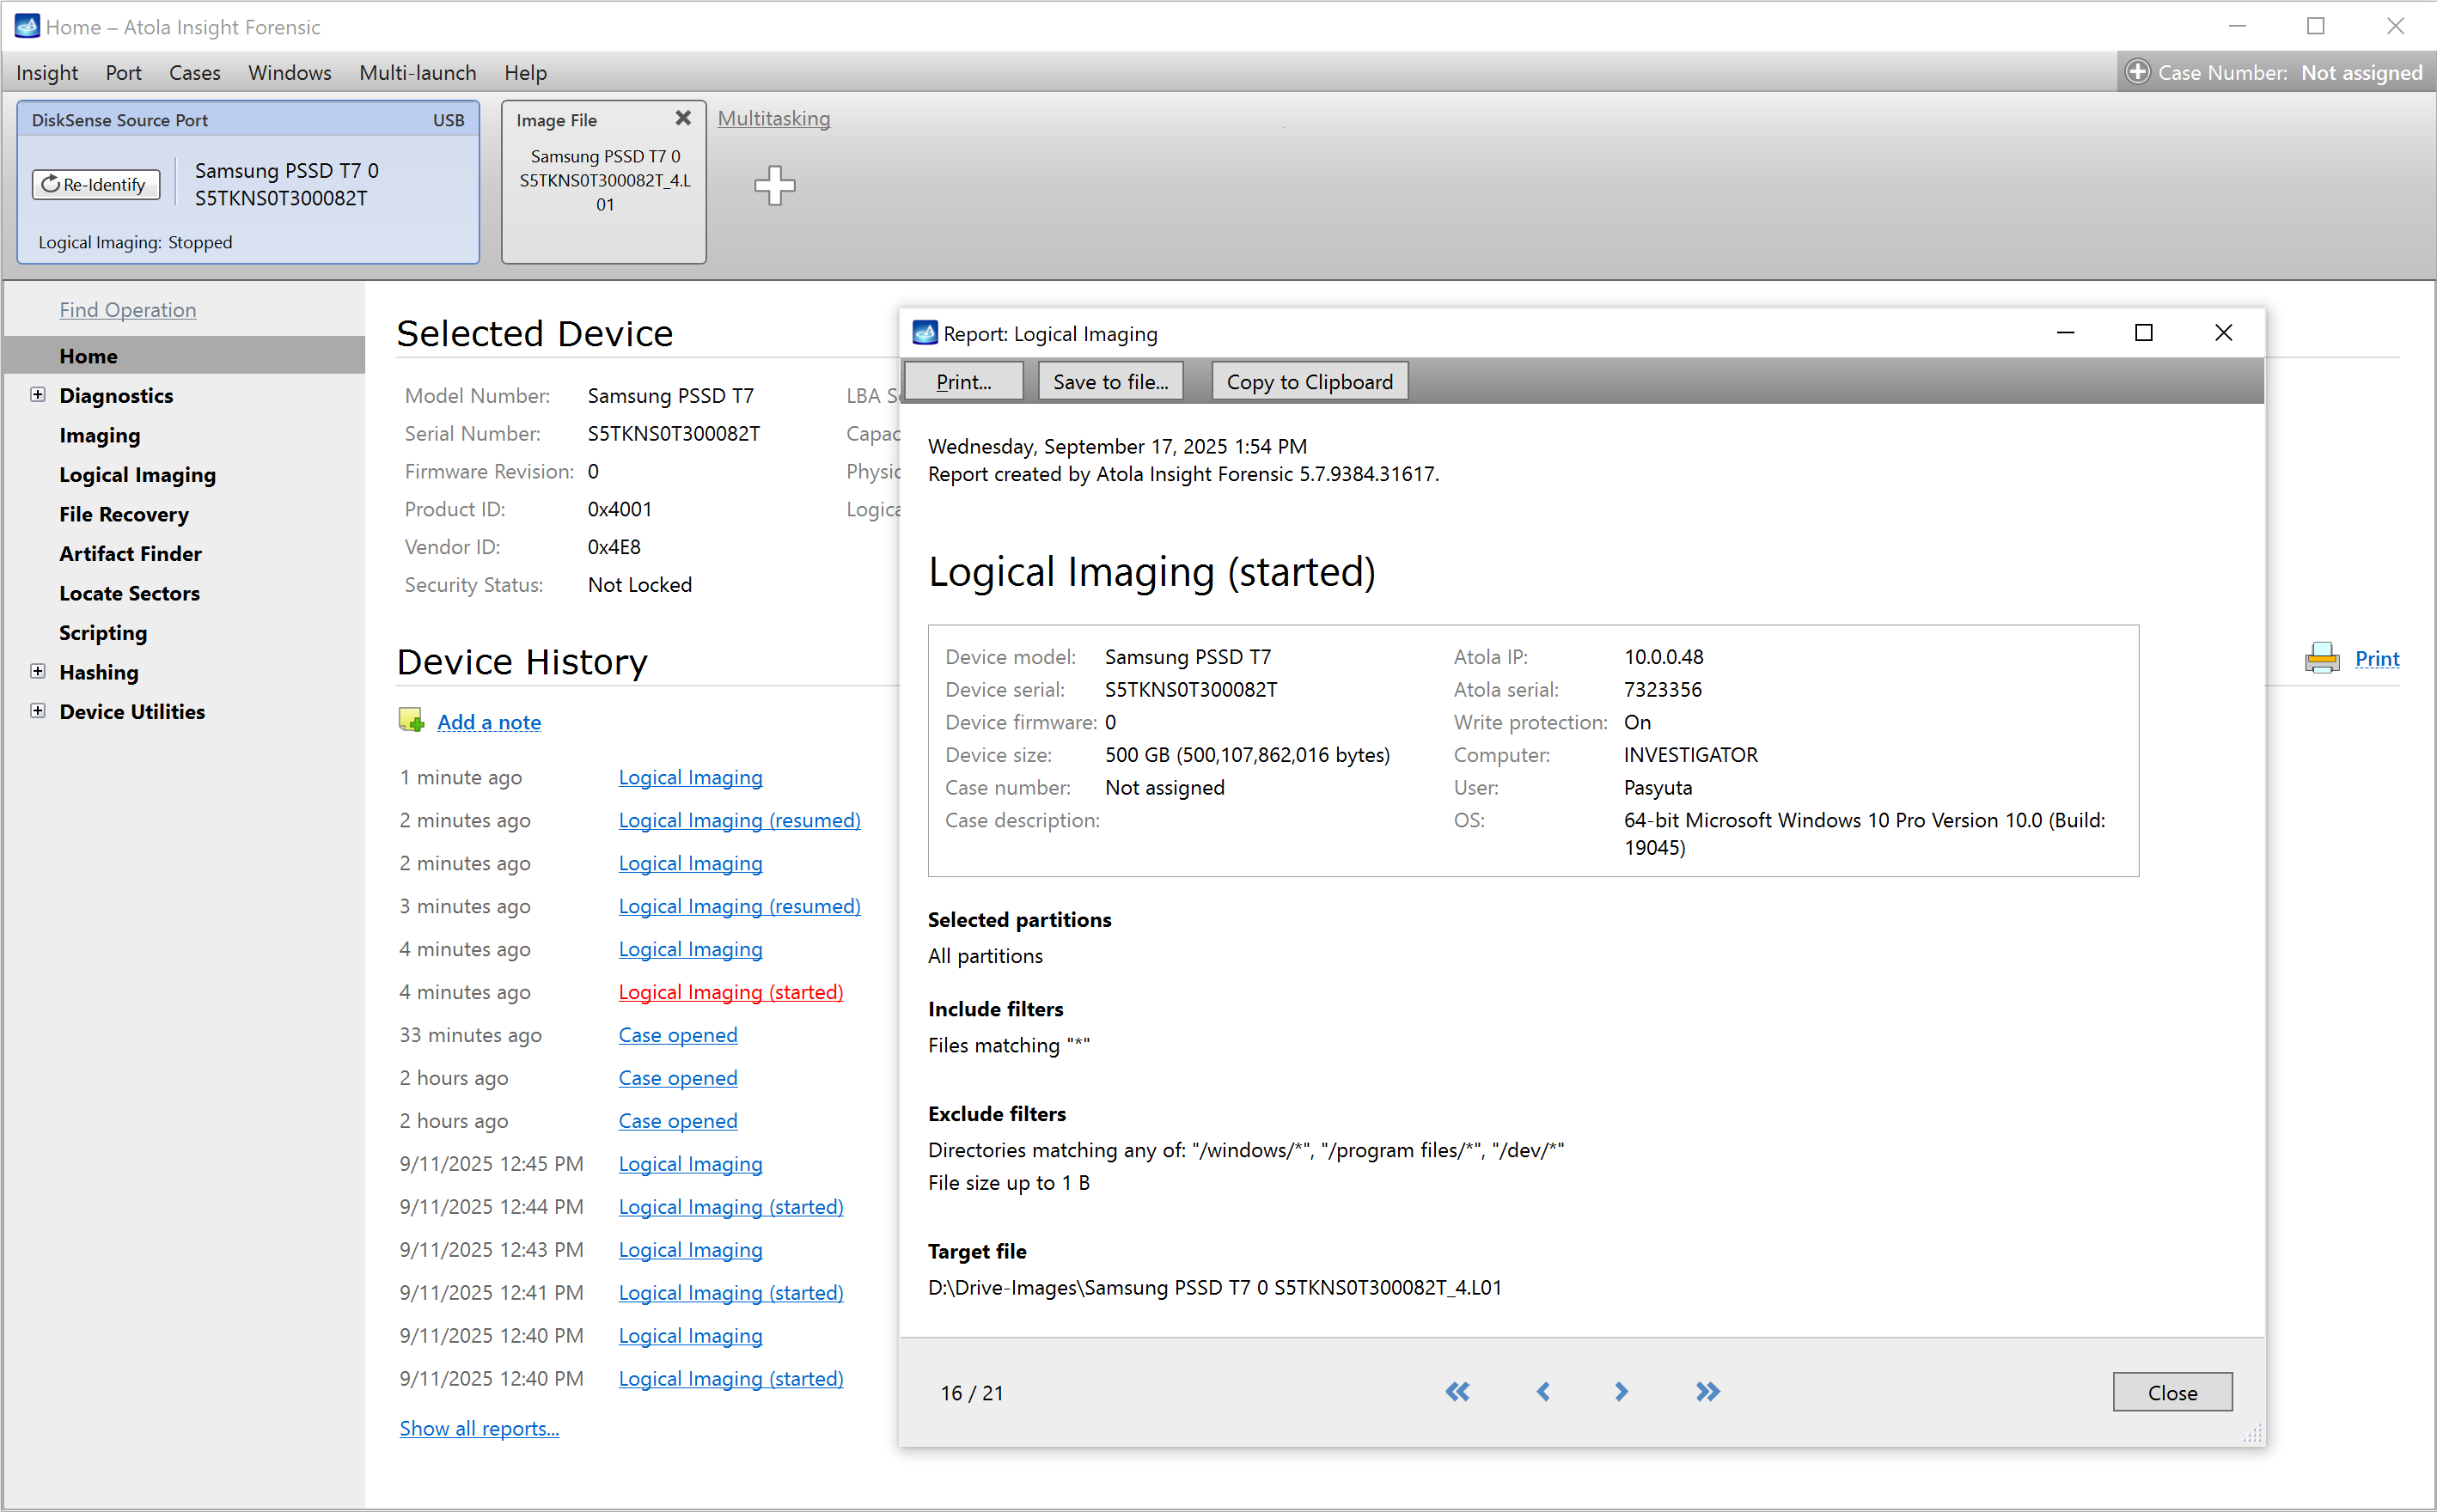
The 'Logical Imaging (started)' report.
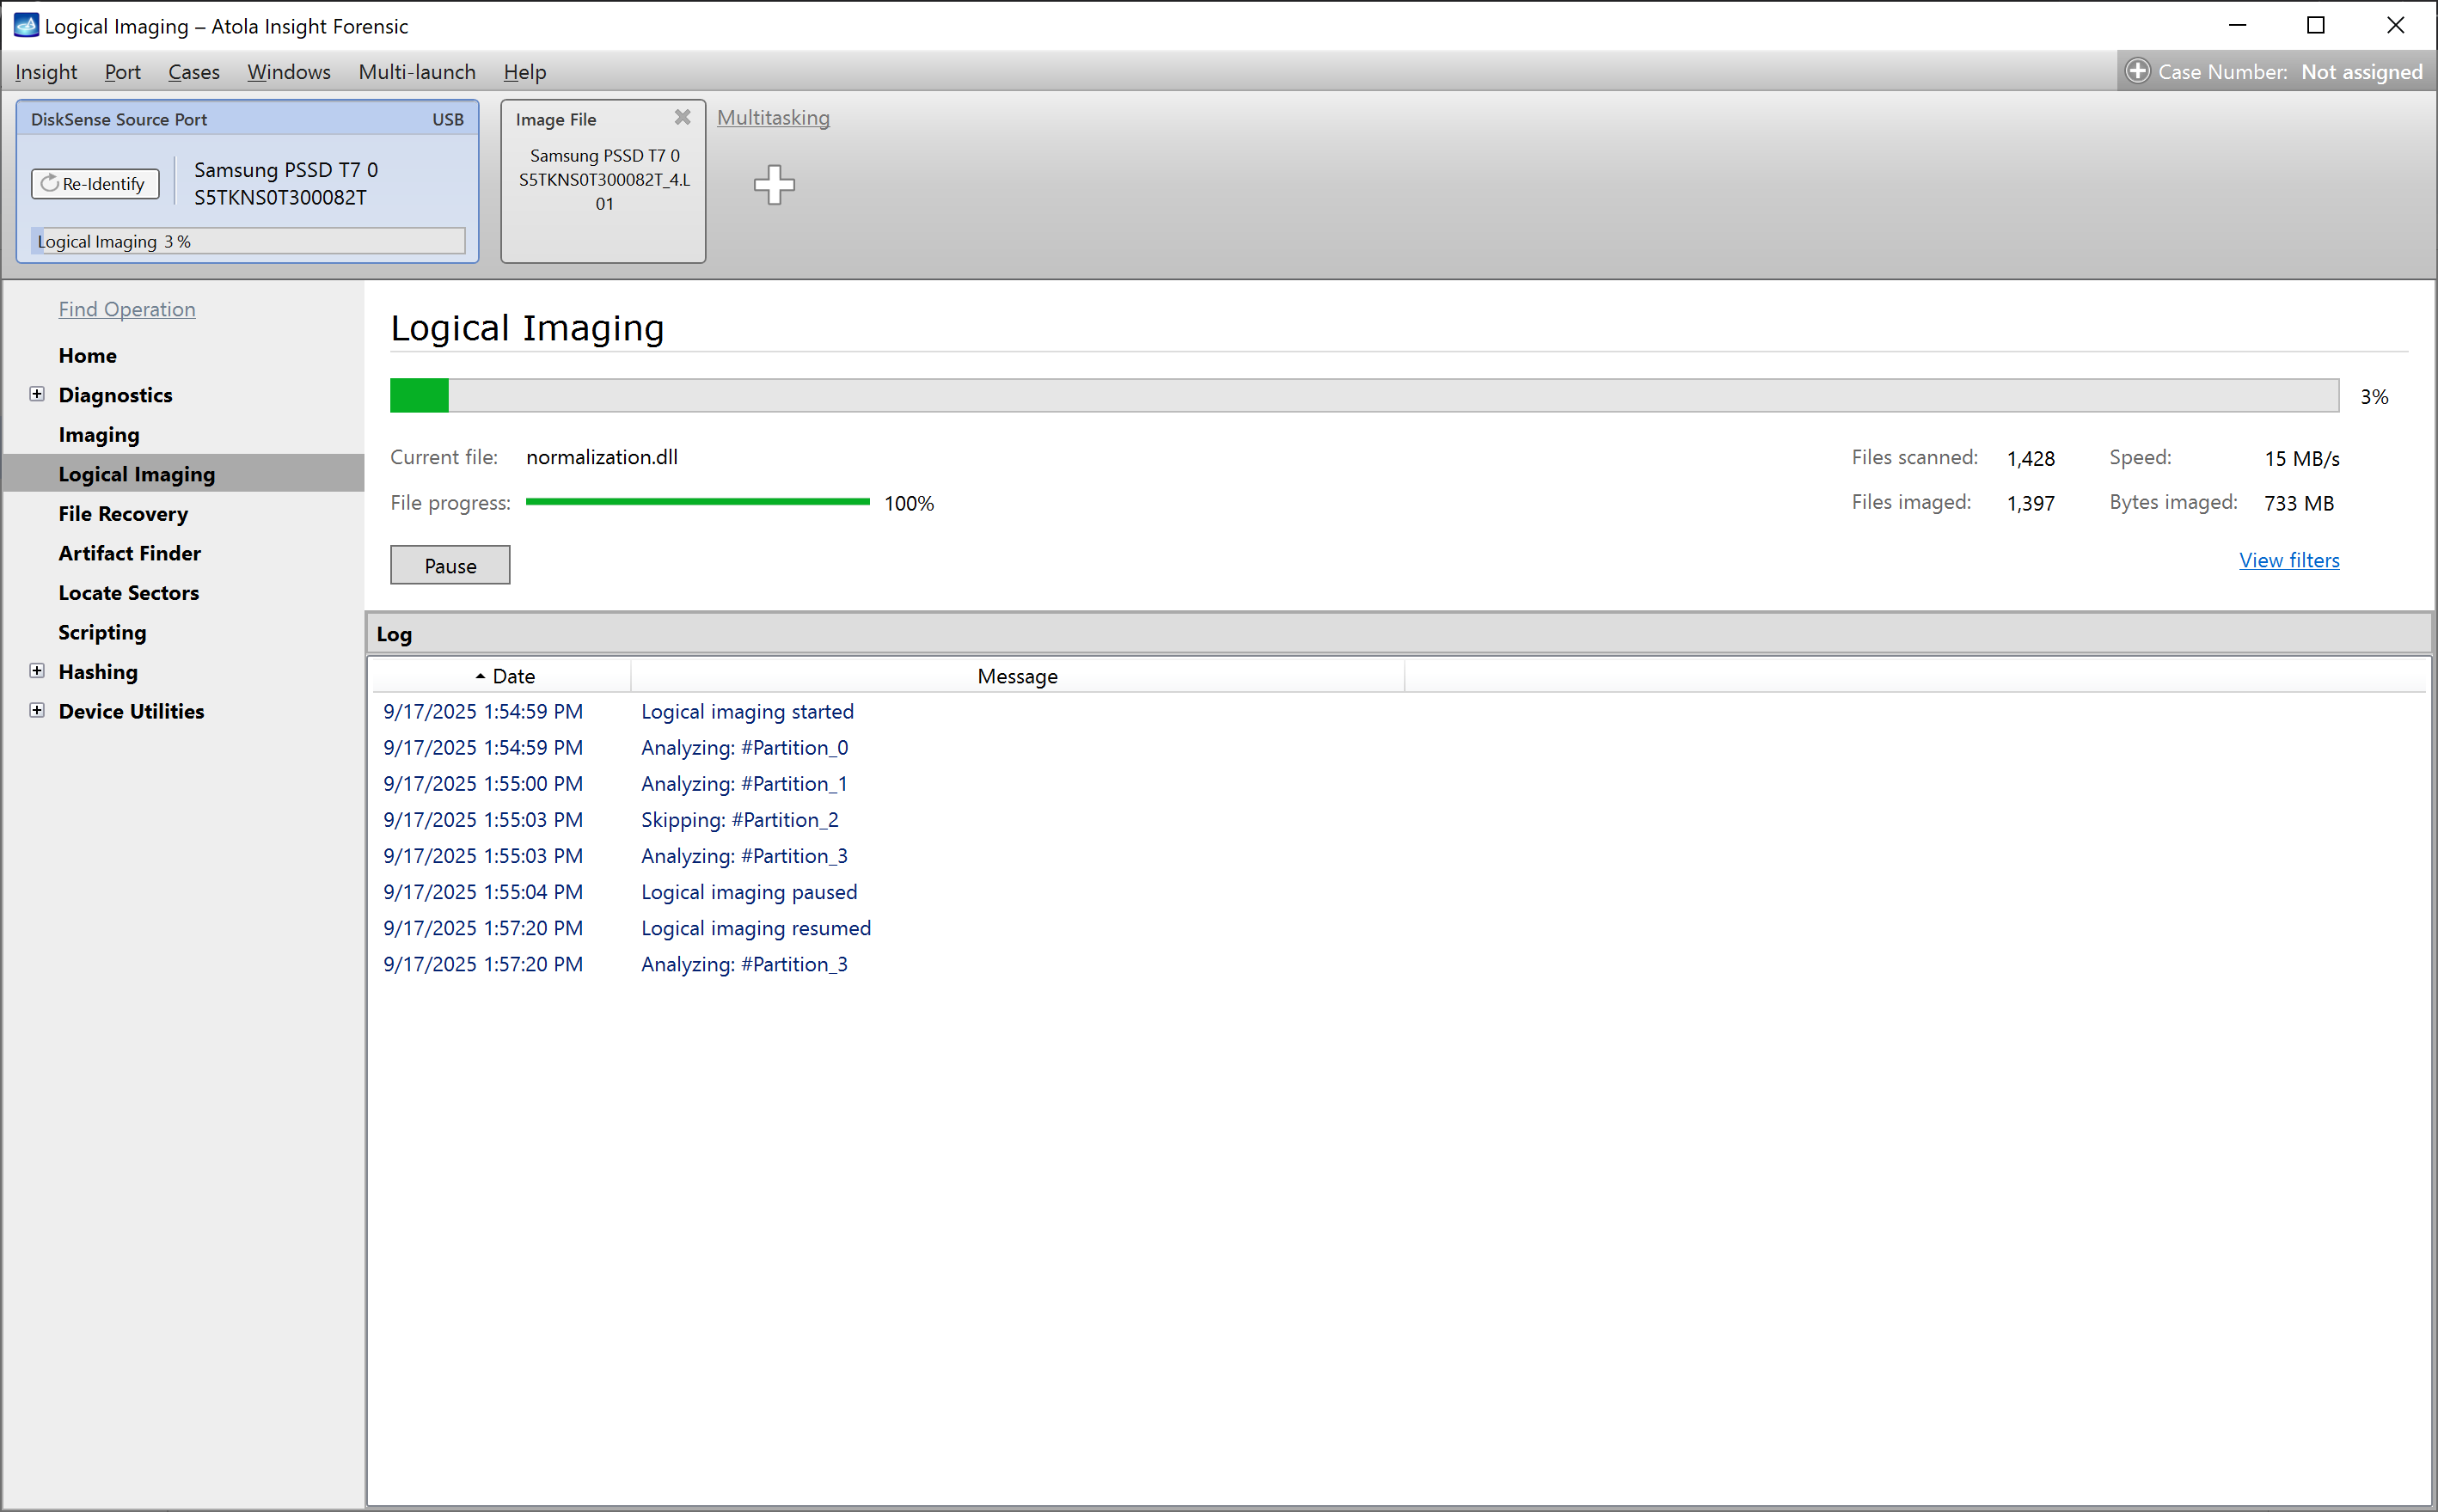
During the imaging process, you can track the progress of individual files.
To check the filtering parameters of the running session, click the View filters link on the right.
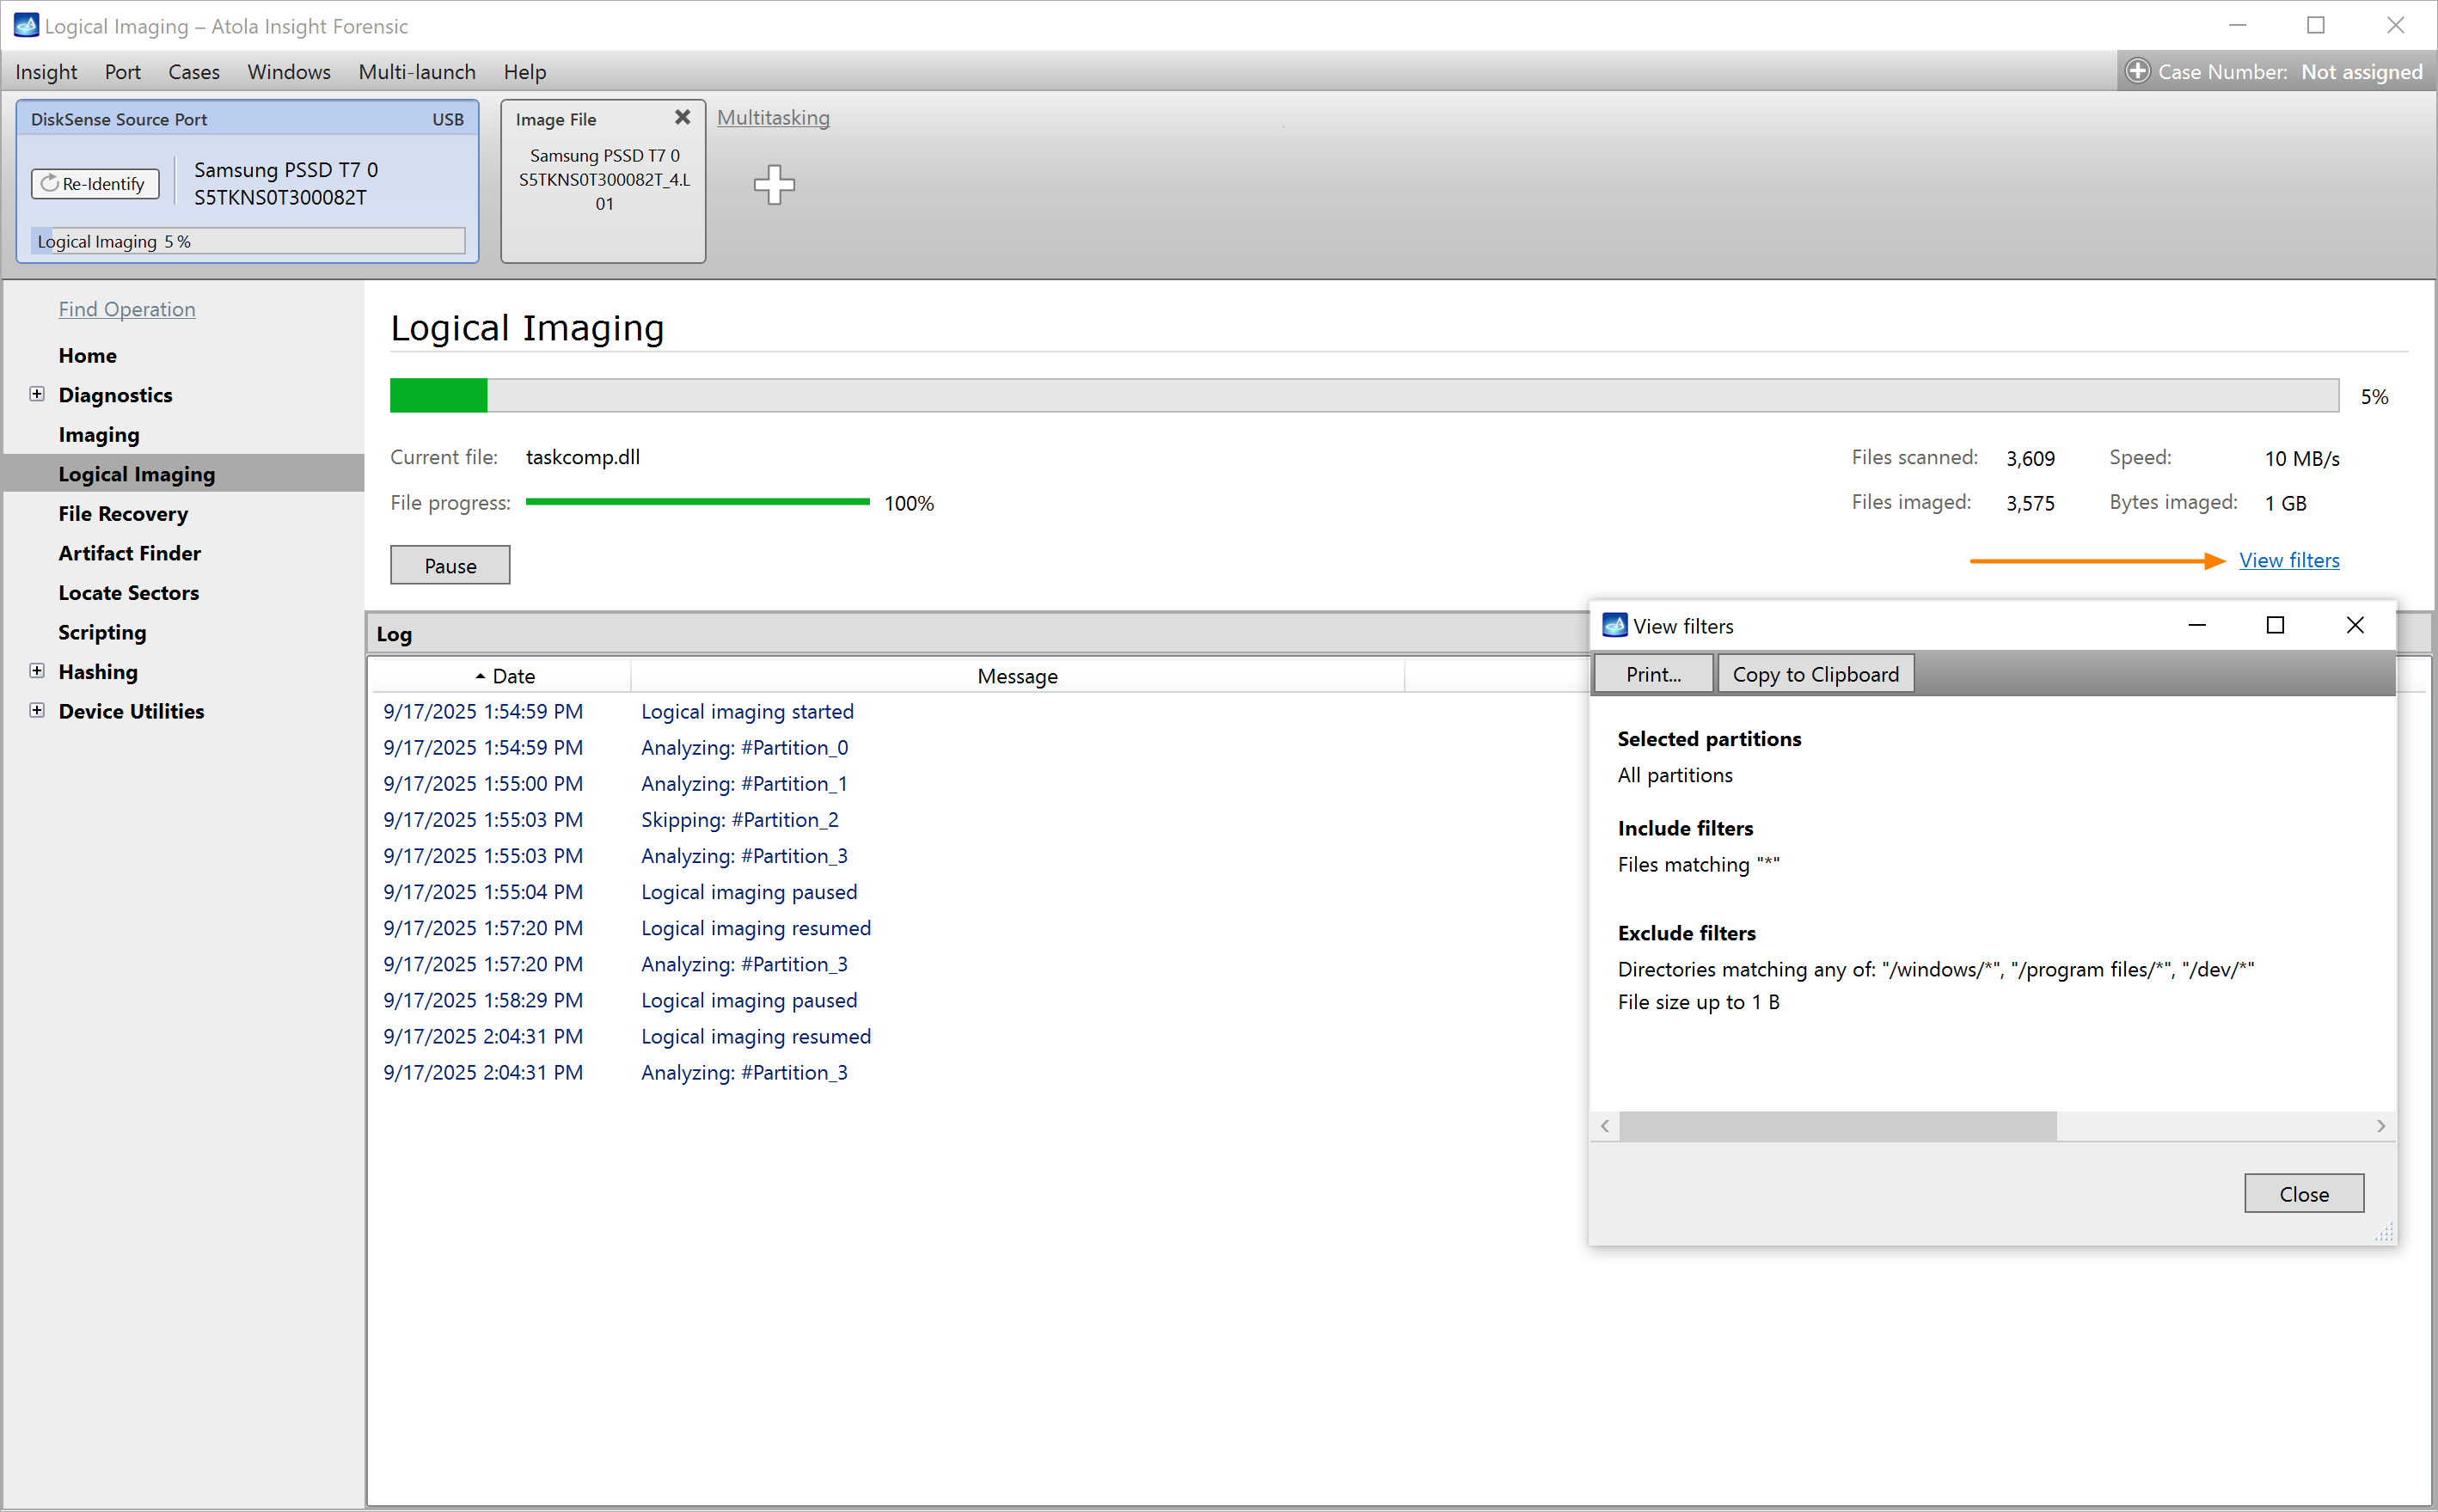
The 'View filters' option.
Pause and Resume
Insight lets you pause any logical imaging session and resume it later.
This feature could be helpful when you need to:
- Turn off your equipment and leave the lab for a night, or
- Continue a logical imaging process at a different location
Pause: While the logical imaging process is running, click the Pause button on the left.
Resume: In the Sidebar, click Logical, find your paused session and click the Resume button.
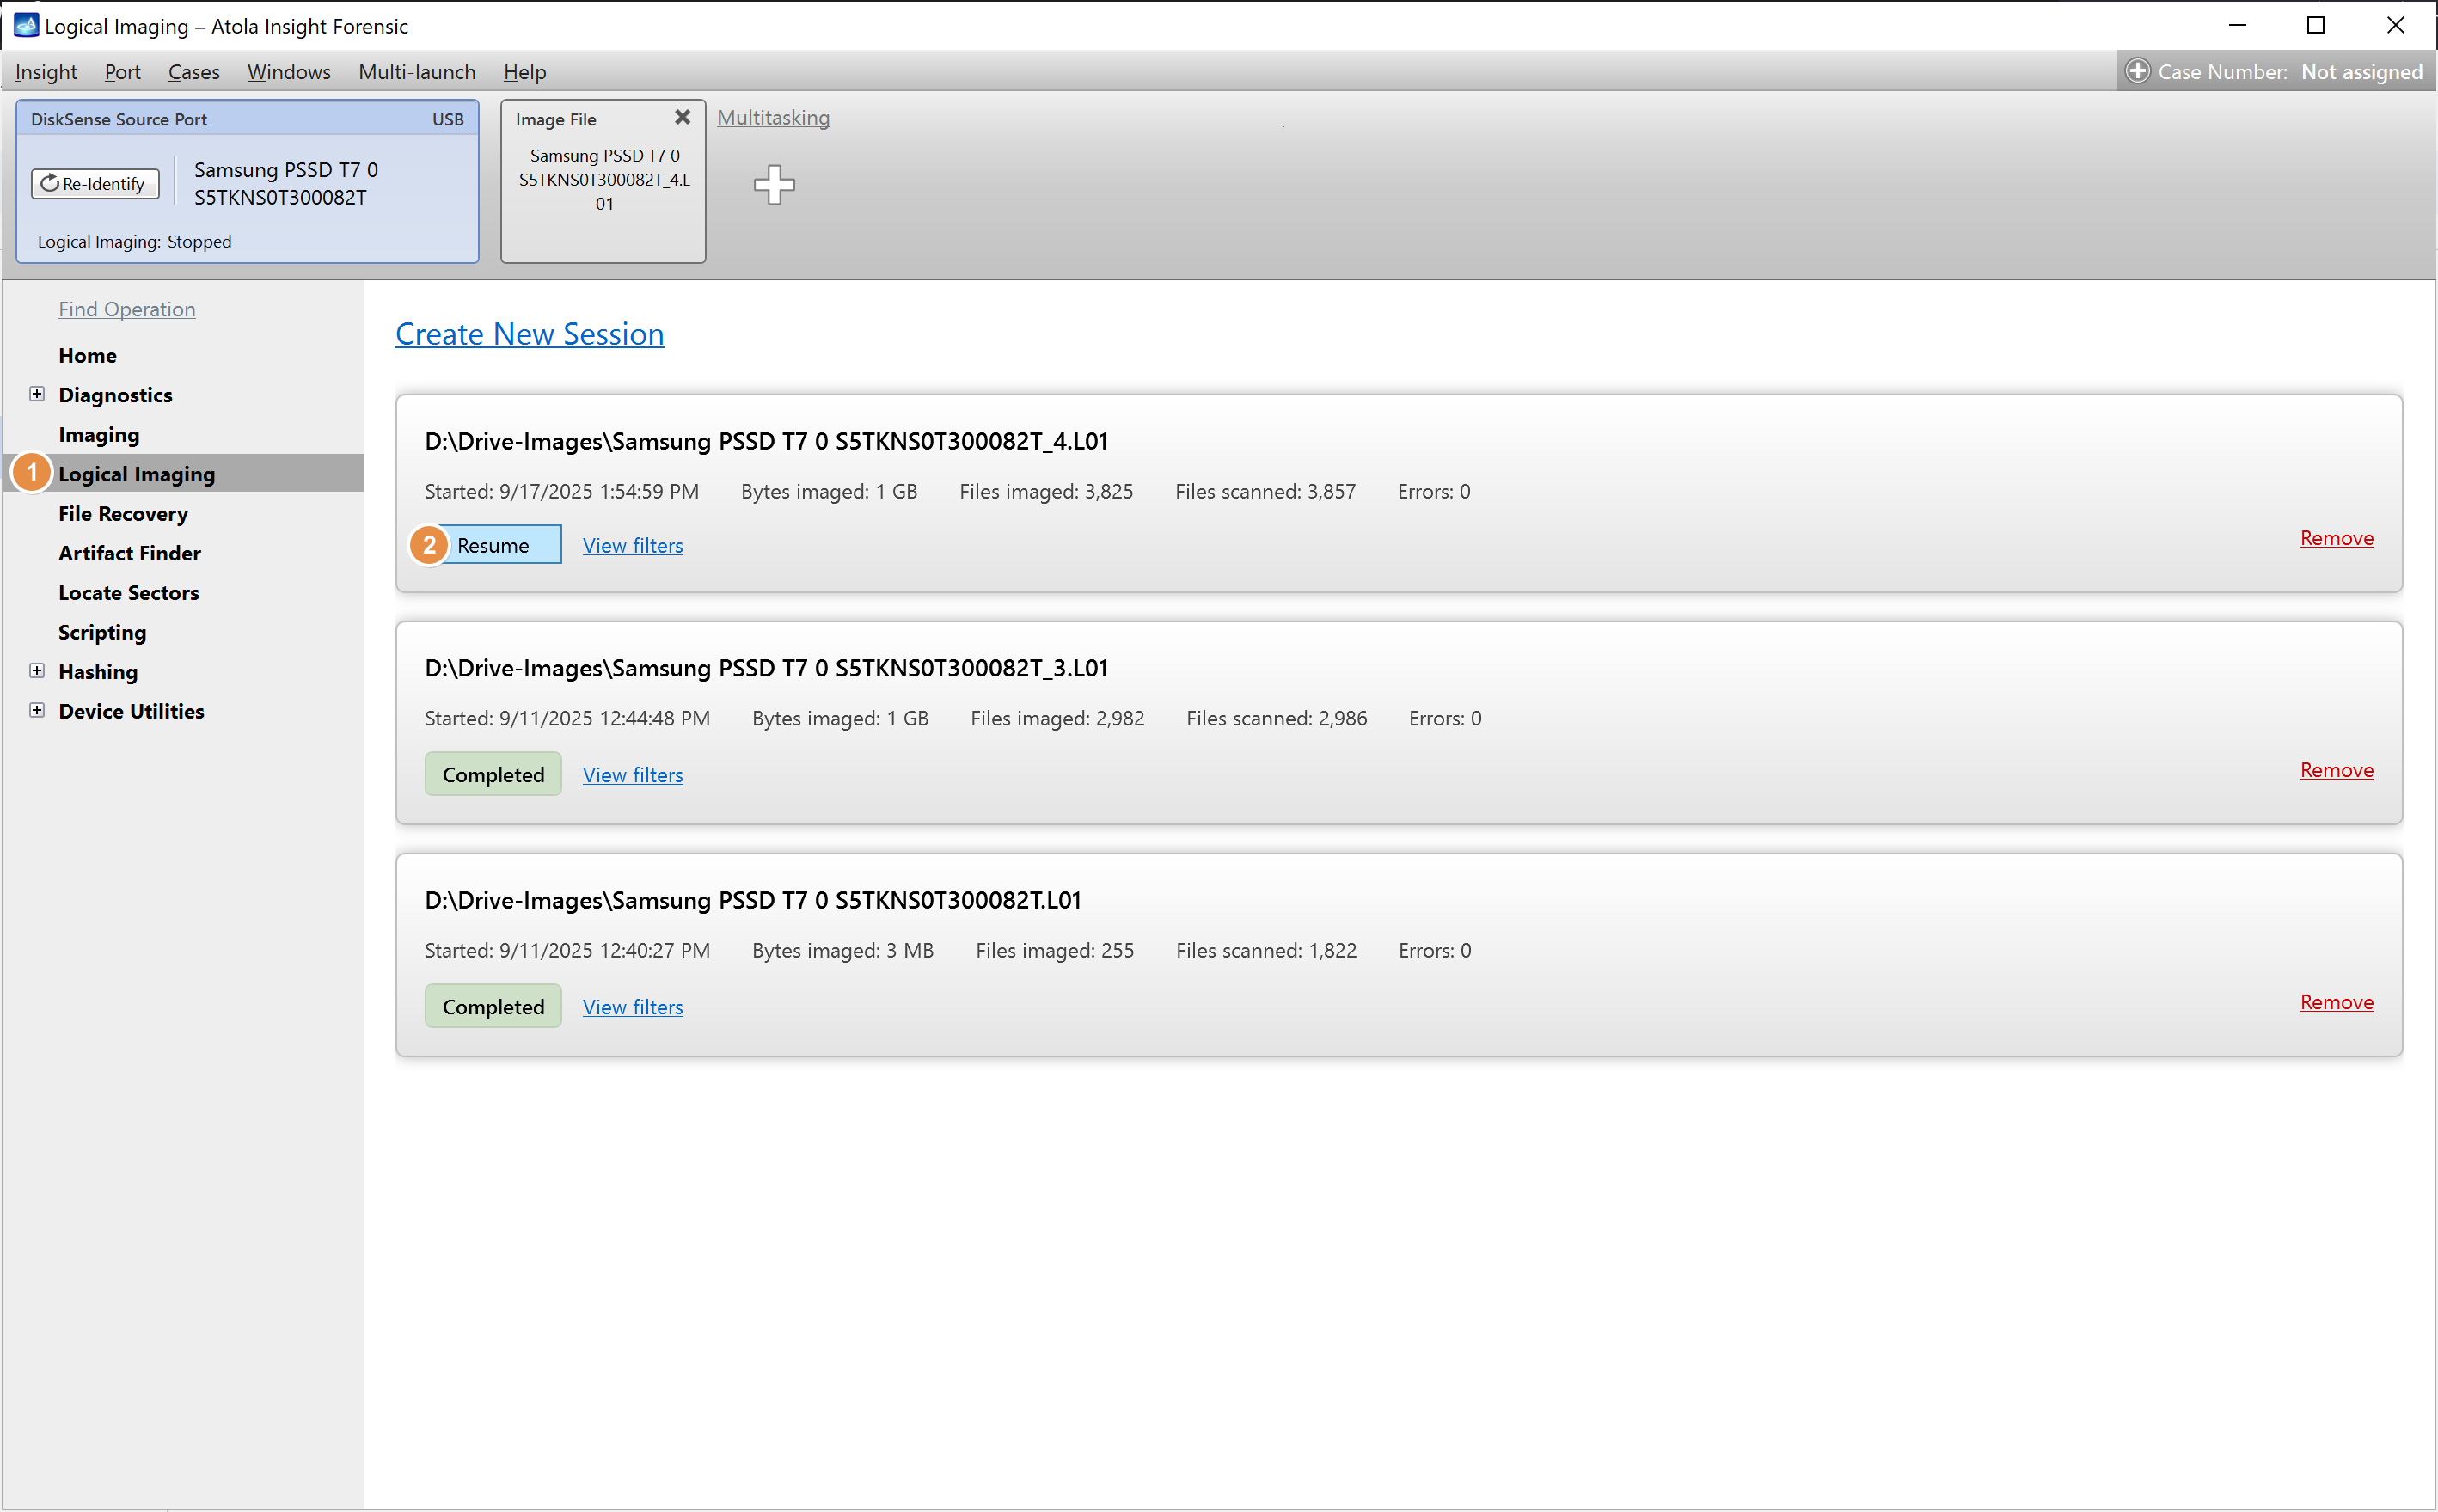
Resuming the paused logical imaging session.
Logical imaging report
After the logical imaging process is completed, Insight generates a comprehensive report with all the details of the imaged data:
- The number of scanned and imaged files
- The volume of imaged data
- Timestamps
- and more
You can find the Logical imaging report on the device Home screen, in the Device history section.
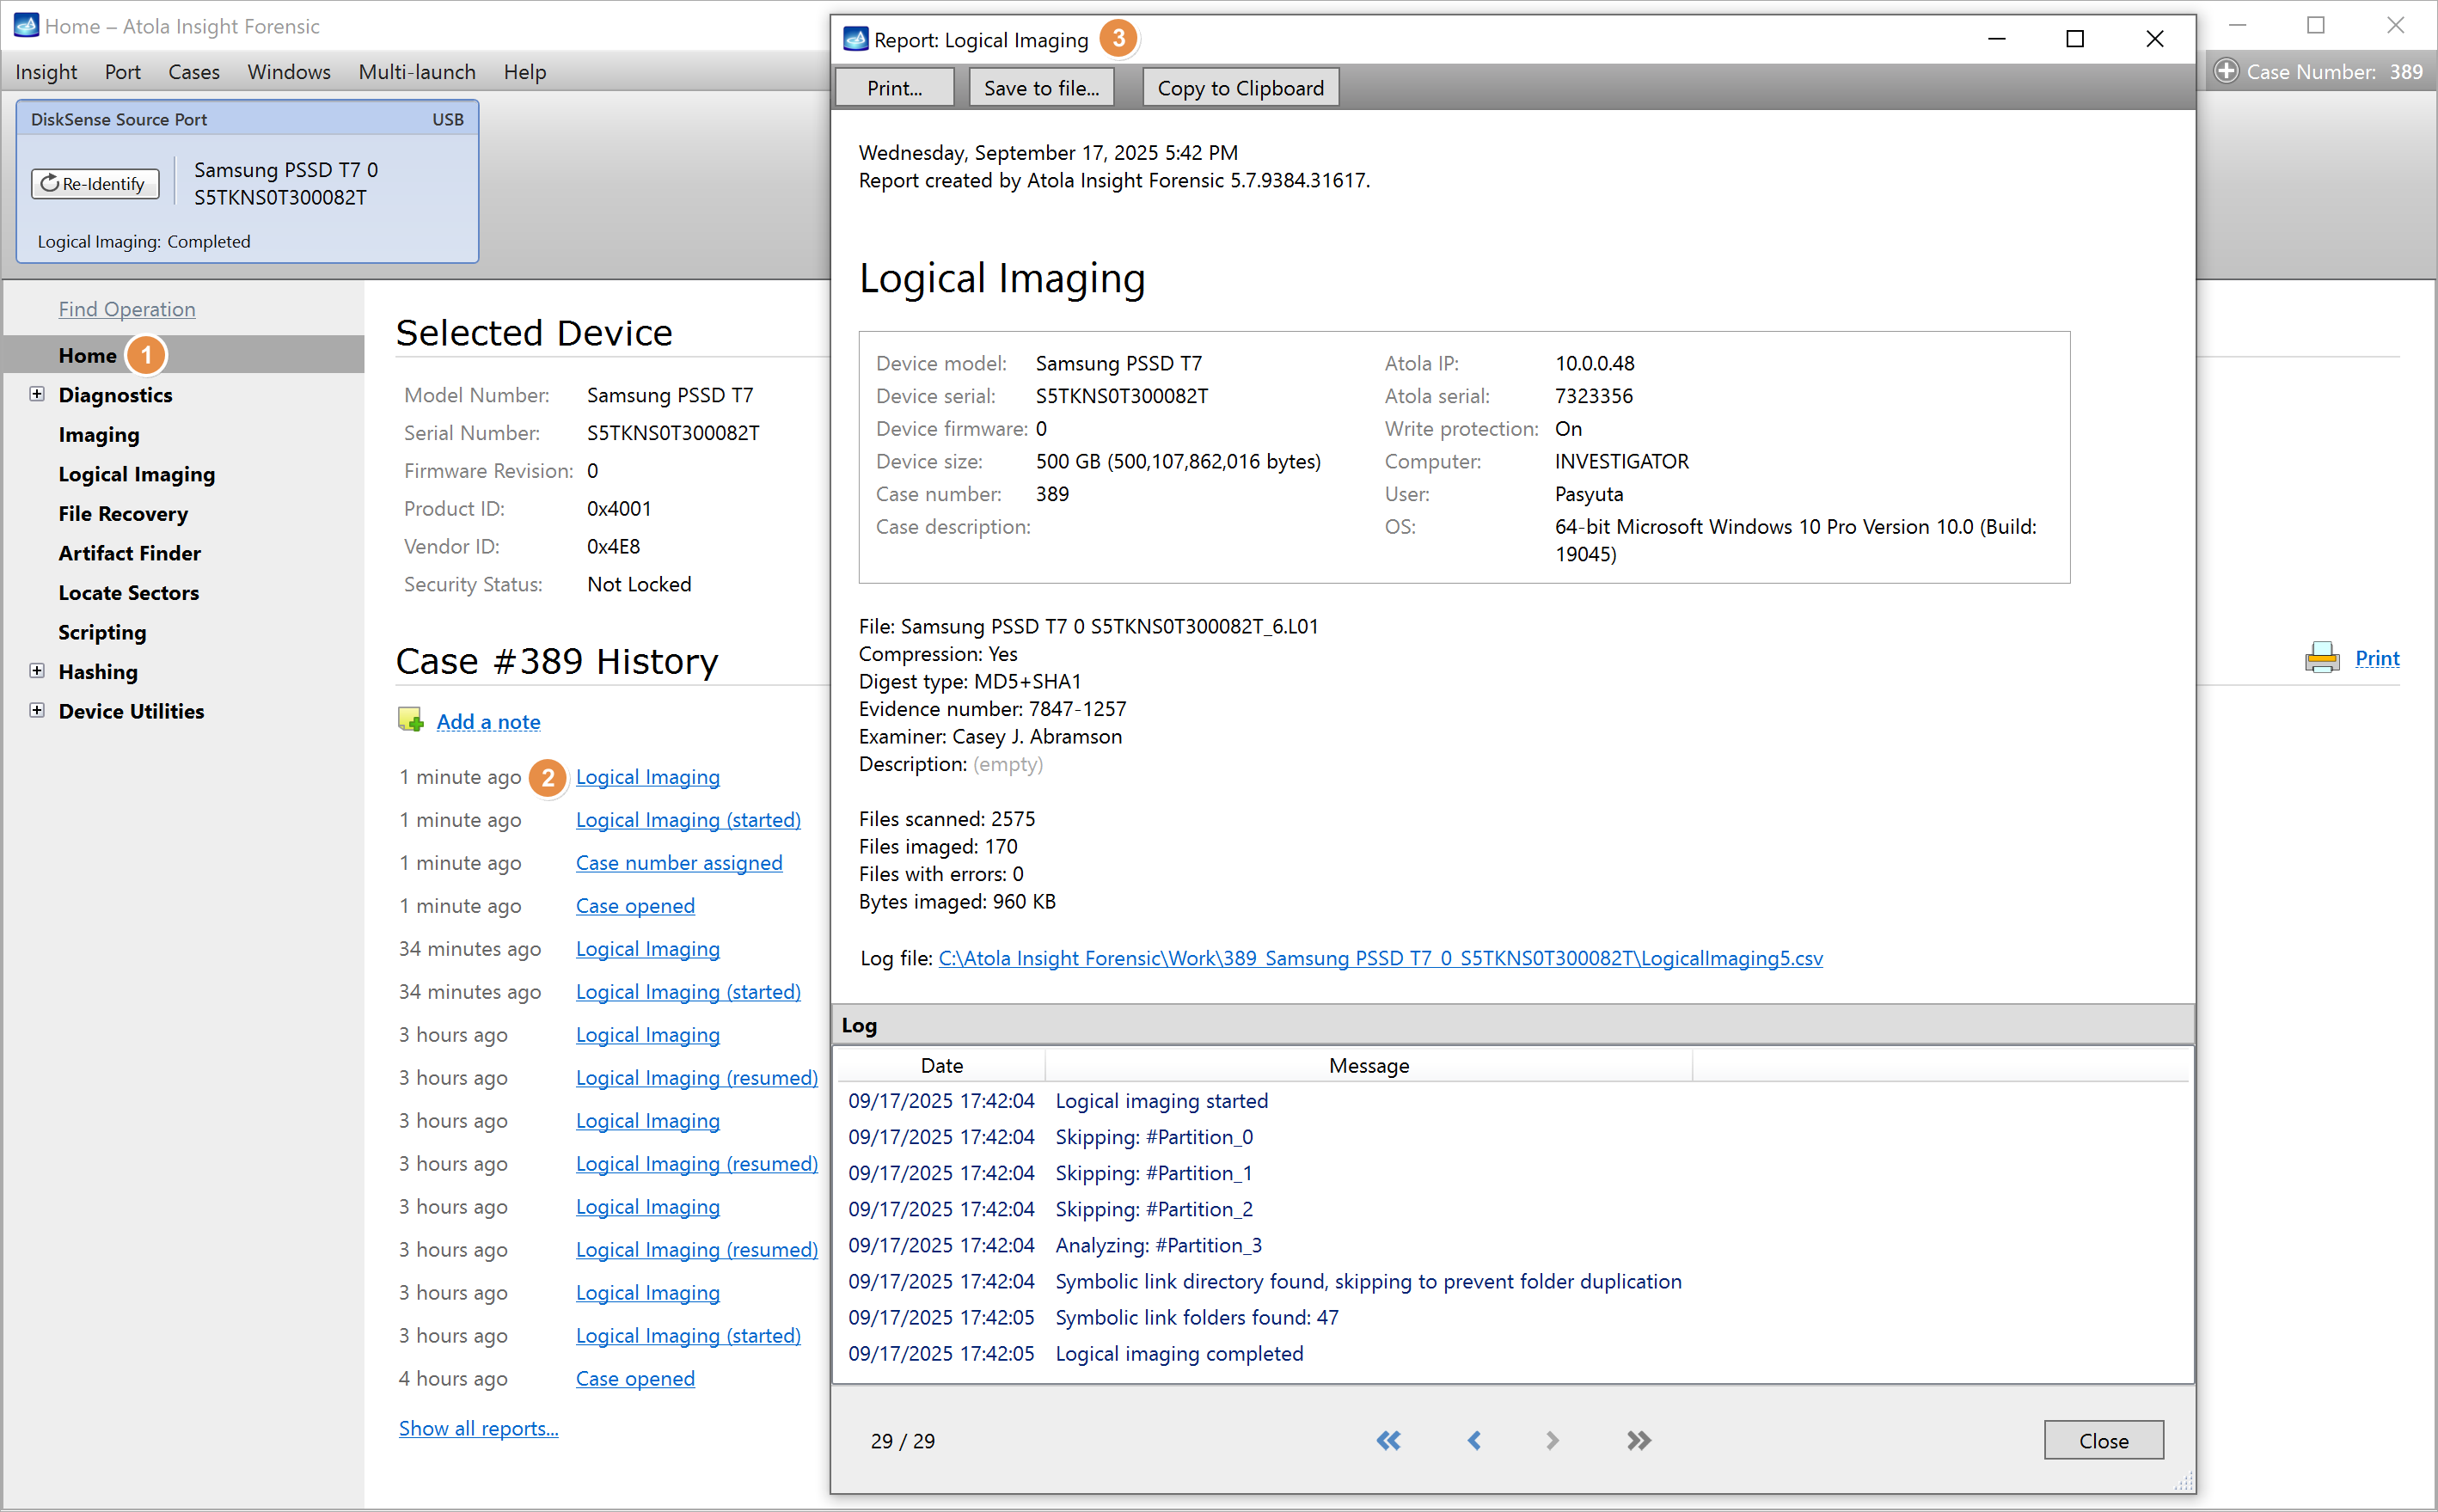
The Logical imaging report.