Artifact Finder
Atola Insight Forensic's Artifact Finder feature allows early analysis of data by reading and parsing data on an evidence drive or its images.
Unlike most forensic analysis tools that parse the file structure, Insight does sector-level parsing, which allows getting data even from the spaces of the drive that are not associated with any file (e.g. remnants of previously deleted documents), thus providing you with clues that are omitted by most analysis tools. Artifact finder uses Intel Hyperscan engine, which makes it the fastest possible tool for early data analysis.
The artifacts include:
- Keywords
- Regular expressions
- Bitcoin and Ethereum wallet addresses
- BIP39 mnemonic phrases
- Credit cards
- Emails
- GPS coordinates
- IP
- MAC
- Phone numbers
- URL
In addition to the widely known filter algorithms for proper result filtering (such as the Luhn formula used to validate credit card numbers), more custom smart filters were applied to eliminate false results (e.g. two slashes next to a number that has preliminarily been identified as a credit card number, will eliminate it from the search results, as it is likely to be a part of a URL).
Find artifacts during imaging
Expedite analysis of data on source drives, by searching for artifacts during imaging. Specific categories of artifacts can be selected in imaging settings.
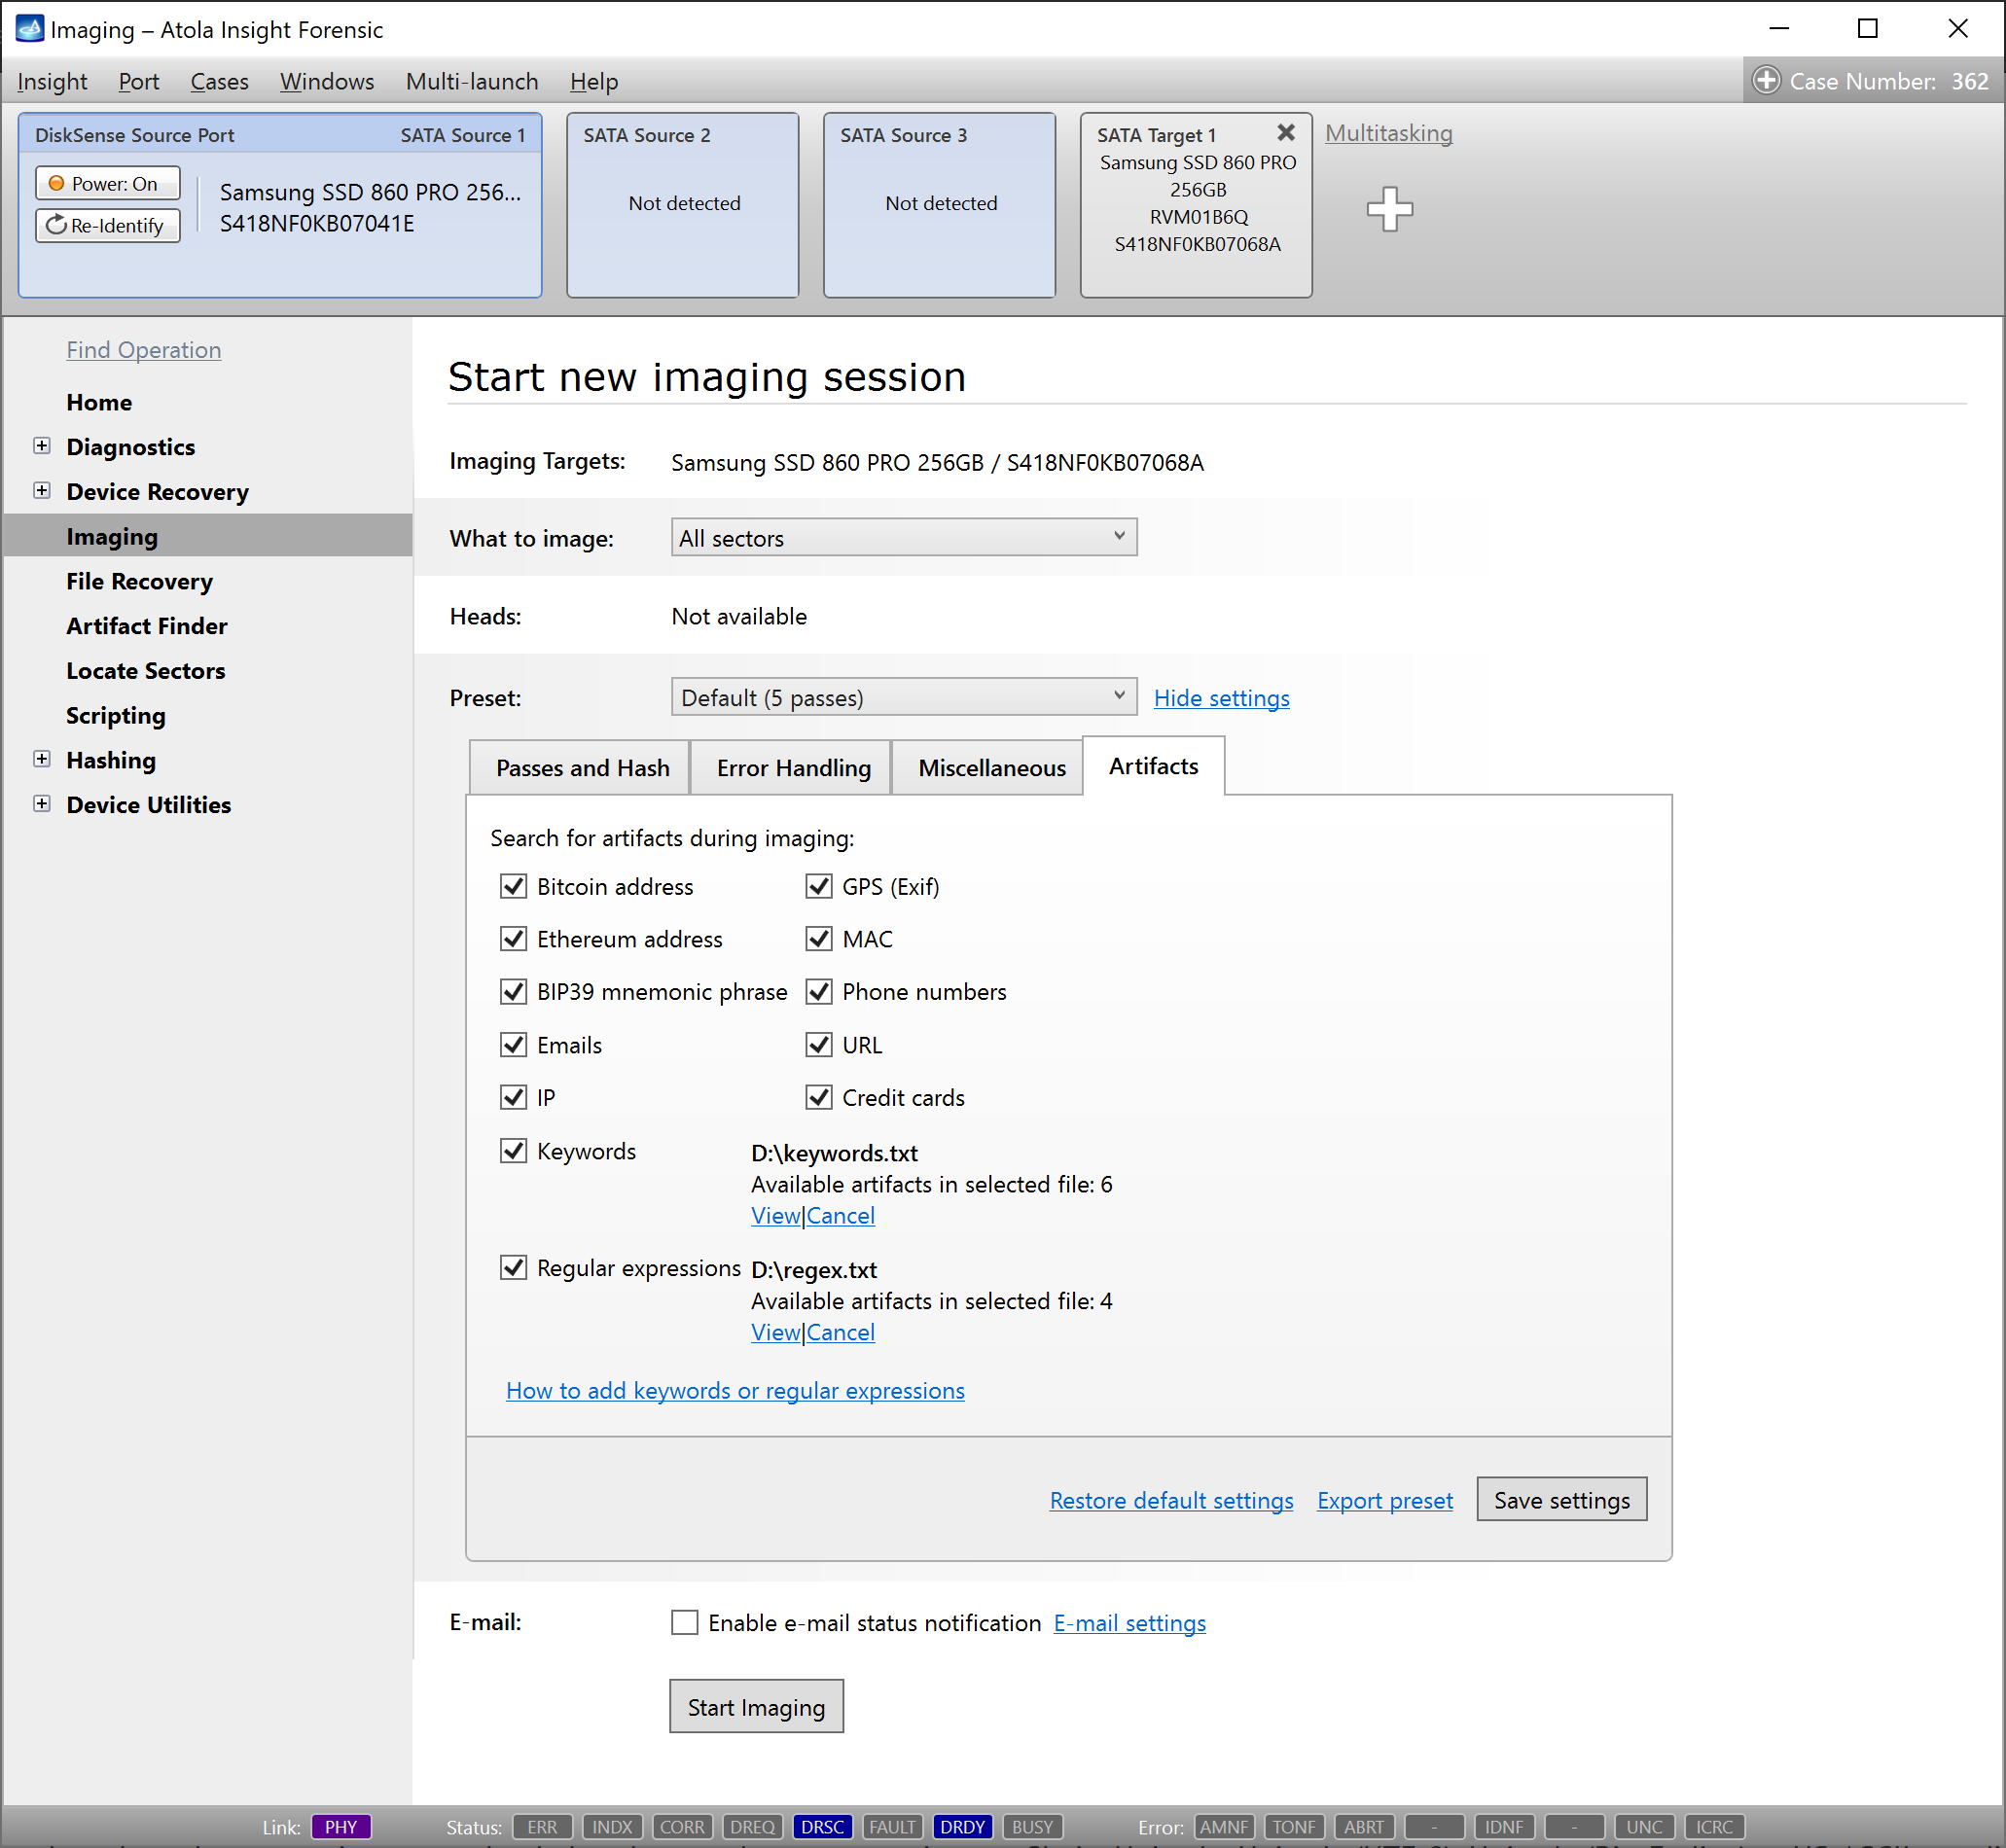
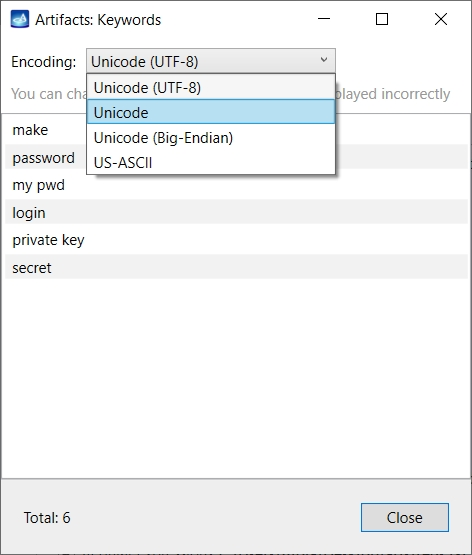
Keywords and regular expressions are uploaded to the search parameters in a txt file in Unicode, Unicode (UTF-8), Unicode (Big-Endian) or US-ASCII encoding.
Bitcoin wallet address search supports P2PKH, P2SH, P2WPKH, and P2TR types.
Search options for BIP39 mnemonic phrase are:
- Case-insensitive search,
- ASCII, UTF-8, UTF-16 encodings,
- English and Portuguese languages.
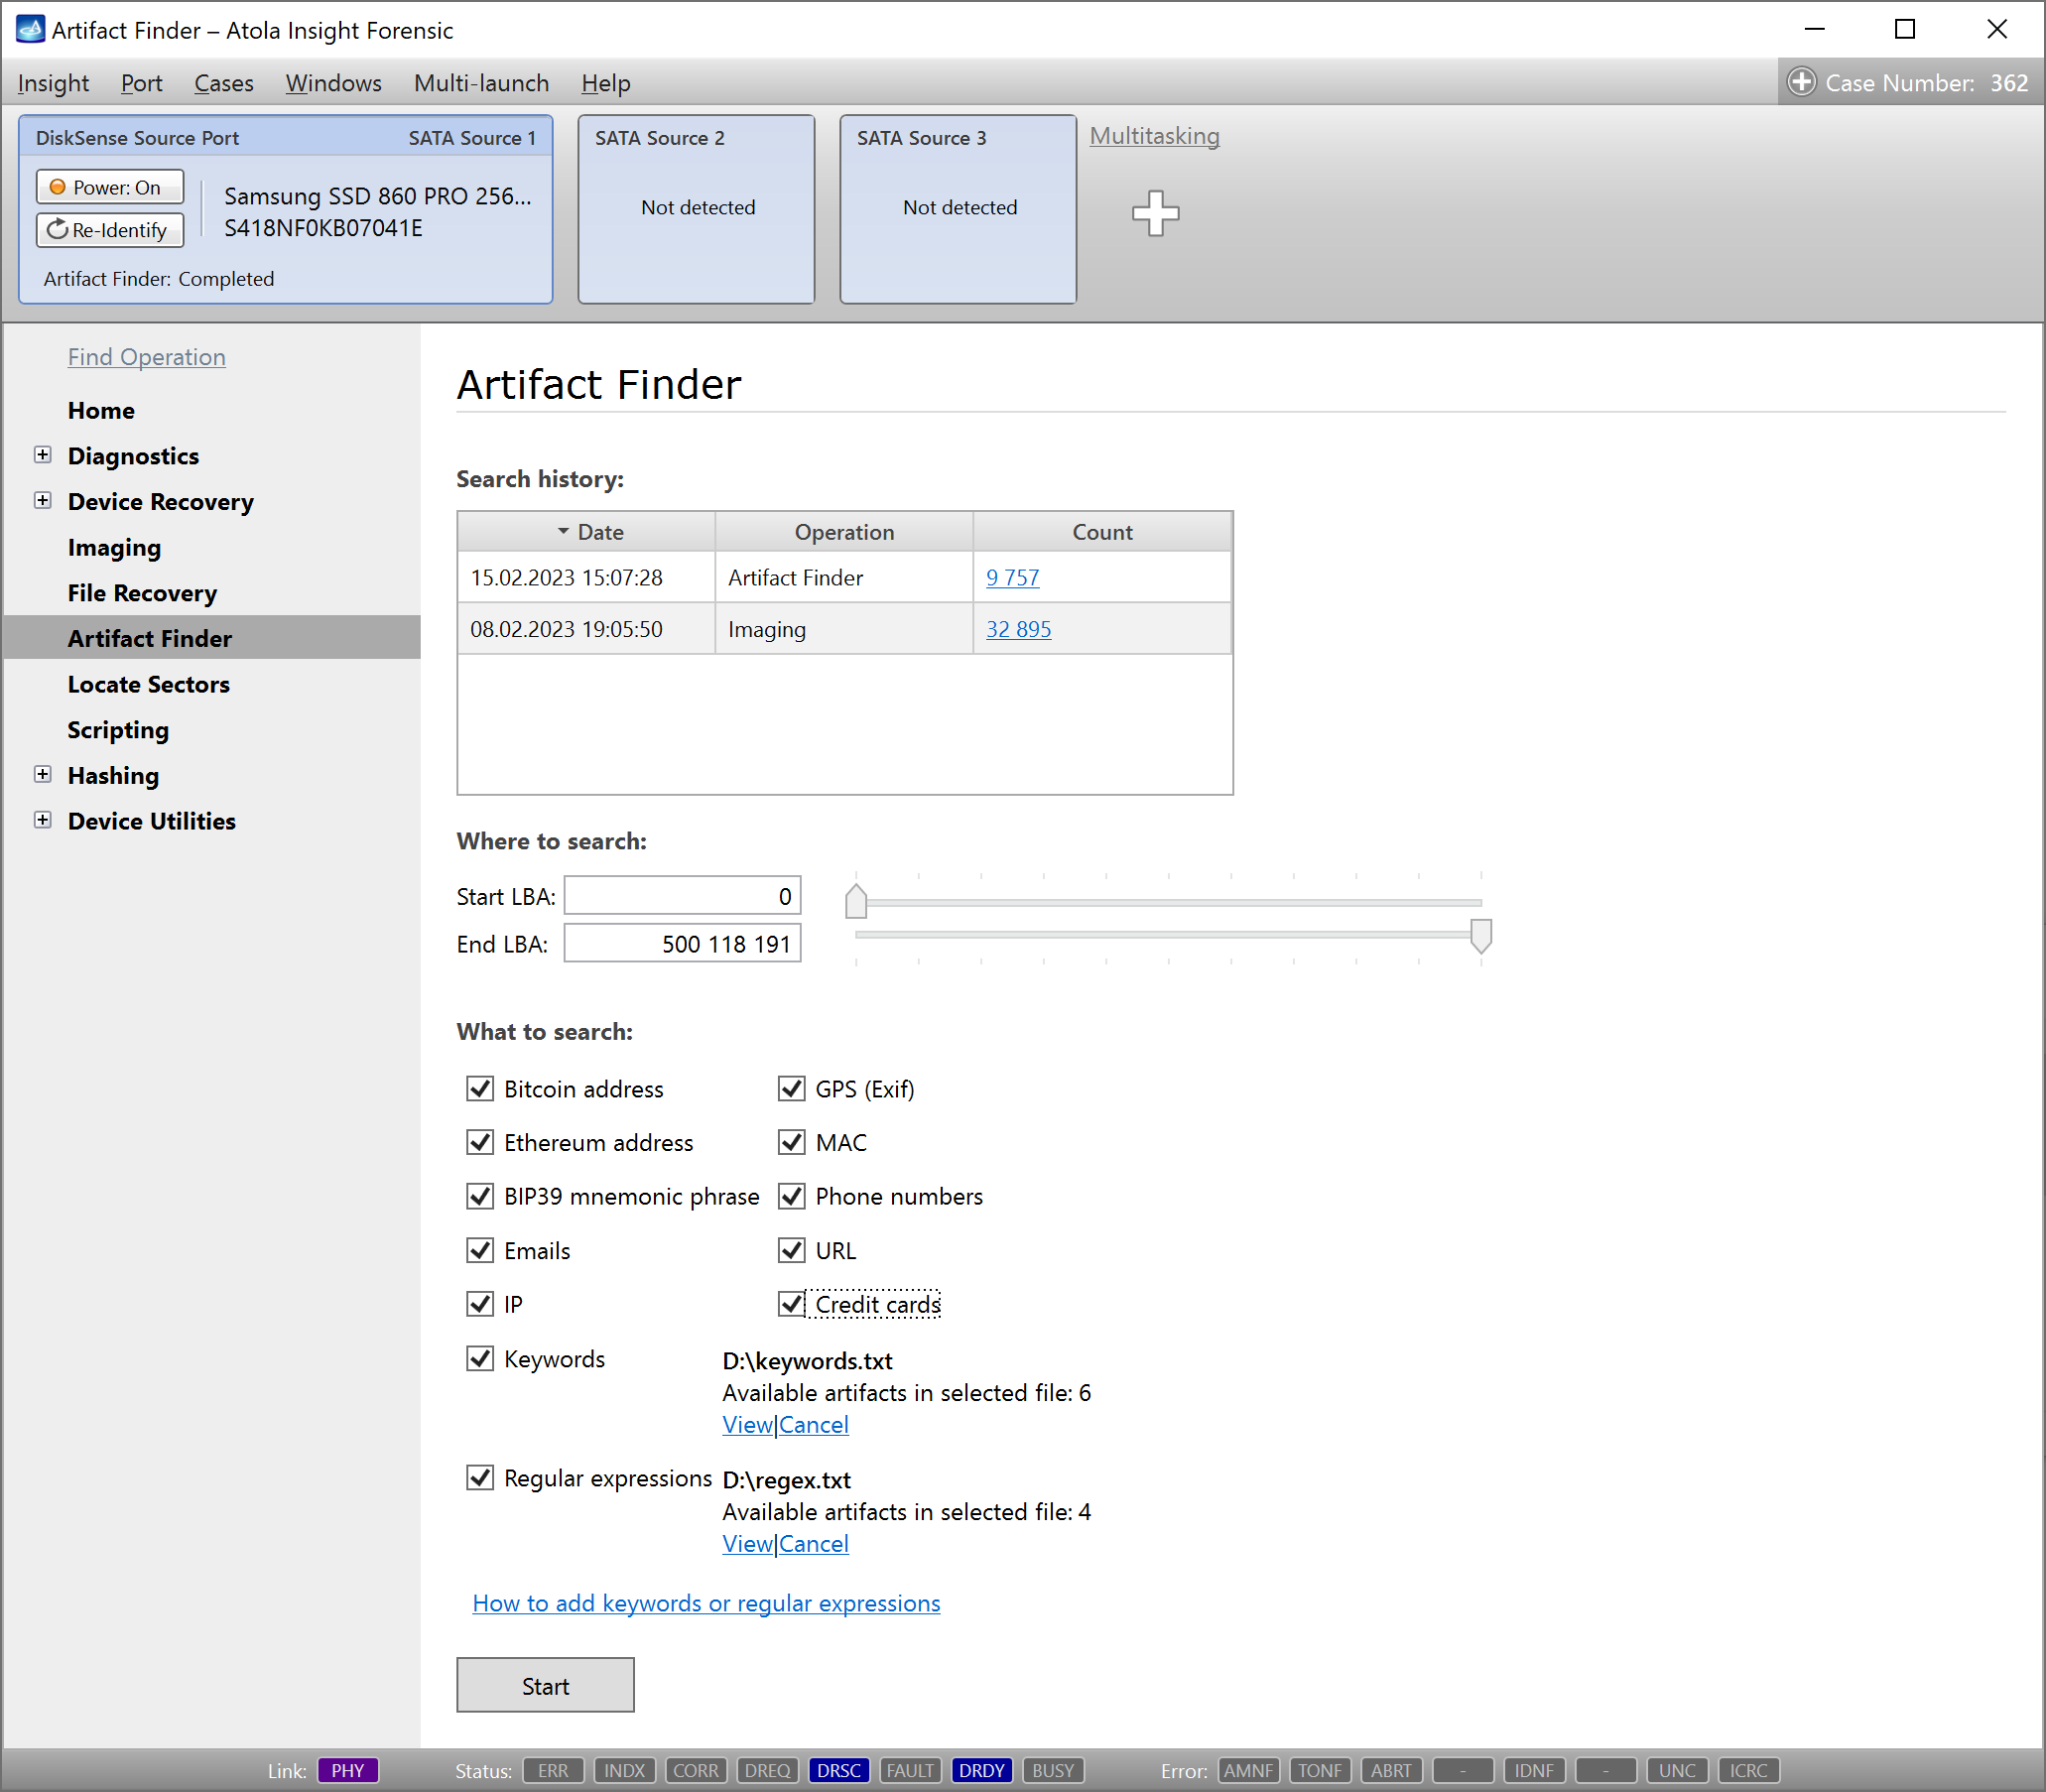
Search with Artifact Finder
Artifact Finder is a separate feature which enables search of artifacts on either sources or targets. Insight supports multiple simultaneous artifact search sessions.
All previous artifact searches performed on the current drive including those performed during imaging, are displayed in the Artifact Finder page.
Study artifacts on the go
Whether the search is performed during imaging or as a separate task, it is possible to look at the list of the artifacts in the progress, by clicking the categories in the diagram or the list next to it in the Artifacts tab below the progress bar.
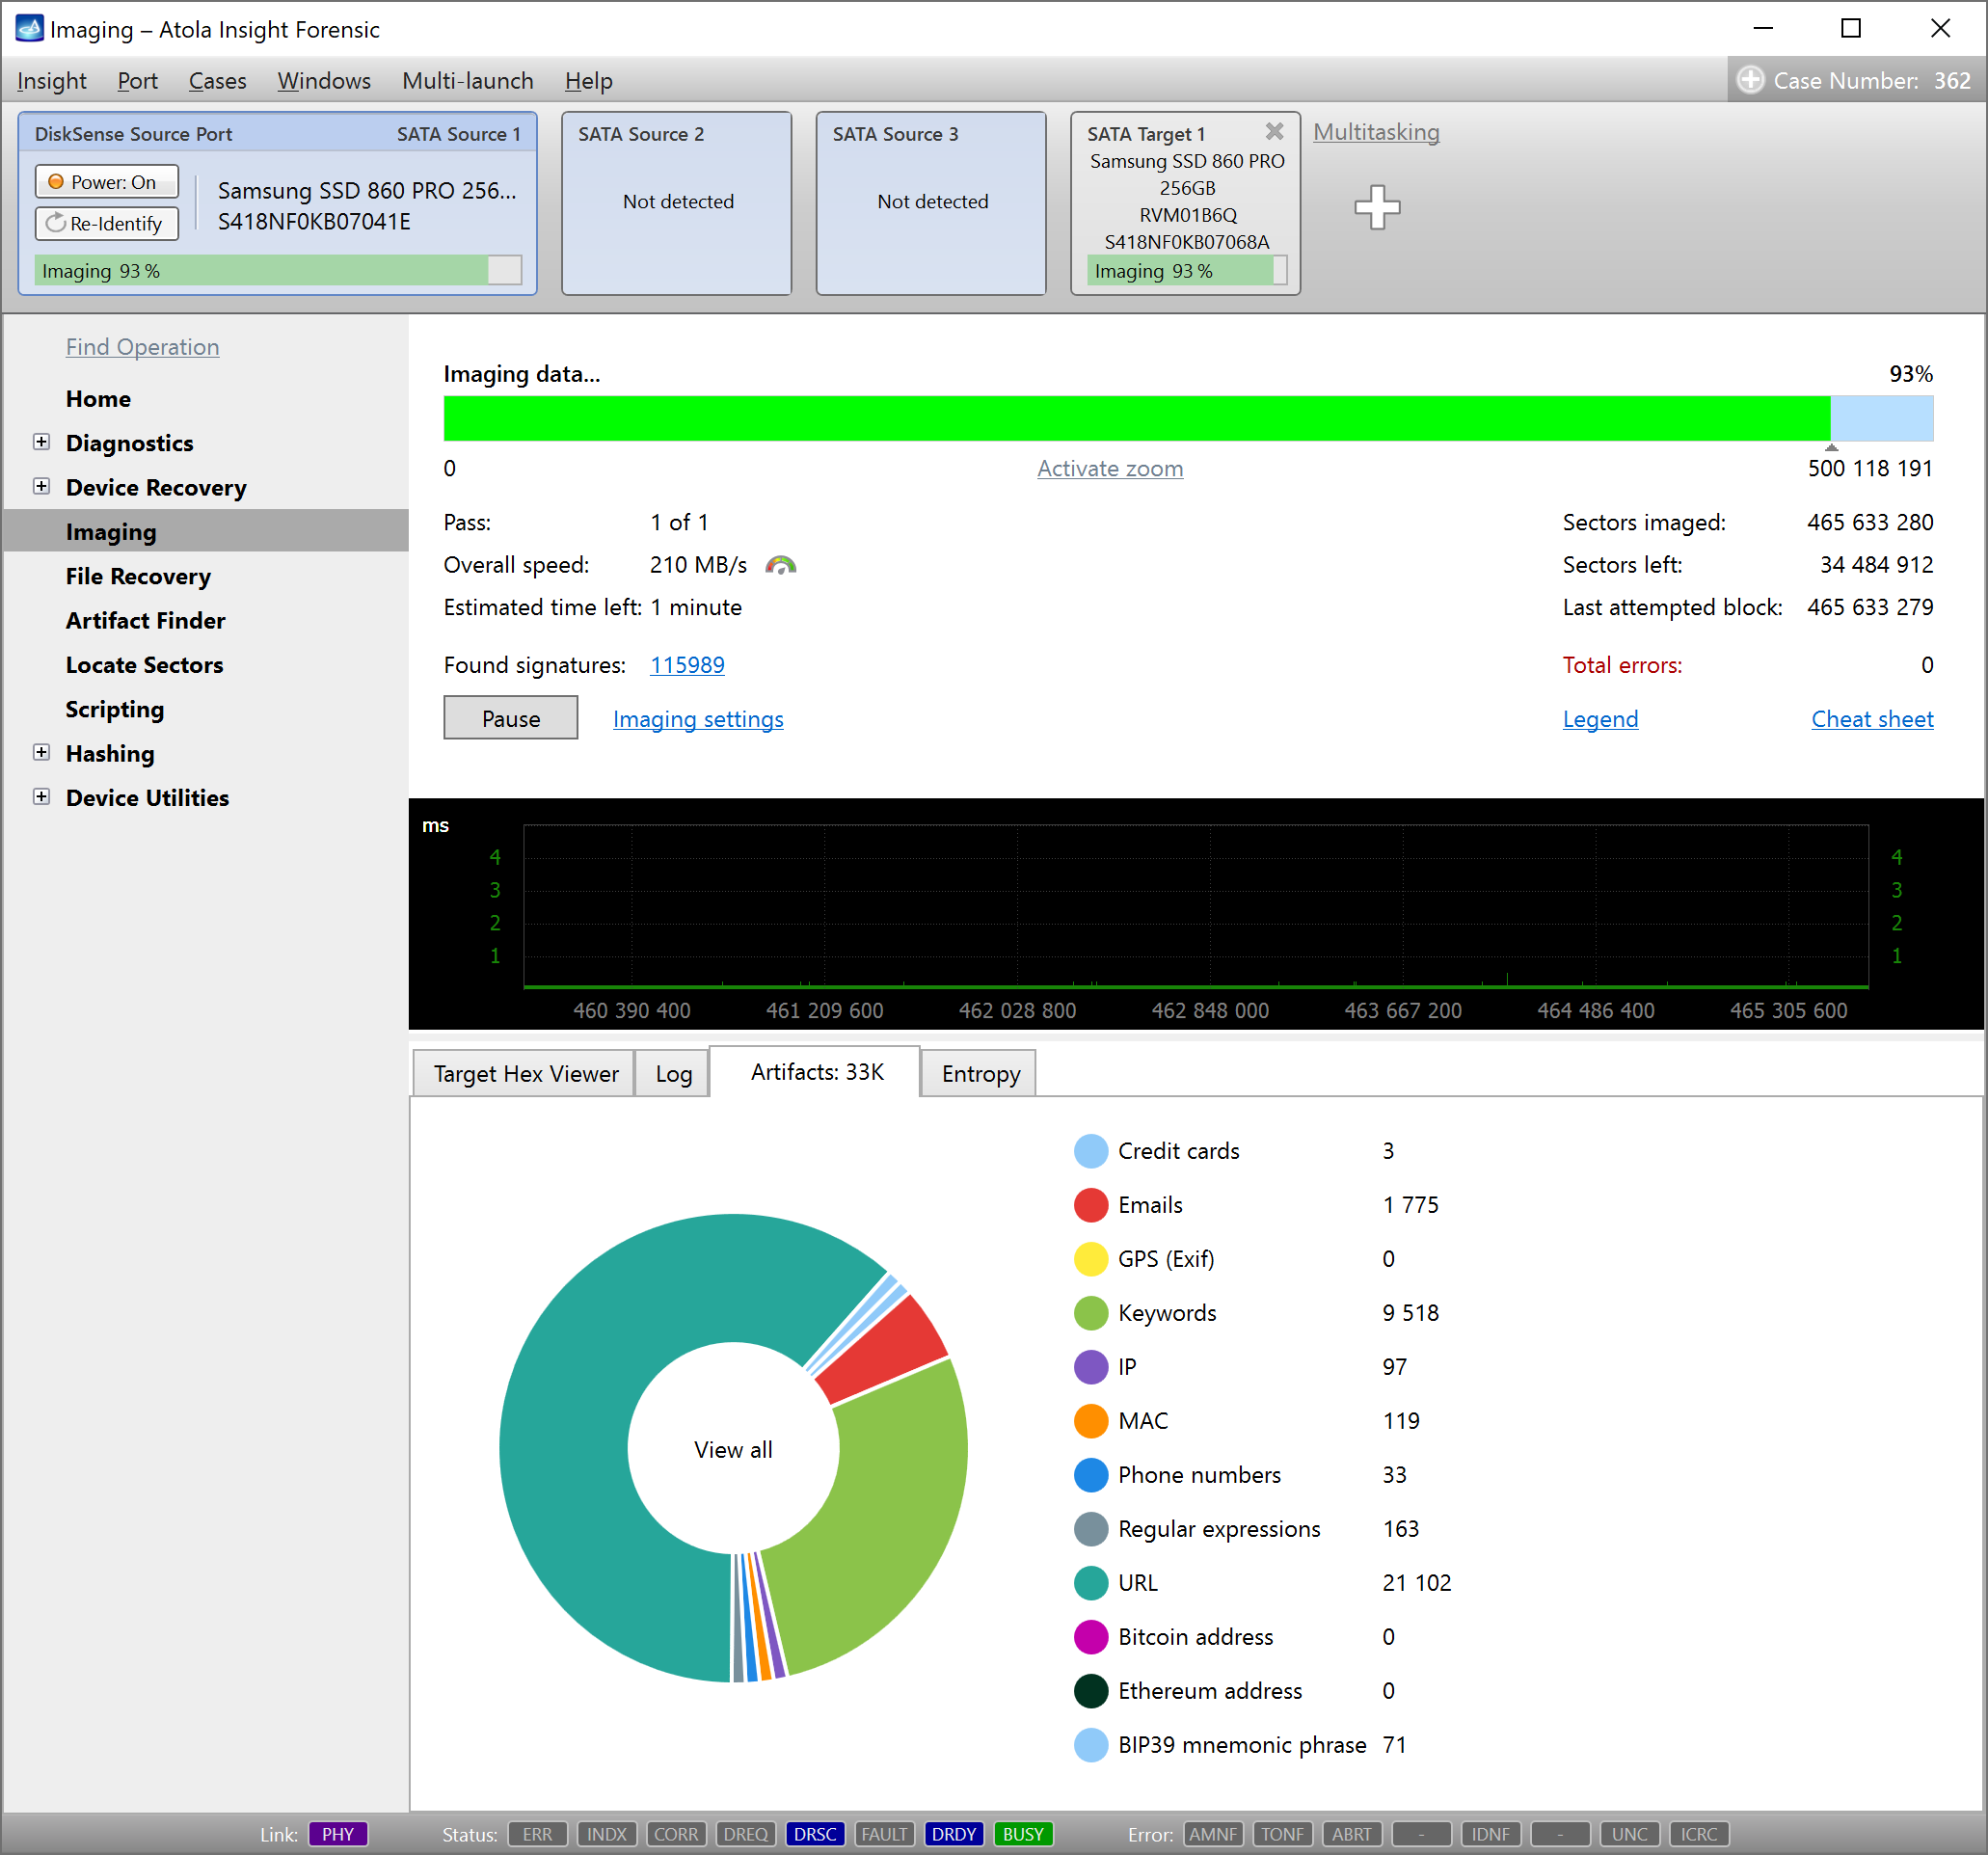
Artifacts can be studied while the search is in progress. The detailed table of artifacts lists the found data in the context (20 bytes prior and 20 bytes after the artifact in grey color), the LBA and the offset are also displayed in the table to help locate the artifact.
There are many options to help find, sort, filter and view the artifacts: you can view one or several categories of artifacts in one list. The Search bar helps find a specific value, filters are available including the Show unique artifacts link, which enables identifying the most frequently occurring values on the drive.
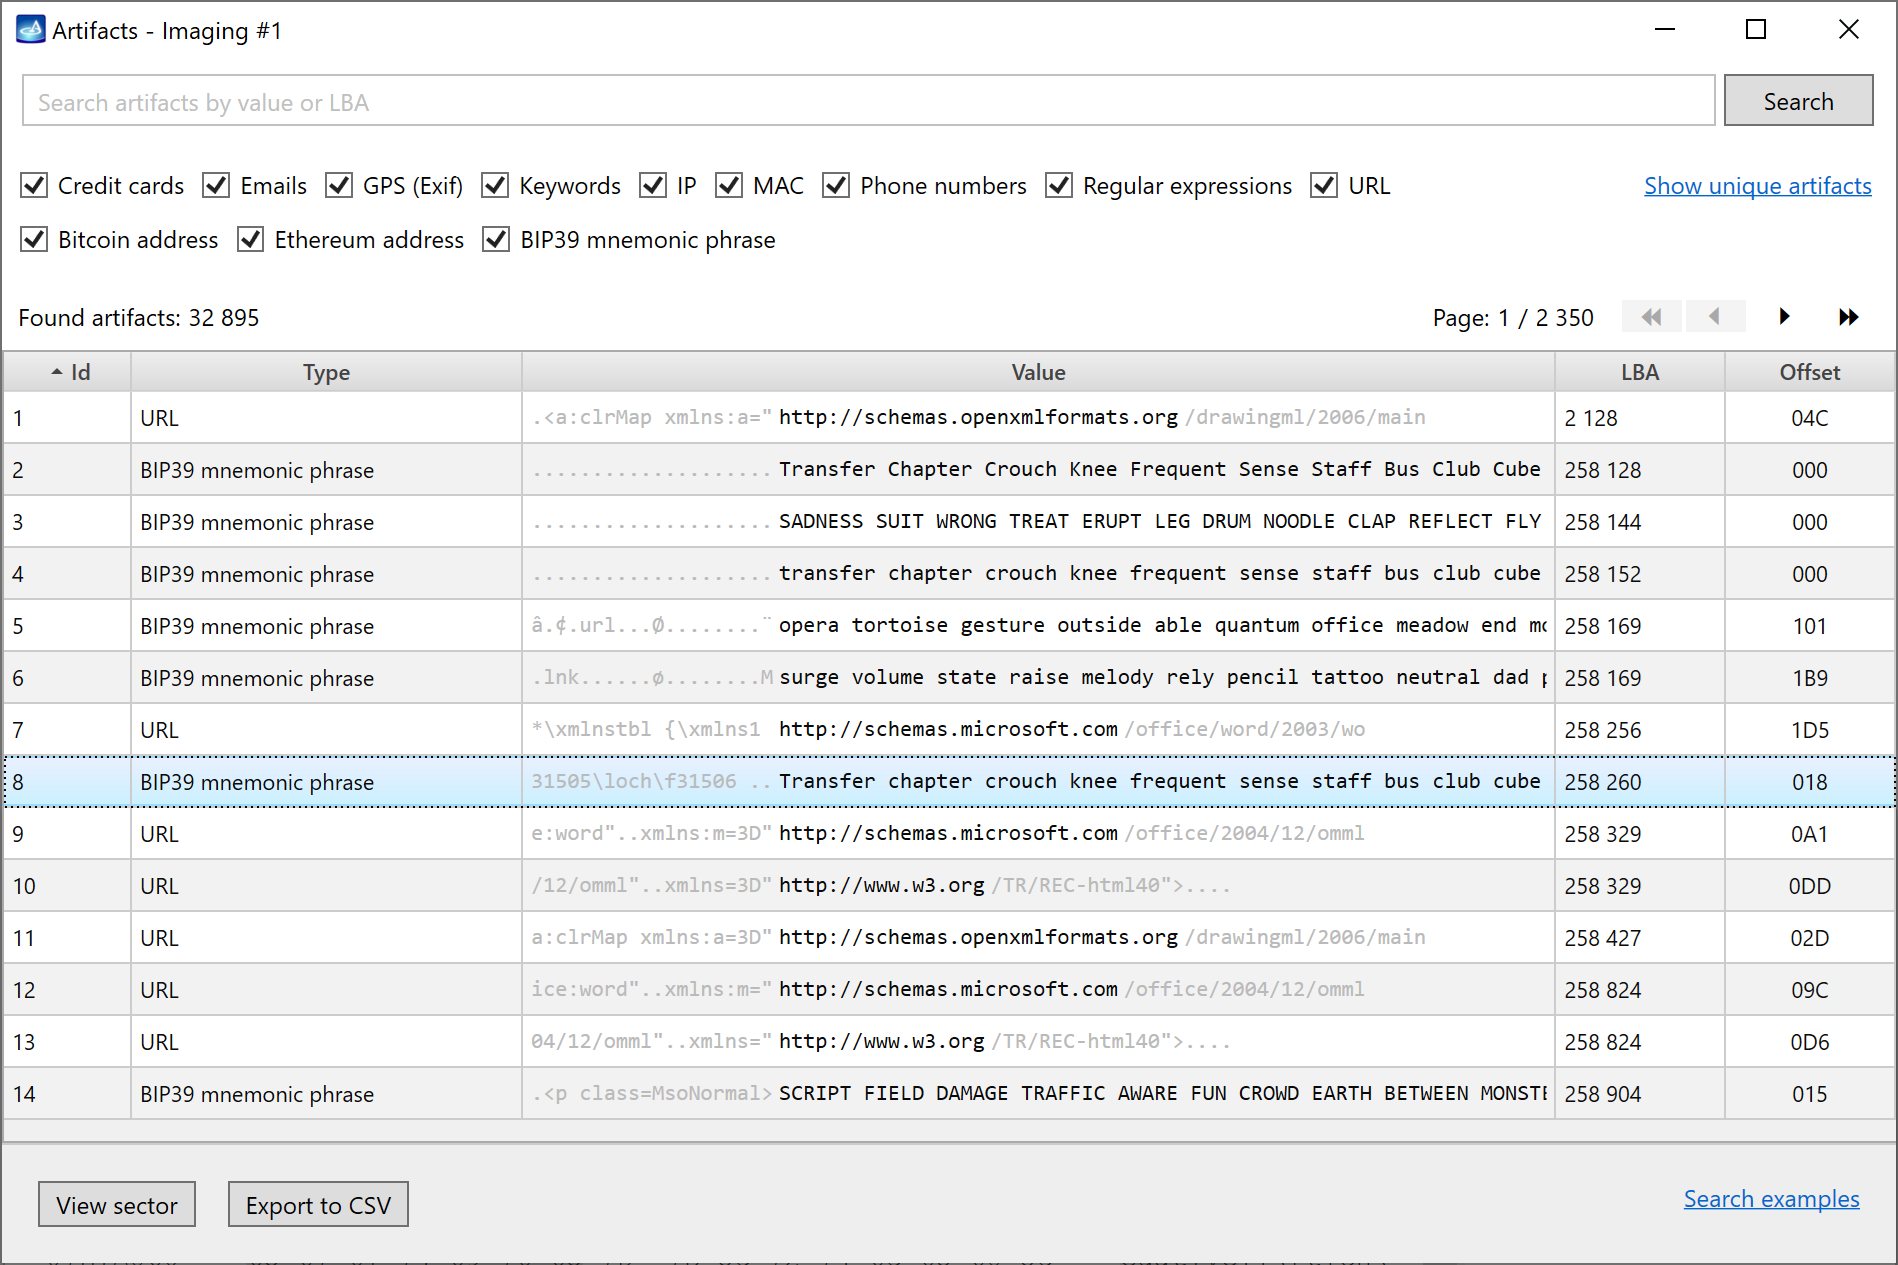
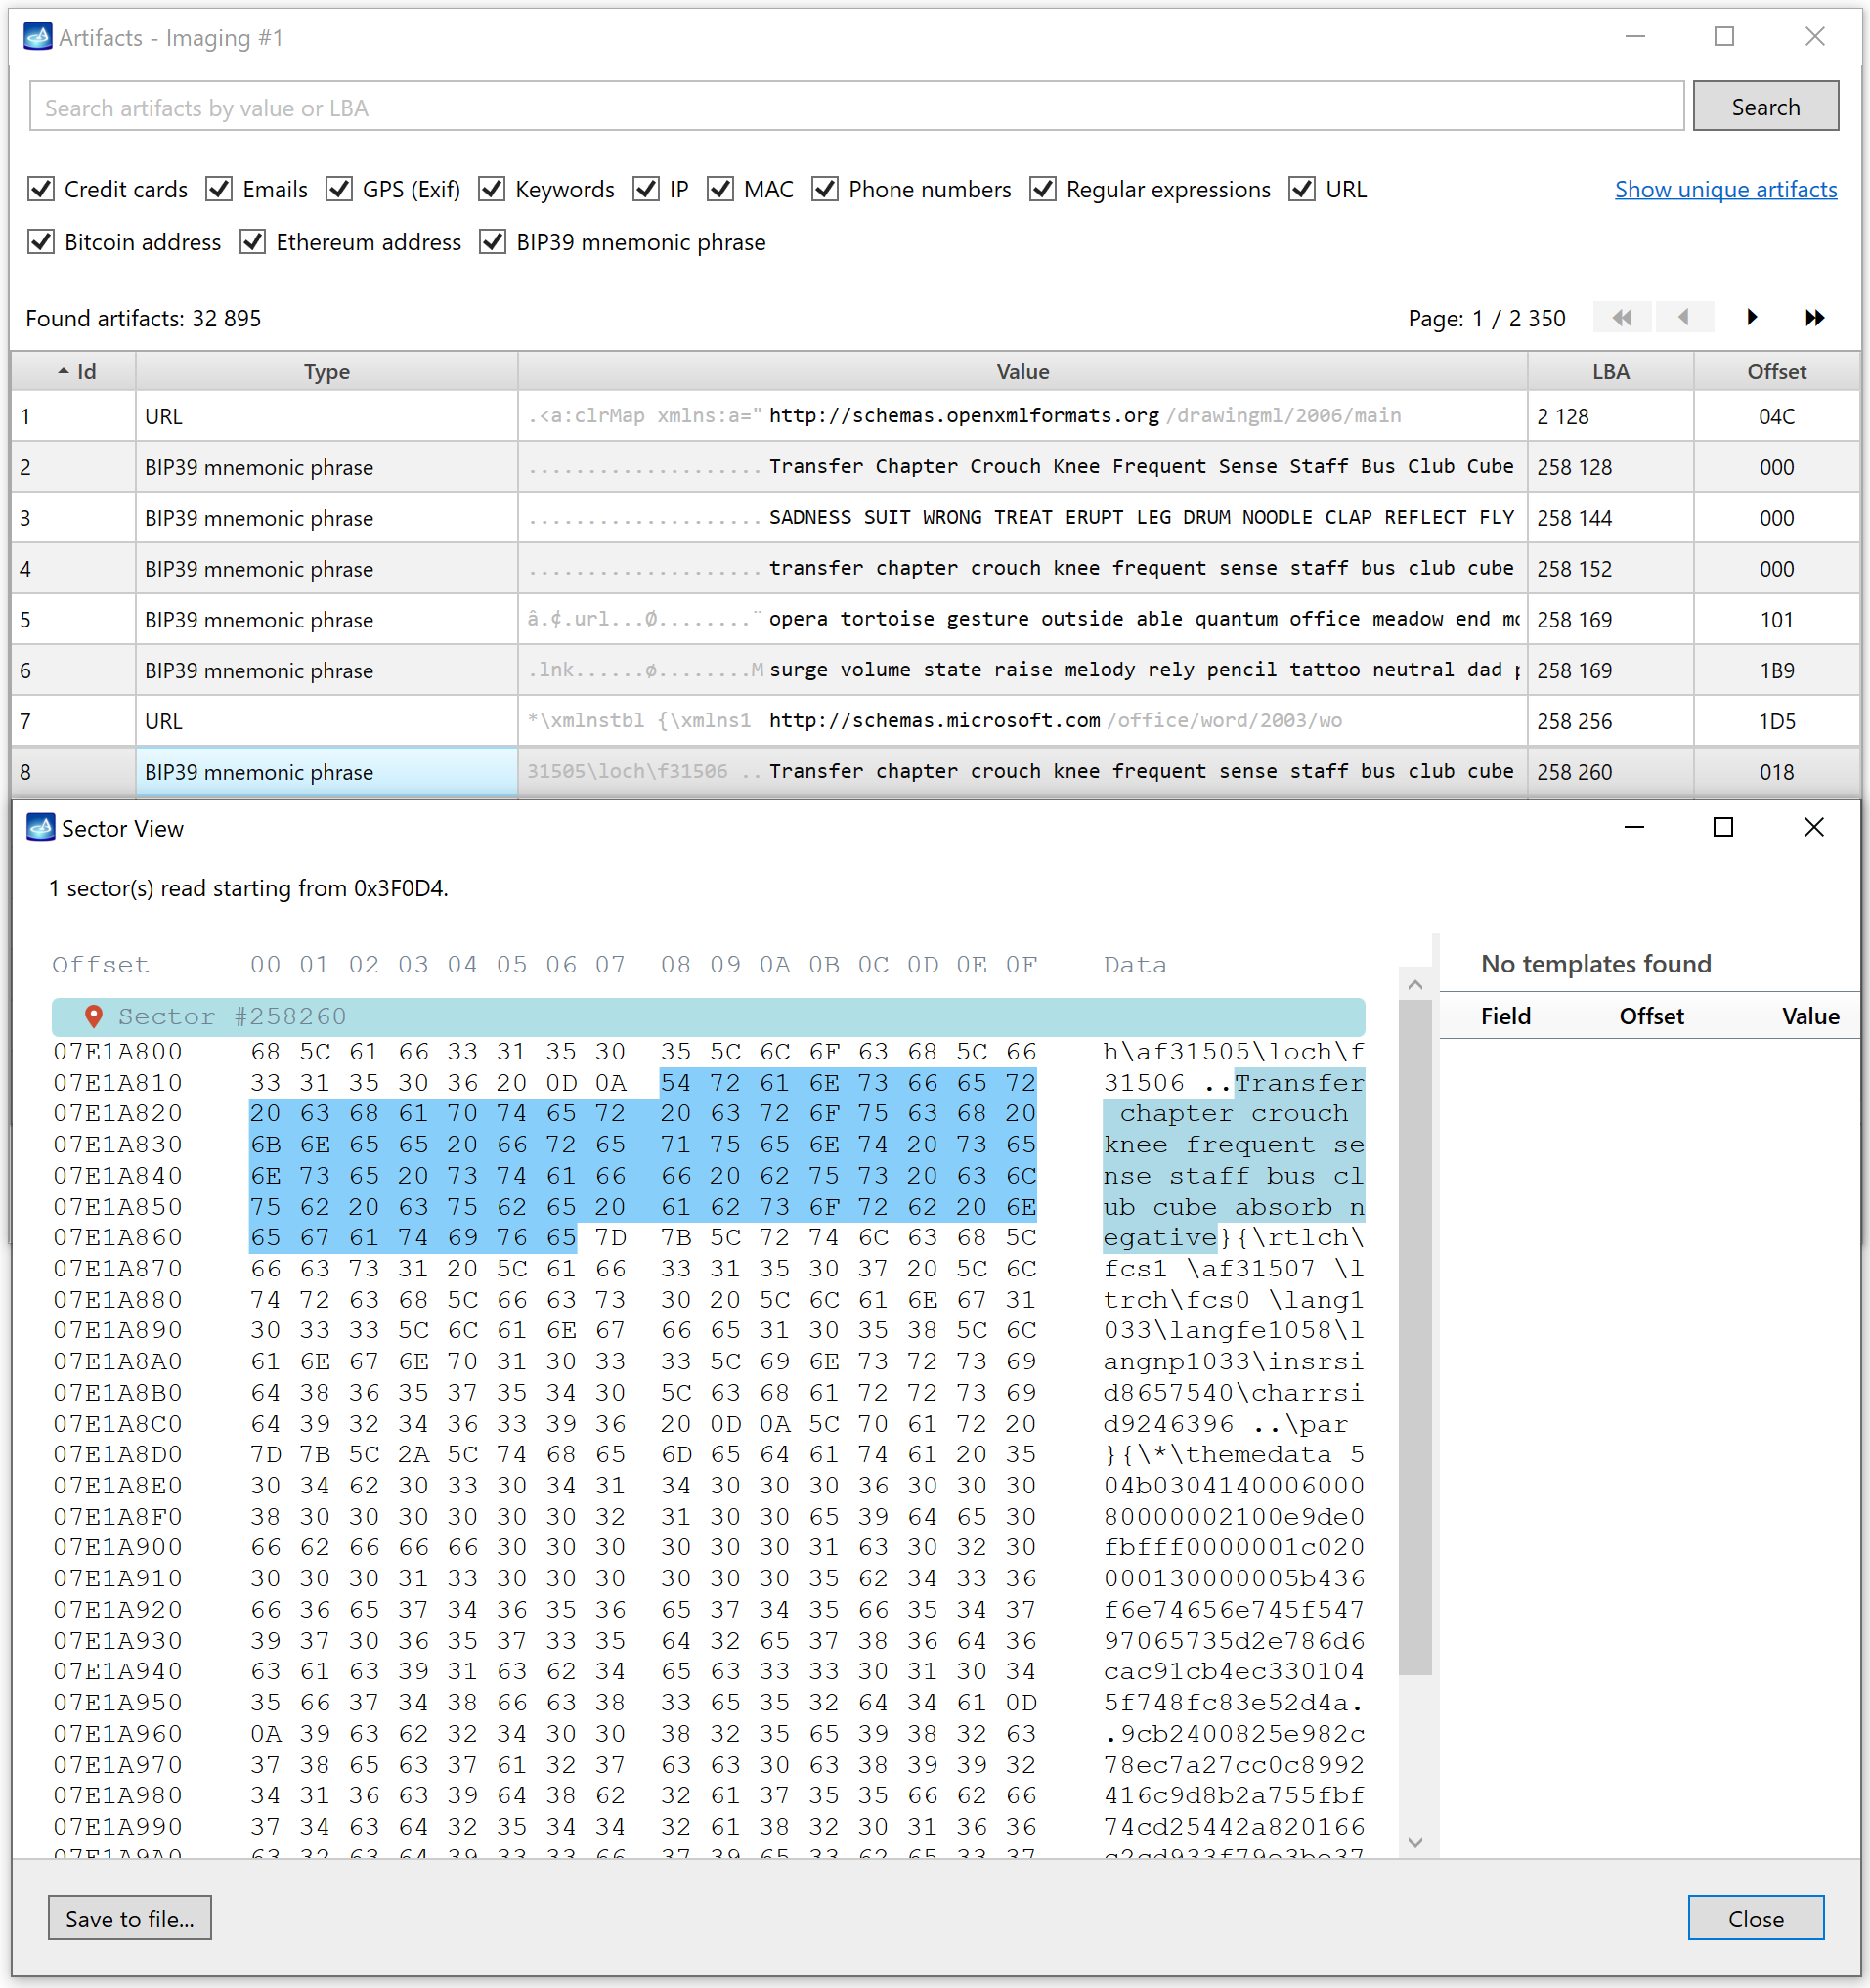
A double click on any artifact displays the sector where it is located.
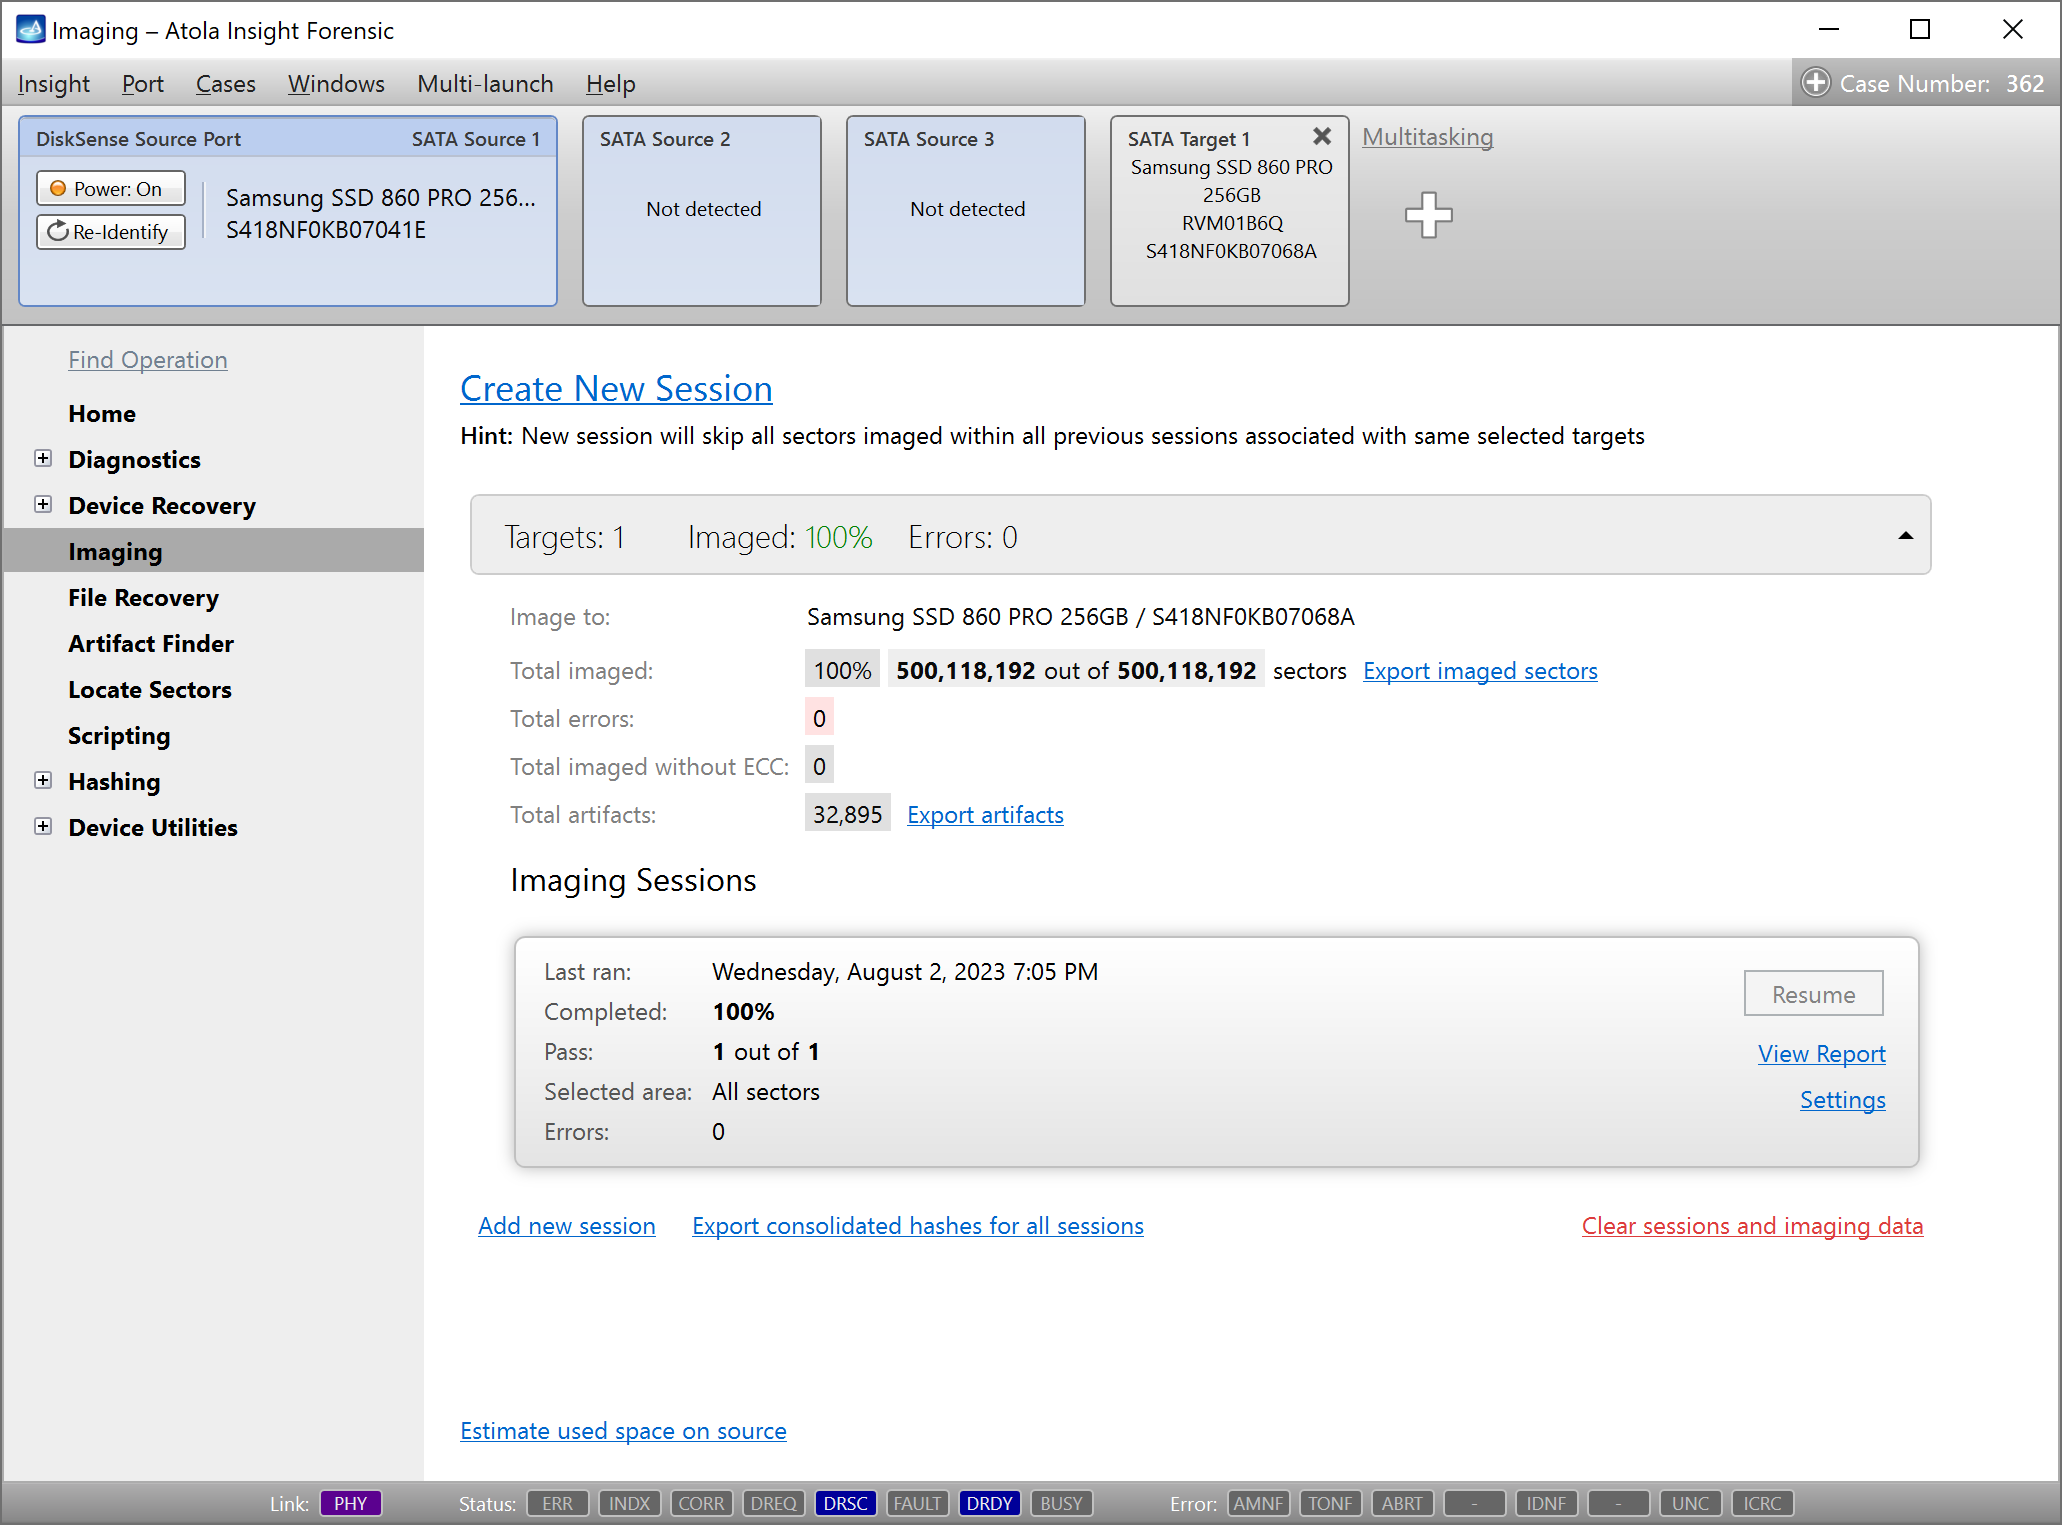
Export artifacts
The found artifacts can be exported to a .csv file. The function is disabled during the search and becomes available when the progress is completed, stopped or paused. When artifact search is performed during imaging, pausing and restarting are possible. For Artifact Finder, only stop command can be performed, but a new search can be started from the last searched LBA (as indicated in the report). This way the current artifact search output can be used for an early analysis with an external tool.
Imaging functionality also allows merging lists of artifacts found during multiple imaging sessions by clicking the Export artifacts link in the Imaging sessions summary page.